
In this post I talked about the 3.2″ 240×400 TFT and how it can be connected to a MEGA or Due.
Since then I realised that I might have made things a bit more difficult than they need to be, so I decided to give it another go, this time making a (relatively) foolproof guide. So here goes.
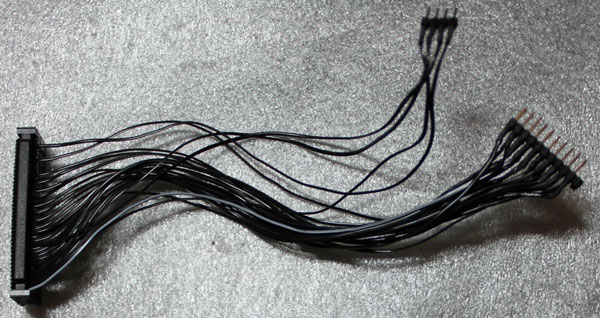
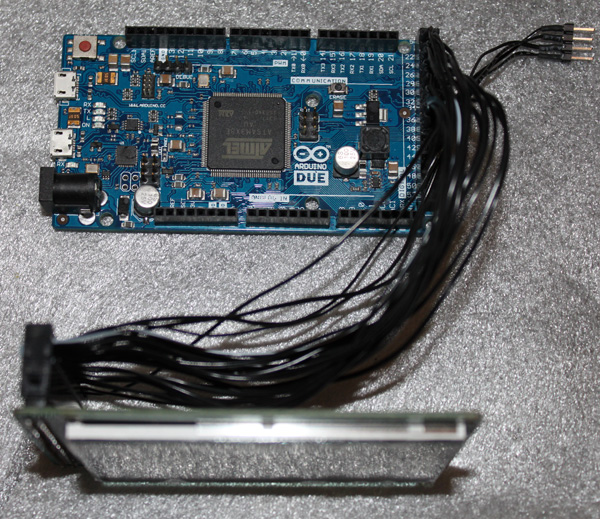
The finished assembly should look something like this:
What you need:
– An old 40 pin IDE cable. If you can’t get your hands on a ready-made IDE cable, you will need to find some 40 pin ribbon cable and a 40 pin connector (you can find it as “IDC40 IDE FEMALE CONNECTOR”) so you can roll your own. You will also need a small vise to press the connector.
– A 2×13 (or larger) pin header.
– A 1×4 (or larger) pin header.
– Some heat-shrink tubing.
– A soldering iron, etc.
We will be connecting only the wires necessary for operating the TFT as a display, so no SD card reader or touchscreen. You should keep that in mind.
Also, this cable only works with the Due, since it uses 3.3V logic. In order for it to work with the MEGA, 10K resistors should be connected in series with all the signal cables (except of course for the Vcc, LED-A and GND lines).
Let’s begin.
You start by cutting your IDE cable to the necessary length (or in case you’re making your cable from scratch, using as much ribbon cable as you need). The connectors on most IDE cables have one of the pin holes blocked, so you should use a small drill to open it up.
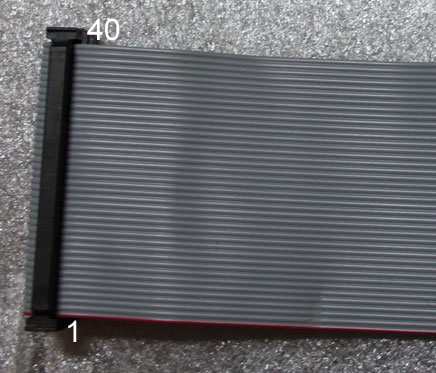
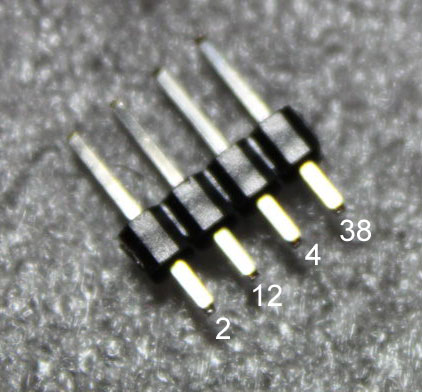
The pin numbering always starts from the red wire, so it goes like this:
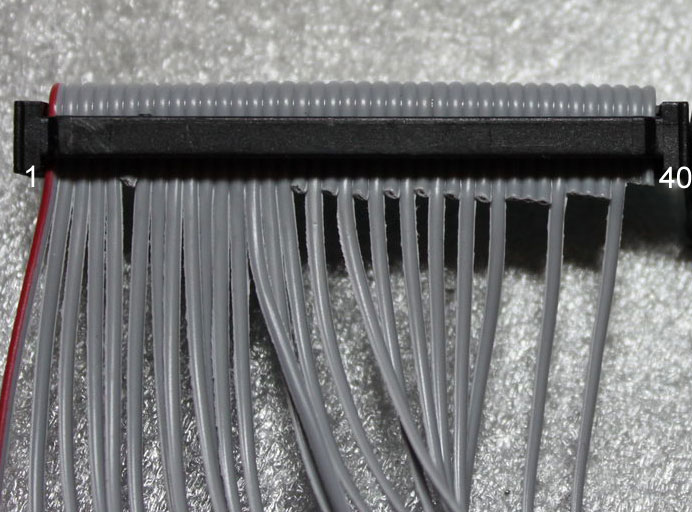
I prefer to cut off the unnecessary wires. This way there is less clutter, plus it is harder to get confused. Once the unnecessary wires have been cut off, we are left with this:
So this is one side of the cable. On the other side we will solder on to these:
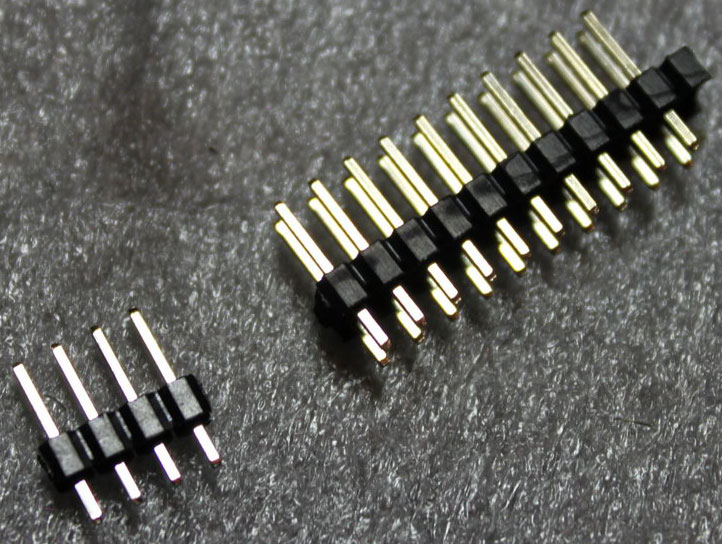
They are two pin headers. The 1×4 one is for LED backlight, Vcc power, RD and ground respectively. That corresponds to these pins:
Finally, we have the 2×11 pin header. We need to make these connections:
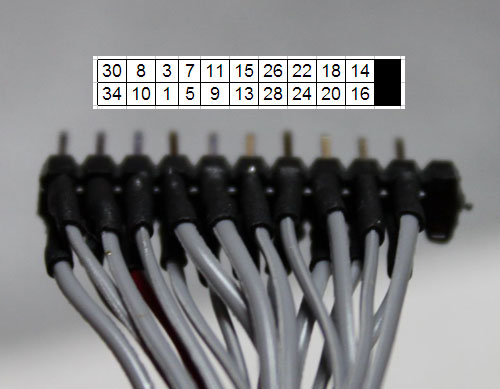
The numbers are obviously pin numbers that correspond to the 40-pin ribbon cable. It should be pretty easy to get them right.
You should use heat-shrink tubing in order to insulate the connections, as well as improve the mechanical properties of the connections.
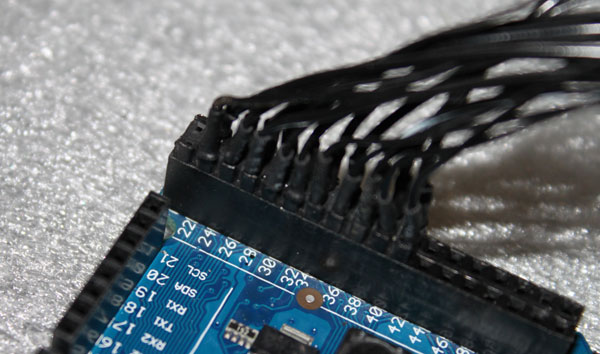
You will notice that the header is missing two pins (on the far right). That is done on purpose, to make it easier to align with the Due’s connector:
And here is the finished cable, connected to the TFT as well as the Due. Note that it’s up to you to connect the 1×4 header whichever way you can.
Notice that the ribbon cable is coming out of the IDC connector and going to the right, and not to the left. Should you connect it the wrong way, it is very likely that the TFT will be damaged, so be carefull!
You should also solder/jumper these pads (J1) on the back of the TFT:
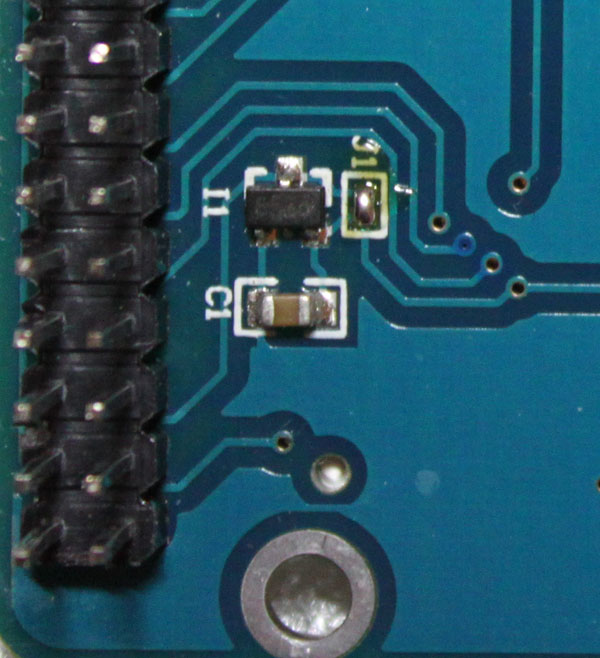
We have to do this since we are already powering the TFT with 3.3V. This way the local regulator will be bypassed.
That’s it! Good luck..