In Part 1 we installed Armbian on our Orange Pi One (or Lite) and set it up on our local network. At this point, all our work can be done on any PC that is on our network, via SSH connection (putty etc.).
Enabling I2S output
First order of business is enabling the Pi’s I2S output. To do that, we need to edit what is called a FEX file. This FEX file (script.fex) is essentially a hardware configuration file for the Pi. For example, if we wanted to enable or disable a serial port at the hardware level, we would edit this FEX file.
The problem is, this FEX file exists in binary form in our file system so in order to edit it, we need to convert it to a text file. To do that we use the bin2fex command.
So, step by step:
Log into Pi as root and type:
cd ..
cd boot
bin2fex script.bin script.fex
nano script.fex
Nano is a relatively user friendly editor for Linux, I use it for all my text editing.
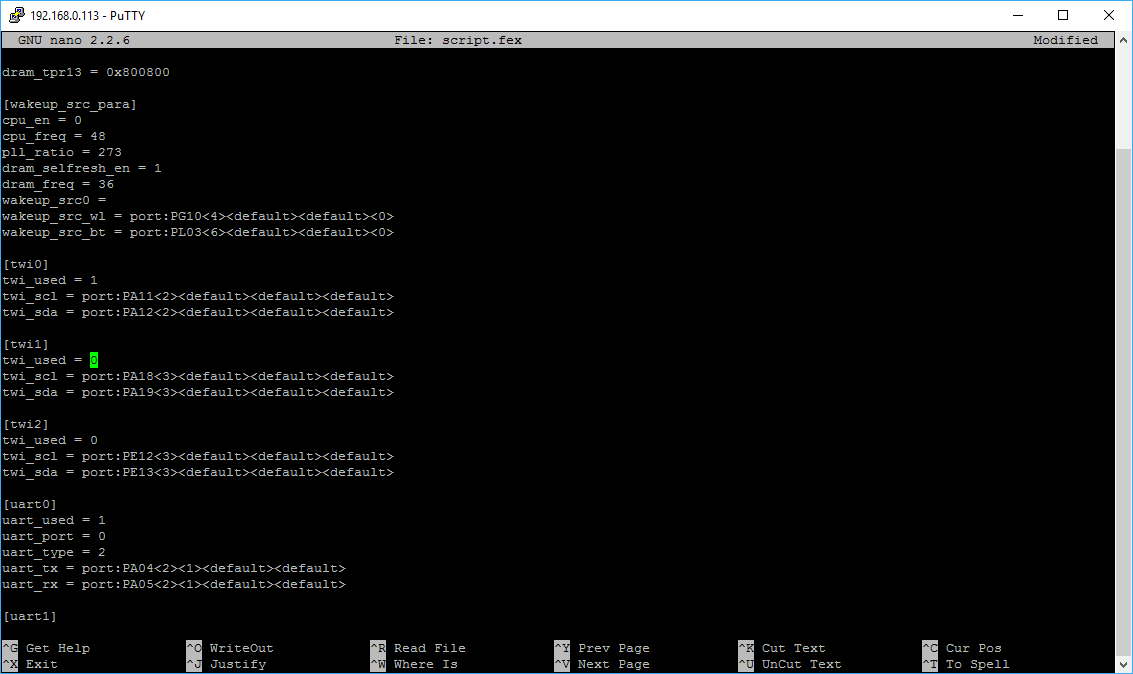
Look for twi1. Change it to this:
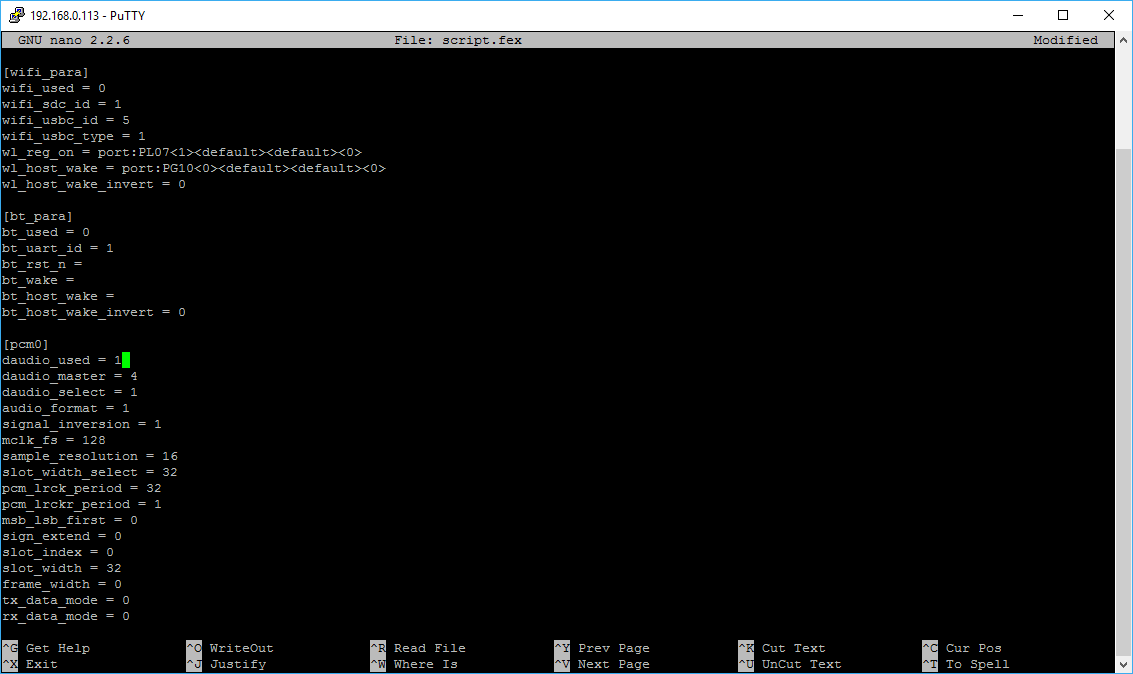
Then look for pcm0. Change it to this:
Once we are done editing the file, we hit Ctrl-X and choose to save the file before exiting.
Then we need to convert the .fex file back to .bin. We type:
fex2bin script.fex script.bin
and we reboot.
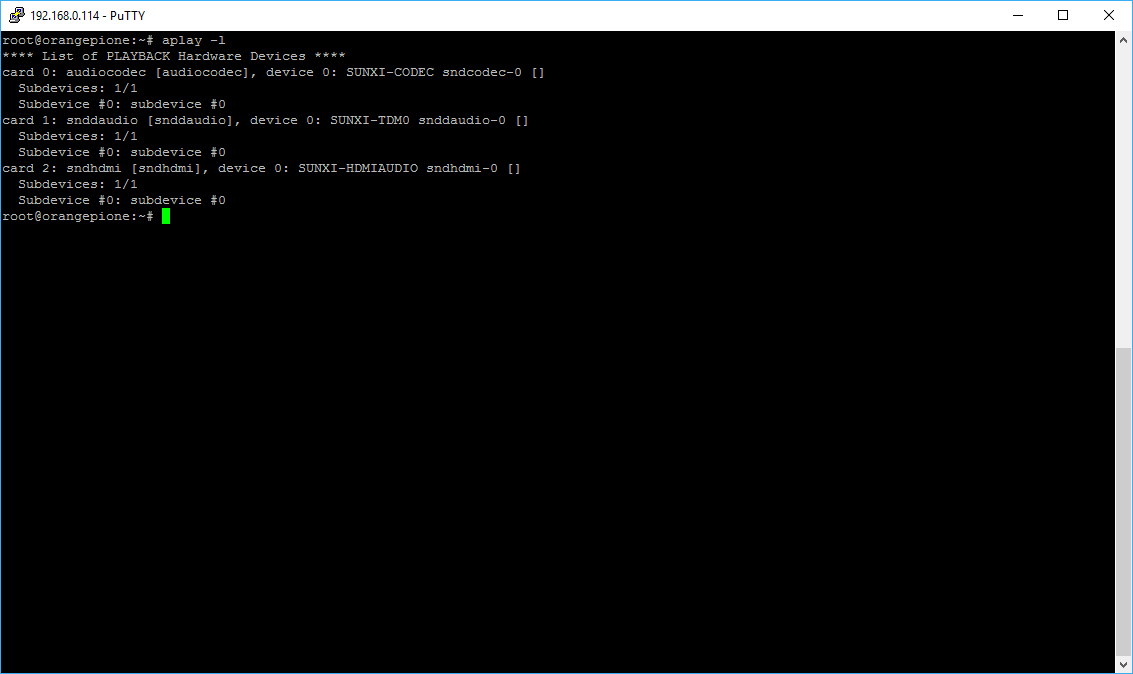
We confirm that we have a new sound device called snddaudio by typing in aplay –l :
Network Share configuration
Now that our I2S output is enabled, we need to give our Pi access to our music. I prefer to store my music in a Synology NAS so I need to configure a network mount on the Pi.
We start by creating a mount point for our share. That can be any empty folder. I choose to mount my shares in mnt/nas-samba. Let’s create that:
cd /mnt
mkdir nas-samba
Then we install the package cifs-utils:
apt-get install cifs-utils
Now we get to the actual mounting of the share:
nano /etc/fstab
For my setup, I add this line: //192.168.0.32/Music /mnt/nas-samba cifs username=,password=,ro,iocharset=utf8,nolock,noauto,x-systemd.automount,x-systemd.device-timeout=10,sec=ntlm,rsize=8048,wsize=8096
This tells our Pi to mount the share //192.168.0.32/Music to the folder that we created above using the credentials that I have supplied. You will need to customize this command to your own network environment.
After a reboot we go to our mount point and have a look inside:
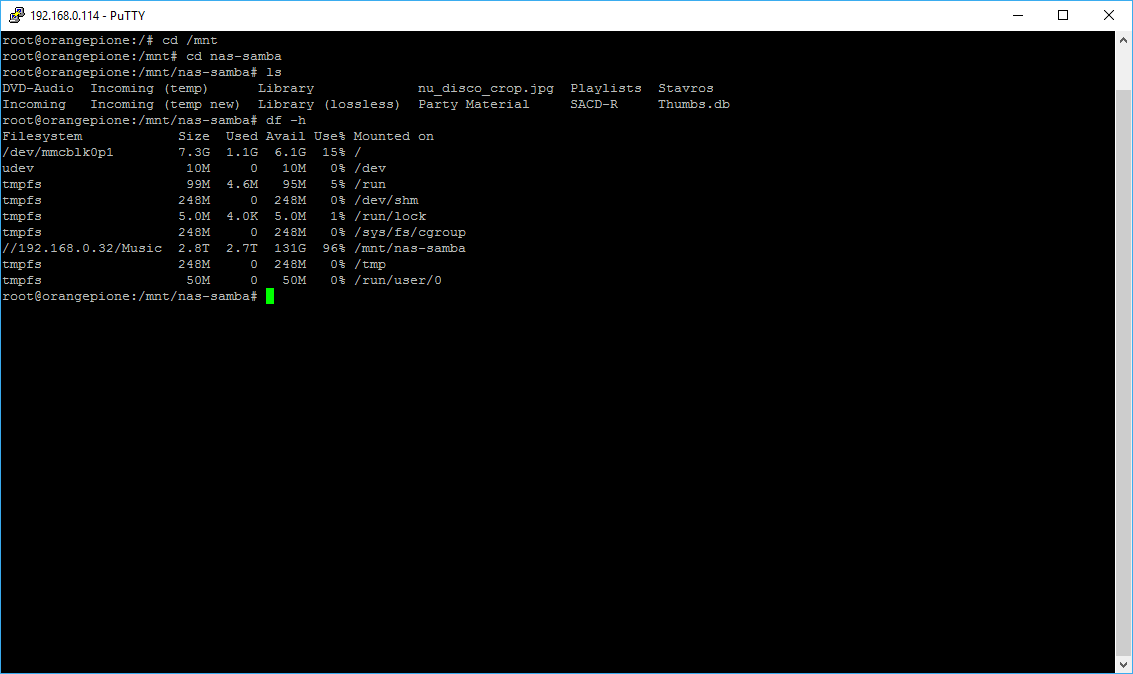
To confirm that the share has been mounted we can use the df -h command, as can be seen above.
MPD Installation
The software on our Pi that does the actual music playback is called MPD (Music Player Daemon). To install it we enter:
apt-get install mpd
This will take a while, since MPD has a bunch of dependencies that will also be downloaded and installed.
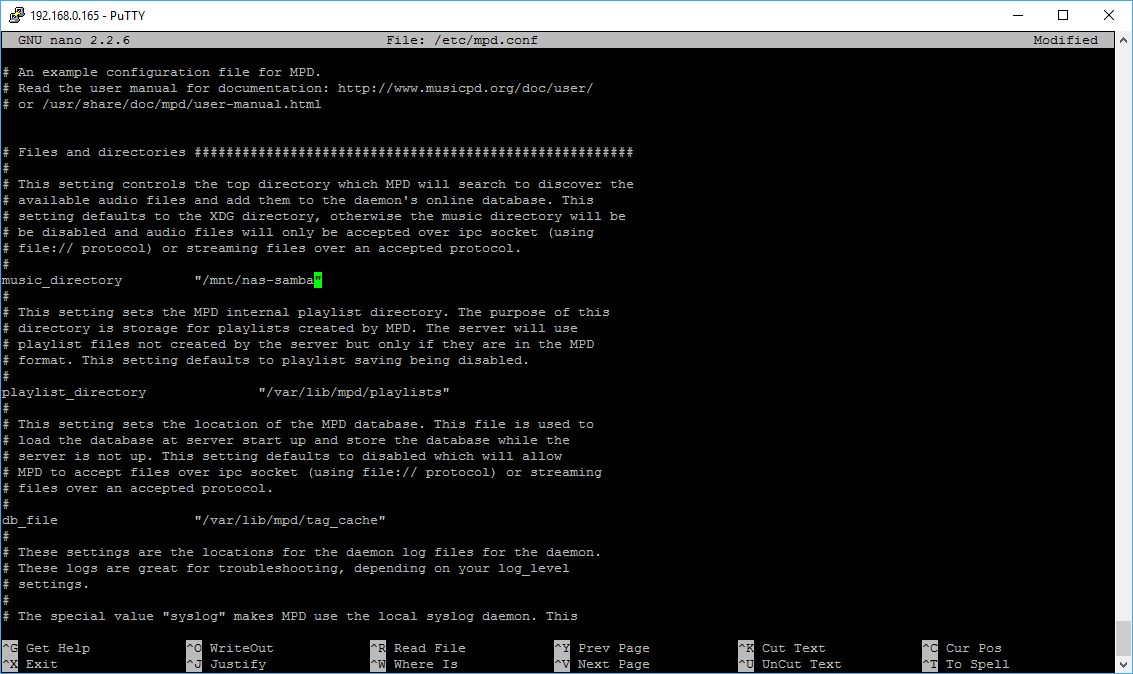
Once the installation is finished, we will need to configure it. To do that, we edit mpd.conf:
nano /etc/mpd.conf
We need to do three things:
1) Set our music directory to /mnt/nas-samba:
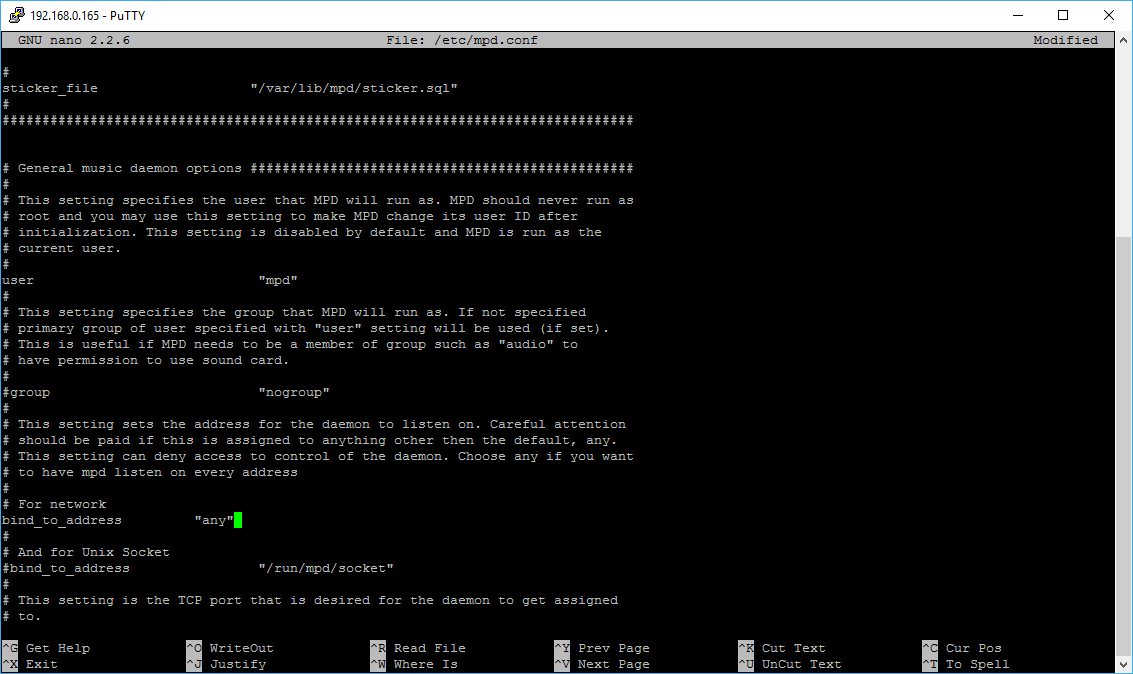
2) Change network binding to “any”:
3) Change the “audio” setting to select our I2S audio output:
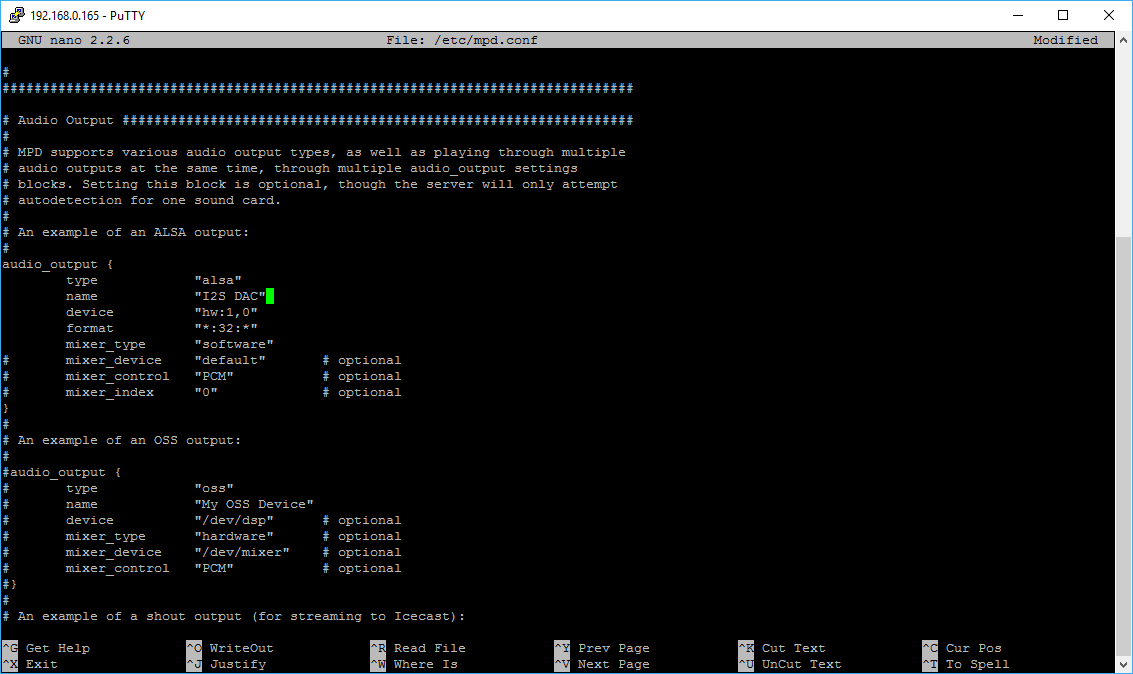
We put in this:
audio_output {
        type            "alsa"
        name            "I2S DAC"
        device          "hw:1,0"
        format          "*:32:*"
        mixer_type      "software"
#       mixer_device    "default"       # optional
#       mixer_control   "PCM"           # optional
#       mixer_index     "0"             # optional
}
This configuration creates an ALSA device called “I2S DAC” that utilizes the Pi’s I2S output. It up-samples all files to 32bits (don’t worry, it doesn’t deteriorate the SQ in any way. It just pads with zeroes when necessary) in order to make this setup compatible with my Buffalo III. Also, it enables software volume control. You can disable it by commenting out the relevant line.
Once we are done, we save the file and quit nano. We then restart MPD to apply the changes:
systemctl restart mpd
MPD Clients Installation
Once MPD is installed, we will need a “human friendly” way of interfacing with it.
In other words, we will need to install what is called a “client”. There exist all kinds of clients, from command line based ones, to web-based environments, to apps for smartphones and tablets. In my setup I install two clients, a command-line based one (mainly for testing purposes) and a web-based one for more general use.
To install the classic command line client “mpc” we enter:
apt-get install mpc
That should take almost no time.
Now that we have at least a basic client installed, is a good time to check that MPD is actually working. To do that, I usually do this:
mpc add http://netradio.live24.gr/886radio
mpc play
mpc status
What these commands do is:
1) Add my favorite internet radio station to MPD’s playlist
2) Start playback
3) Check that playback has indeed started.
If it all went well, you should see something like this:
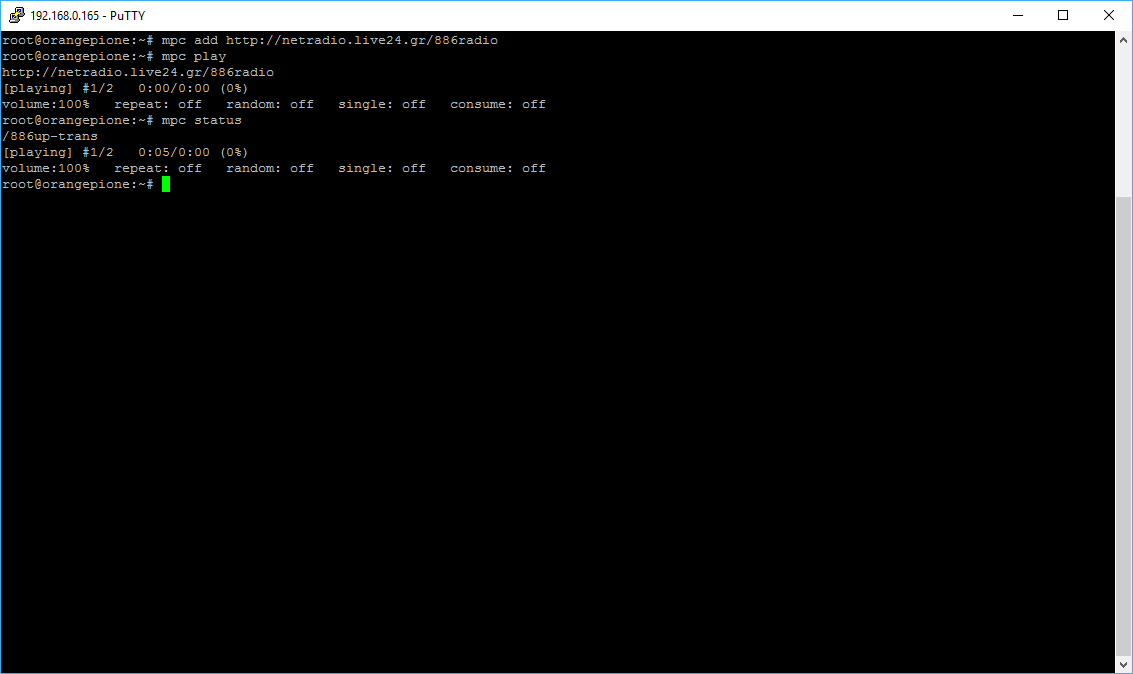
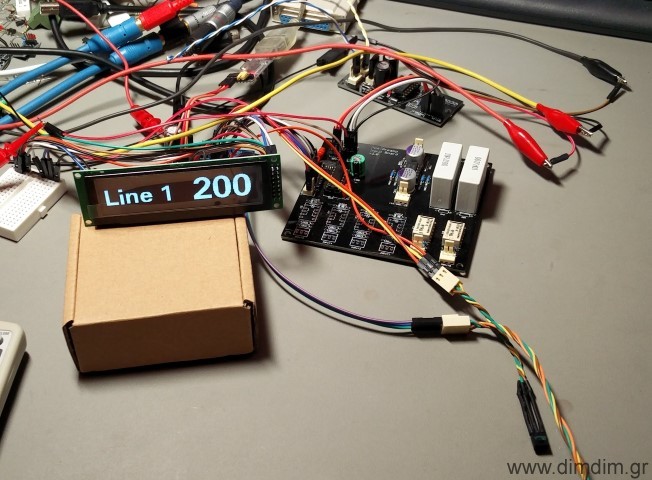
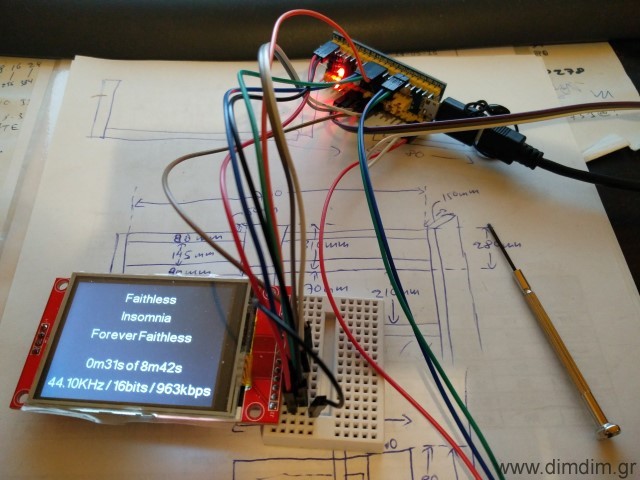
If you have already connected an I2S DAC, you should be hearing music. This means that your MPD is functioning, so the hard part is done.
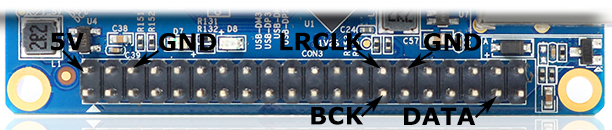
If by chance you’re looking for the Orange Pi One / Lite’s I2S pinout, you’re in luck. Here it is:
At this point you have a choice to make. You can either install an app on your smartphone or tablet and get things done that way, or you can install a web-based “rich” client. I like rich clients, so after a brief internet search I came across RompR.
Installing RompR
The people behind RompR have written a pretty comprehensive installation guide. All of the necessary info is there, for all platforms. But, since this post has to do specifically with the Orange Pi, I’ll give you a customized version of the installation guide. This should take you about 10 minutes. Let’s start.
First we’ll download and install all of the necessary packages:
apt-get install apache2 php5-curl php5-sqlite imagemagick libapache2-mod-php5 php5-json
Then we will download the actual binary into a temp folder:
cd /mnt
wget http://downloads.sourceforge.net/project/rompr/rompr-0.78.zip
Next step is extracting the files to /usr/bin/rompr:
unzip rompr-0.78.zip -d /usr/bin/
..and we get to the editing of .conf files part:
nano /usr/bin/rompr/apache_conf.d/Apache2.4/rompr.conf
We have to replace every /PATH-TO-ROMPR with /usr/bin/rompr:
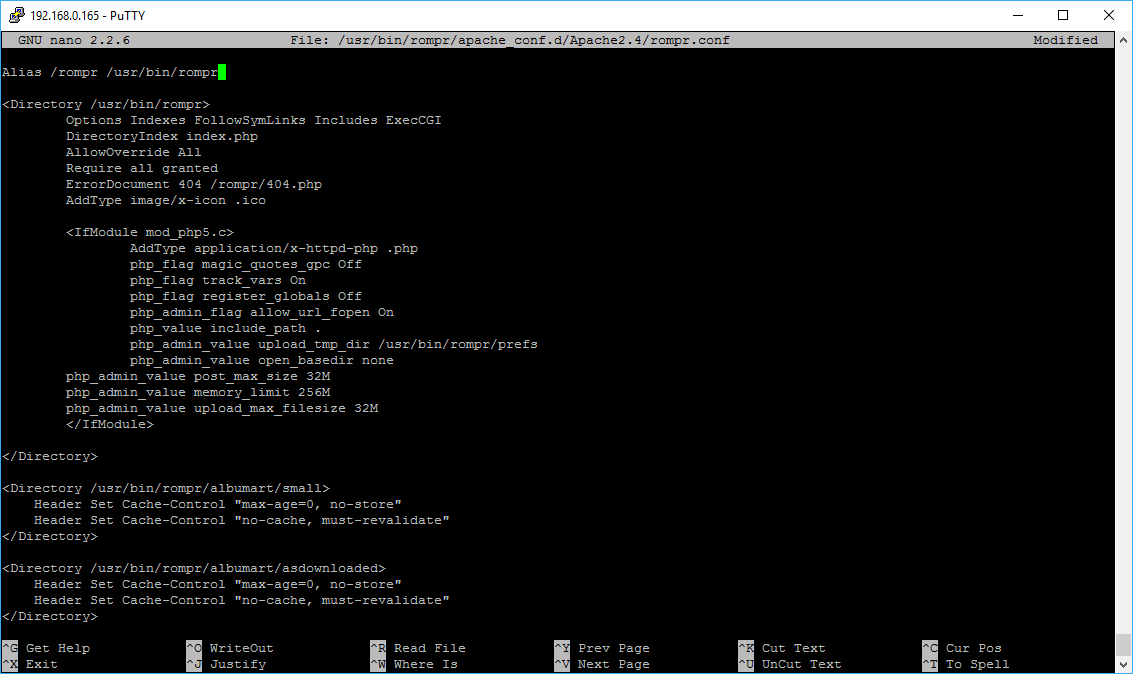
When we’re done we exit nano, saving the file.
Then we copy this file to its final location:
cp /usr/bin/rompr/apache_conf.d/Apache2.4/rompr.conf /etc/apache2/conf-available/
We take care of a few permissions:
chmod -R ugo+rw /usr/bin/rompr/prefs
chmod -R ugo+rw /usr/bin/rompr/albumart
And we finish up:
a2enconf rompr
a2enmod expires
a2enmod headers
service apache2 restart
At last, it’s time to see if our installation works. We type into our browser our Pi’s IP followed by /rompr:
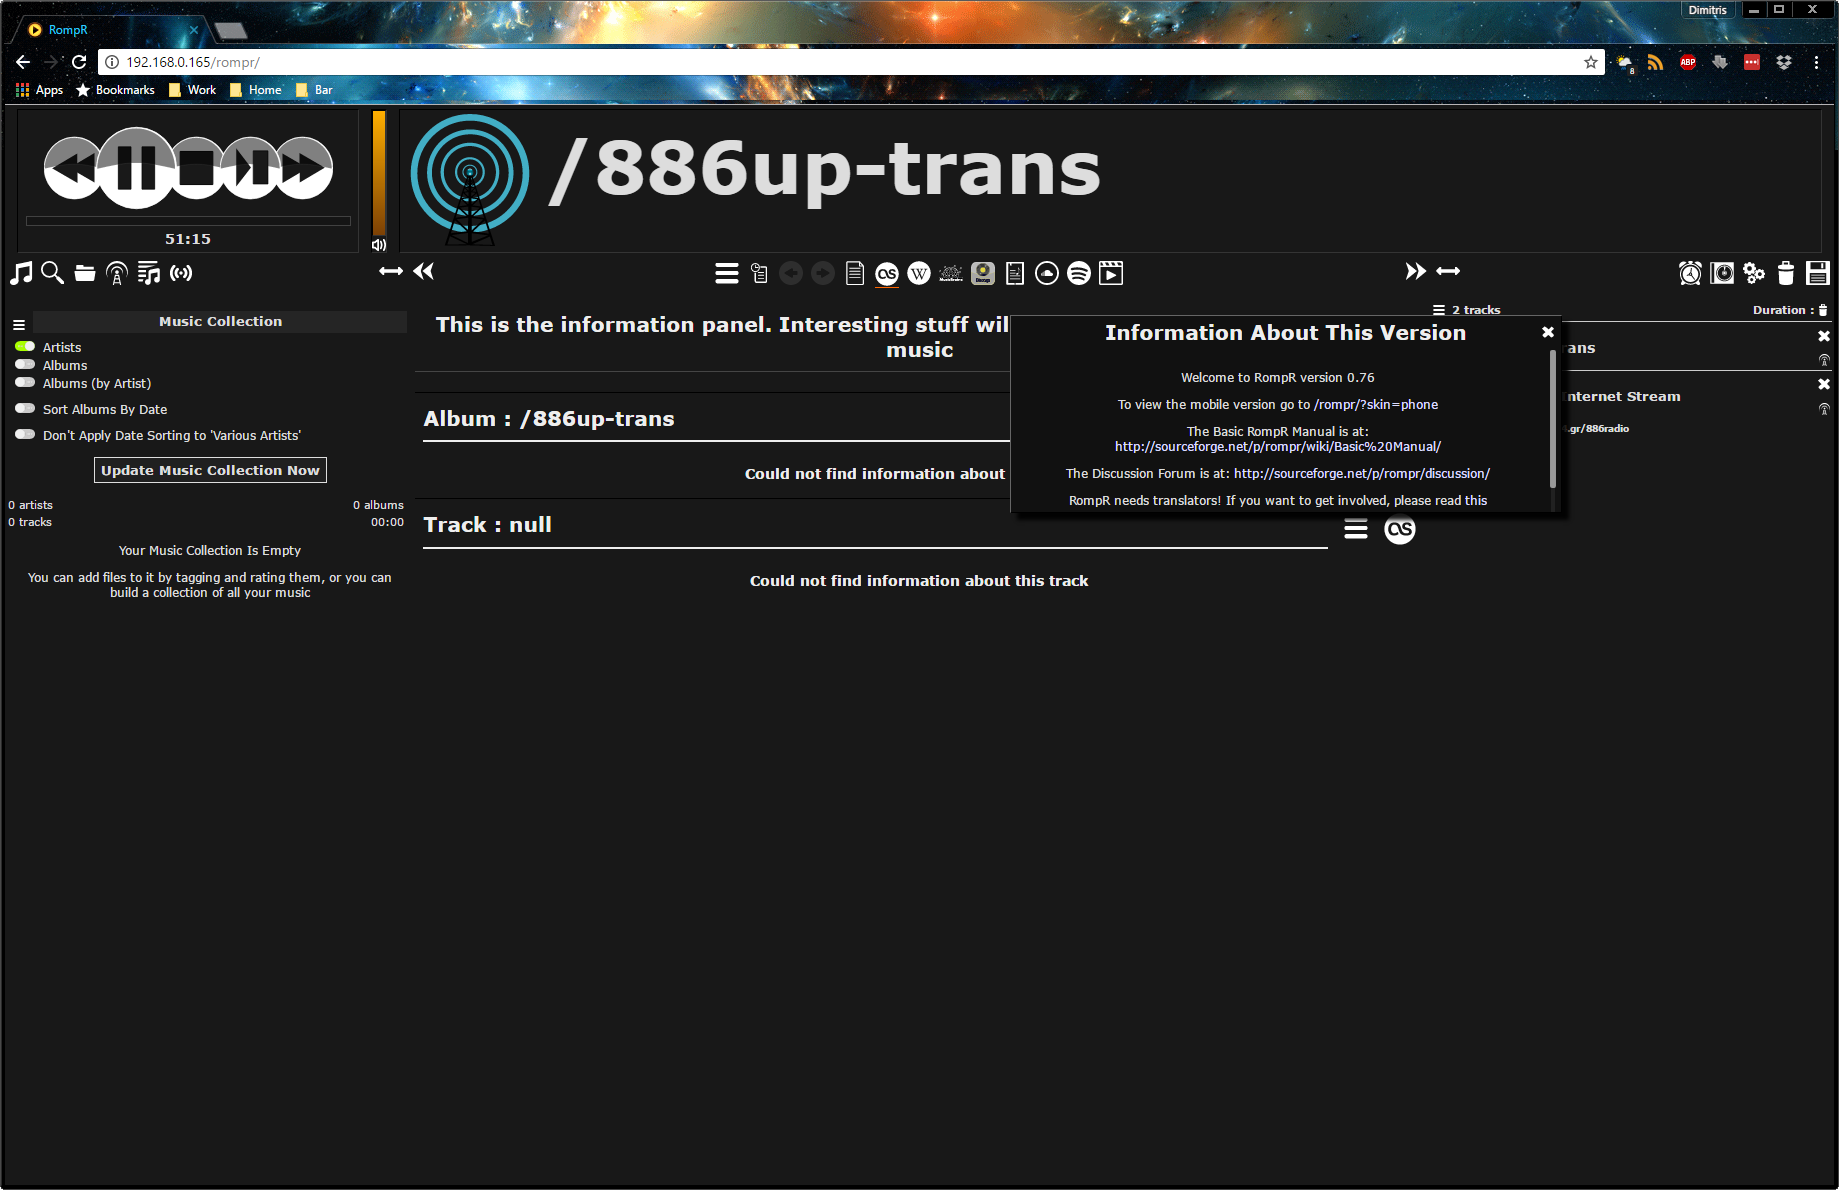
All we have to do now is update MPD’s library. We do that by hitting the red Update Music Collection Now button on the left and we’re done.
Enjoy..