Allo DigiOne S/PDIF HAT

First off, I’m ashamed to admit that I had this little gem in my possession for about 2 years before I finally got the chance to put it through its paces.

After all, it’s just a s/pdif output device for a Raspberry Pi, right? I mean, it’s just s/pdif, how good could it be?

It turns out it can be pretty damned good! But I’m getting ahead of myself.. Let’s start at the beginning.

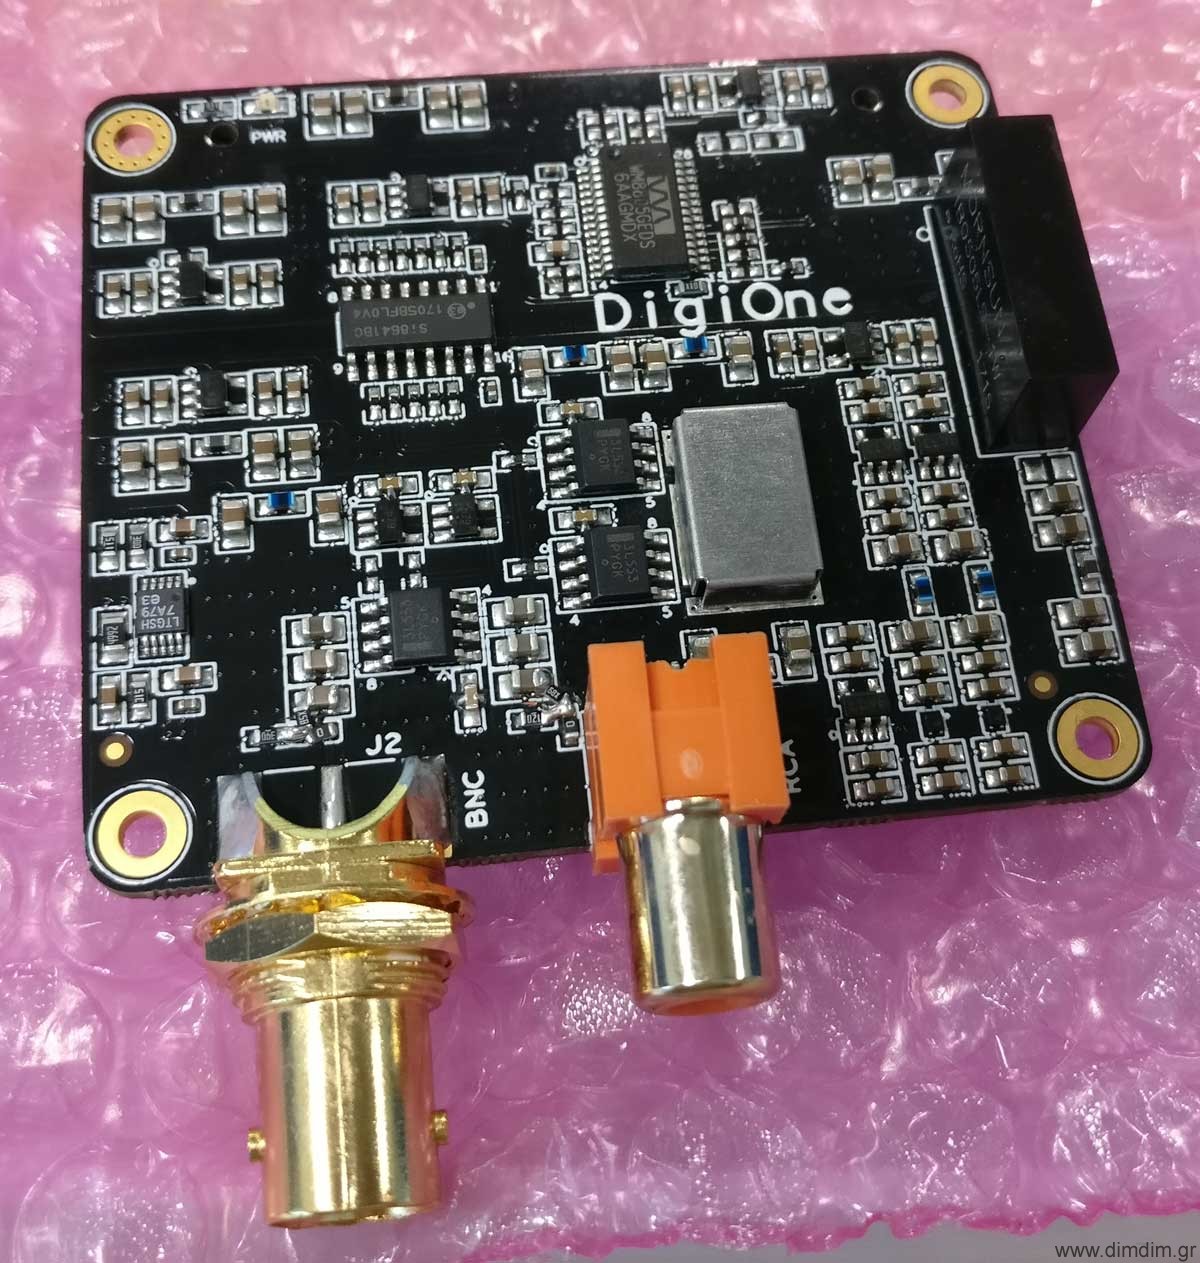
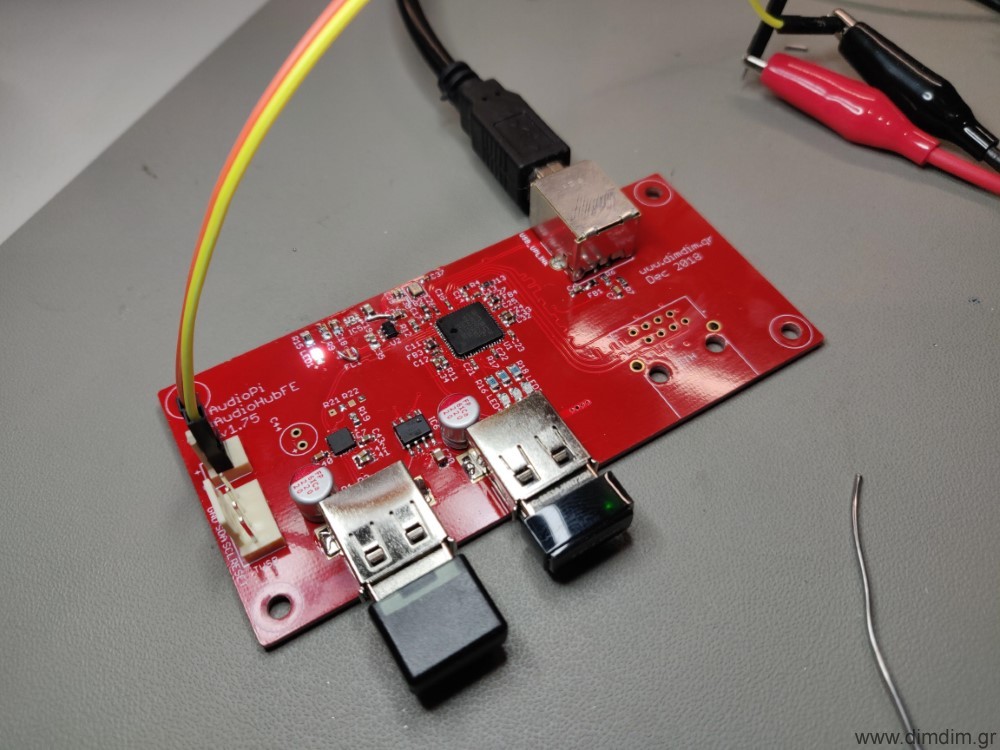
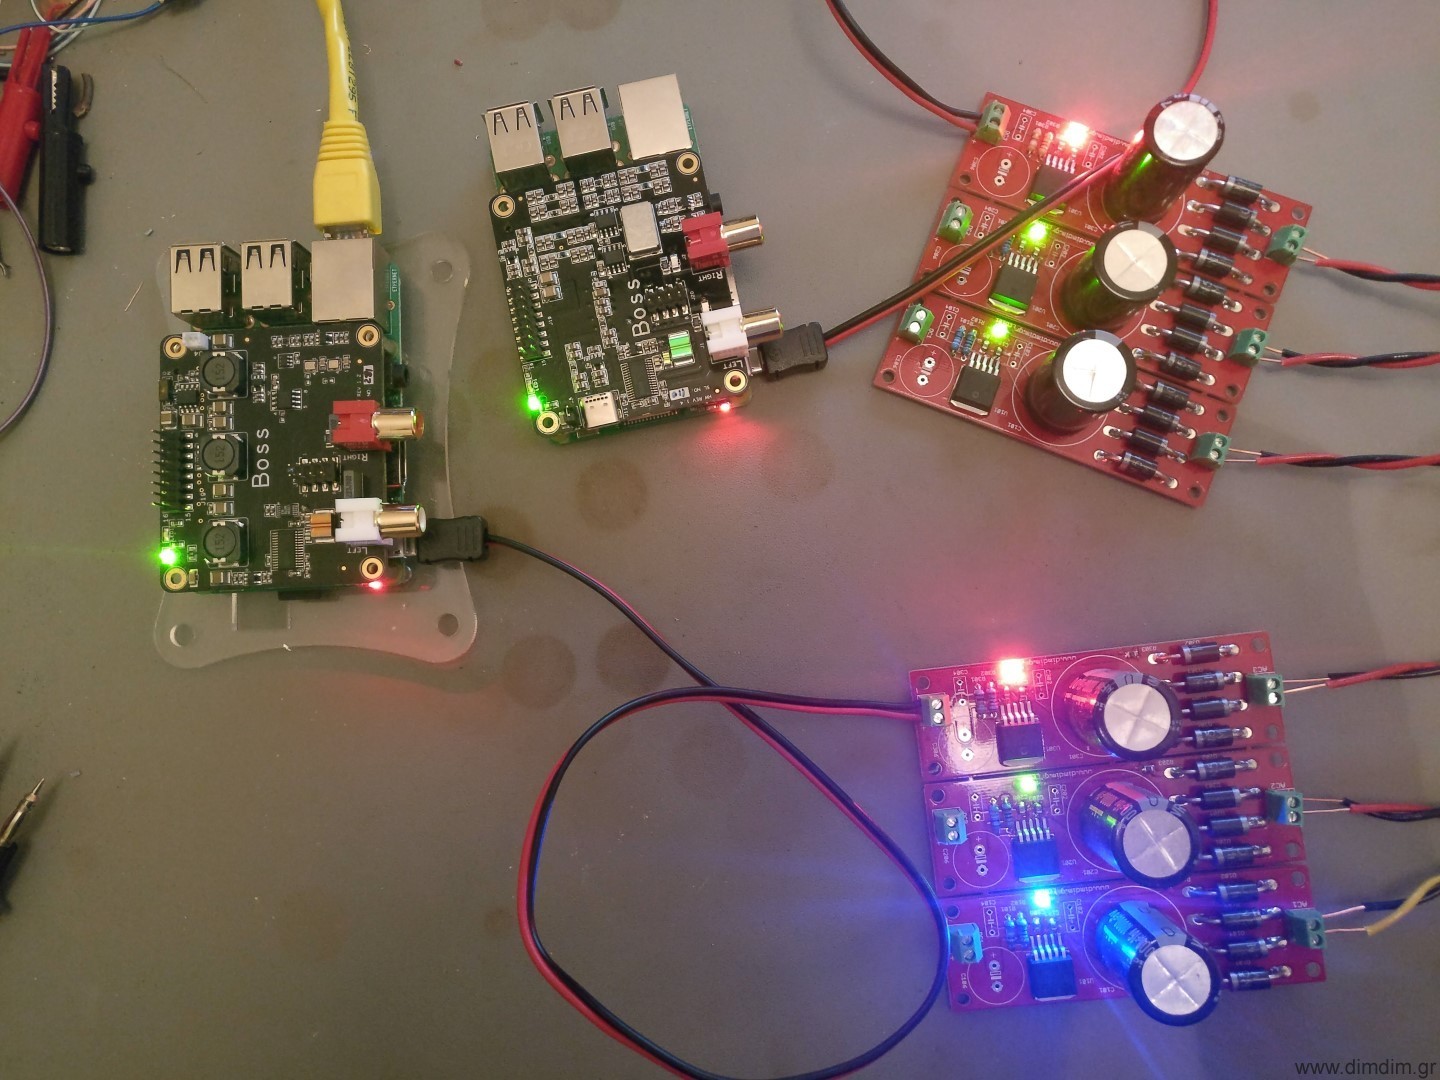
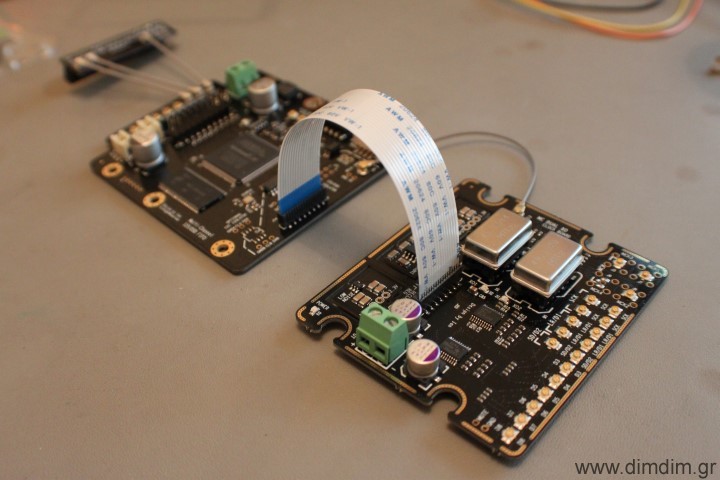
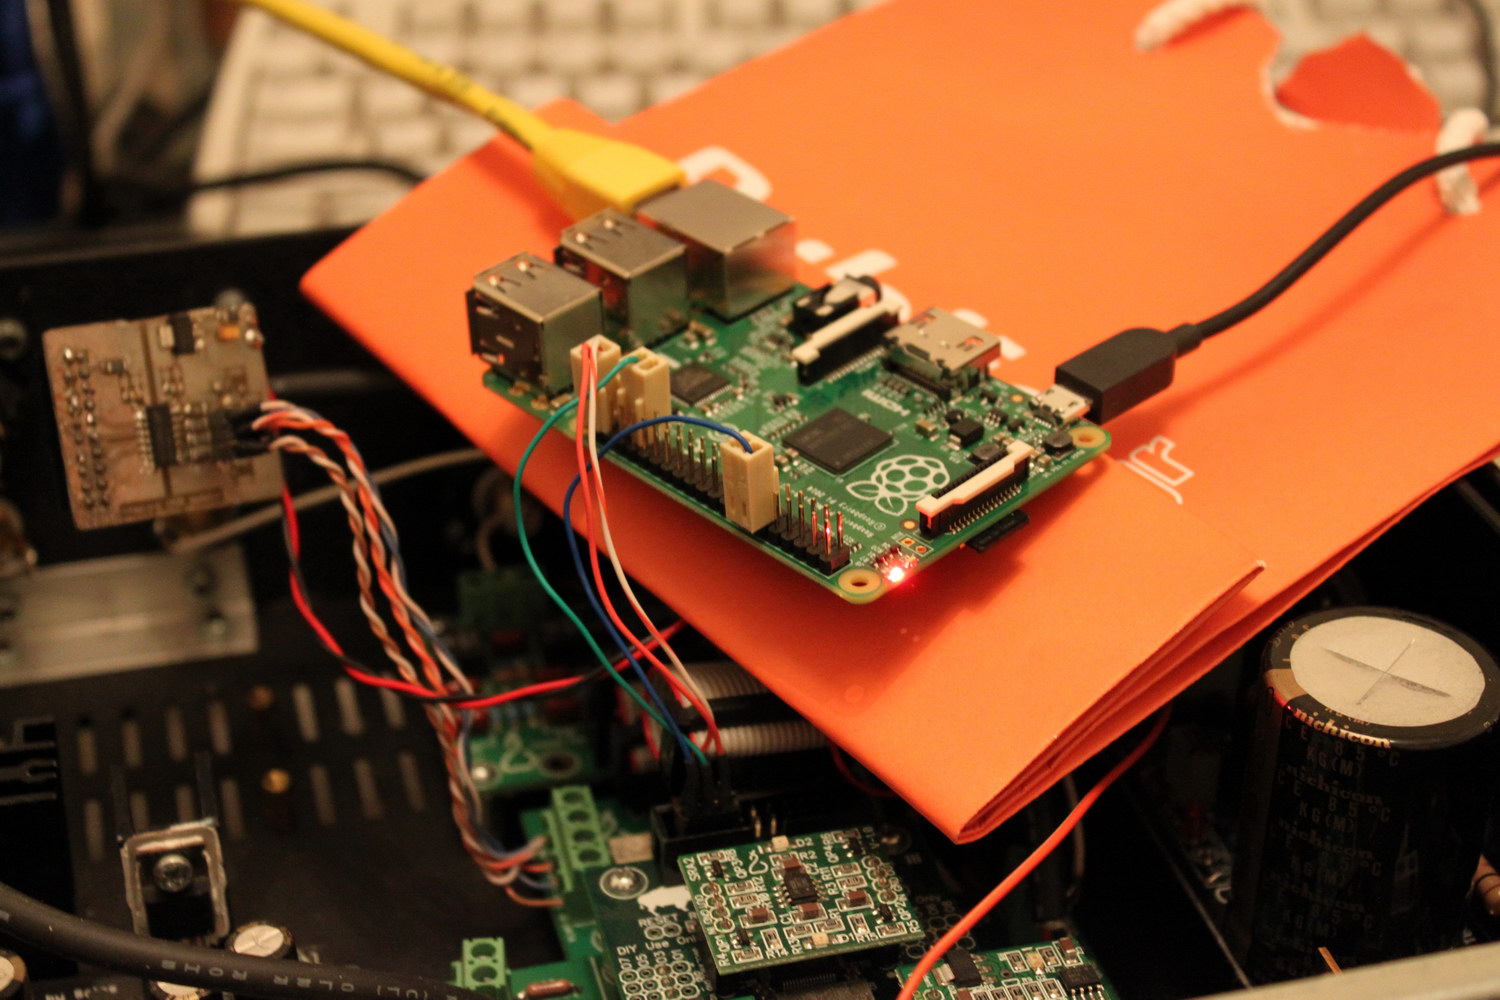
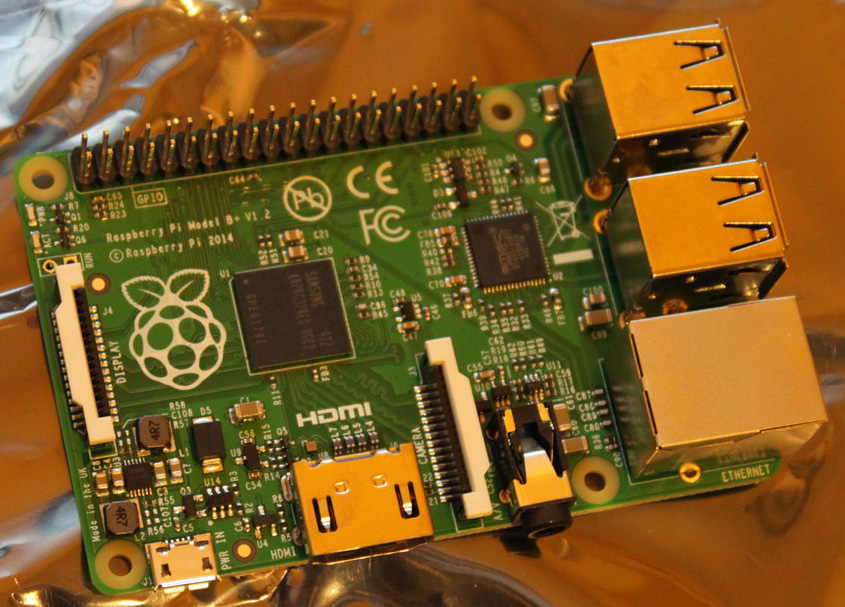
The DigiOne is a HAT compatible with most if not all RPis and supported by most if not all audio distributions. It is intended to be plugged-in directly on top of the RPi, with no need for an isolator HAT. Plus, it is designed to be powered by the RPi via the GPIO header, so no need (or provision) for an external power source.

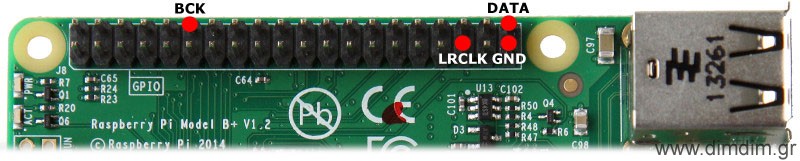
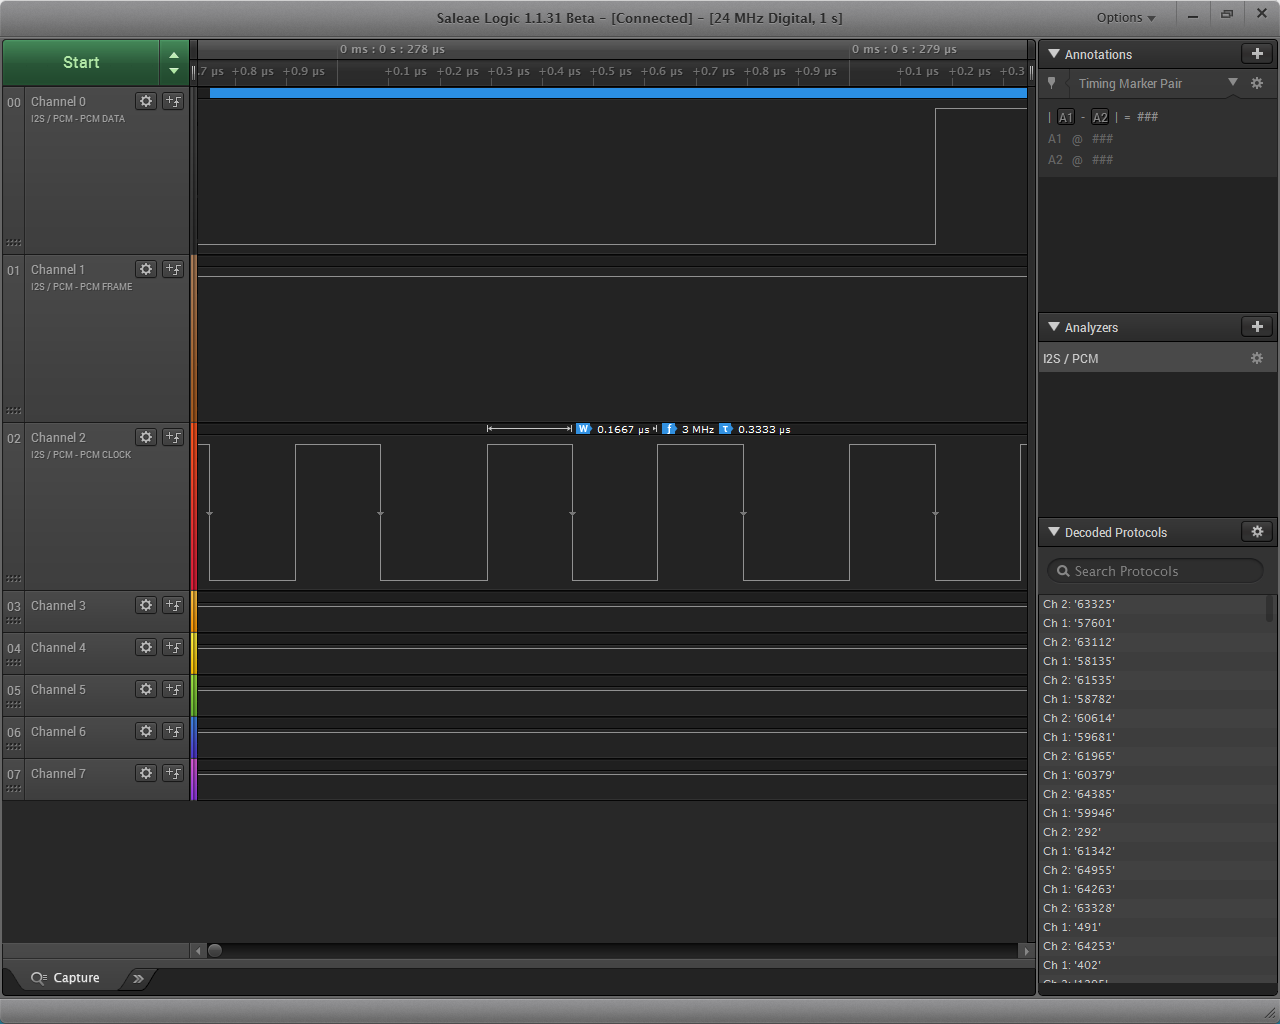
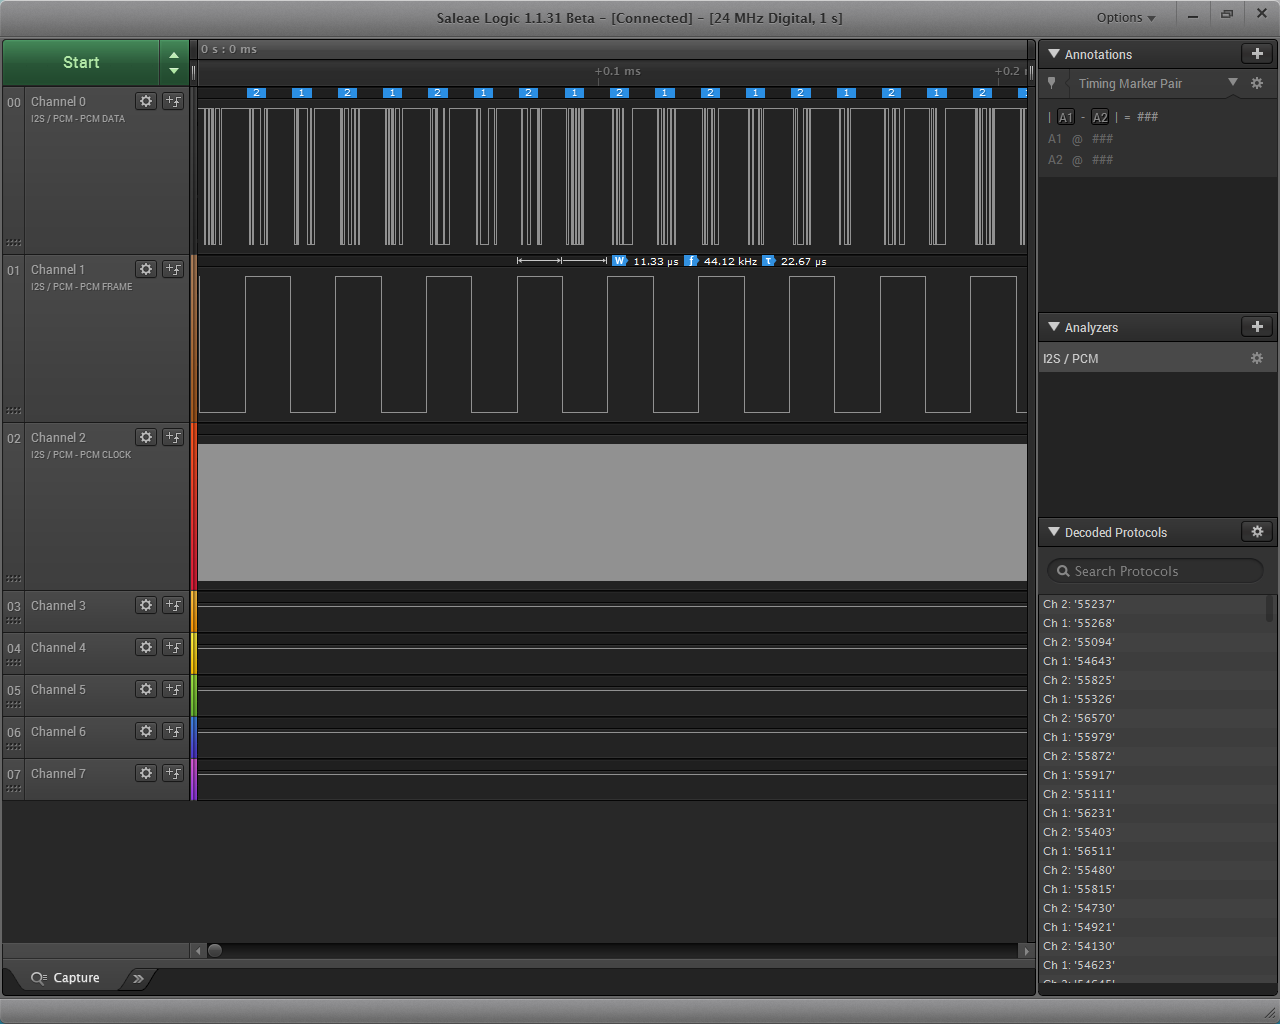
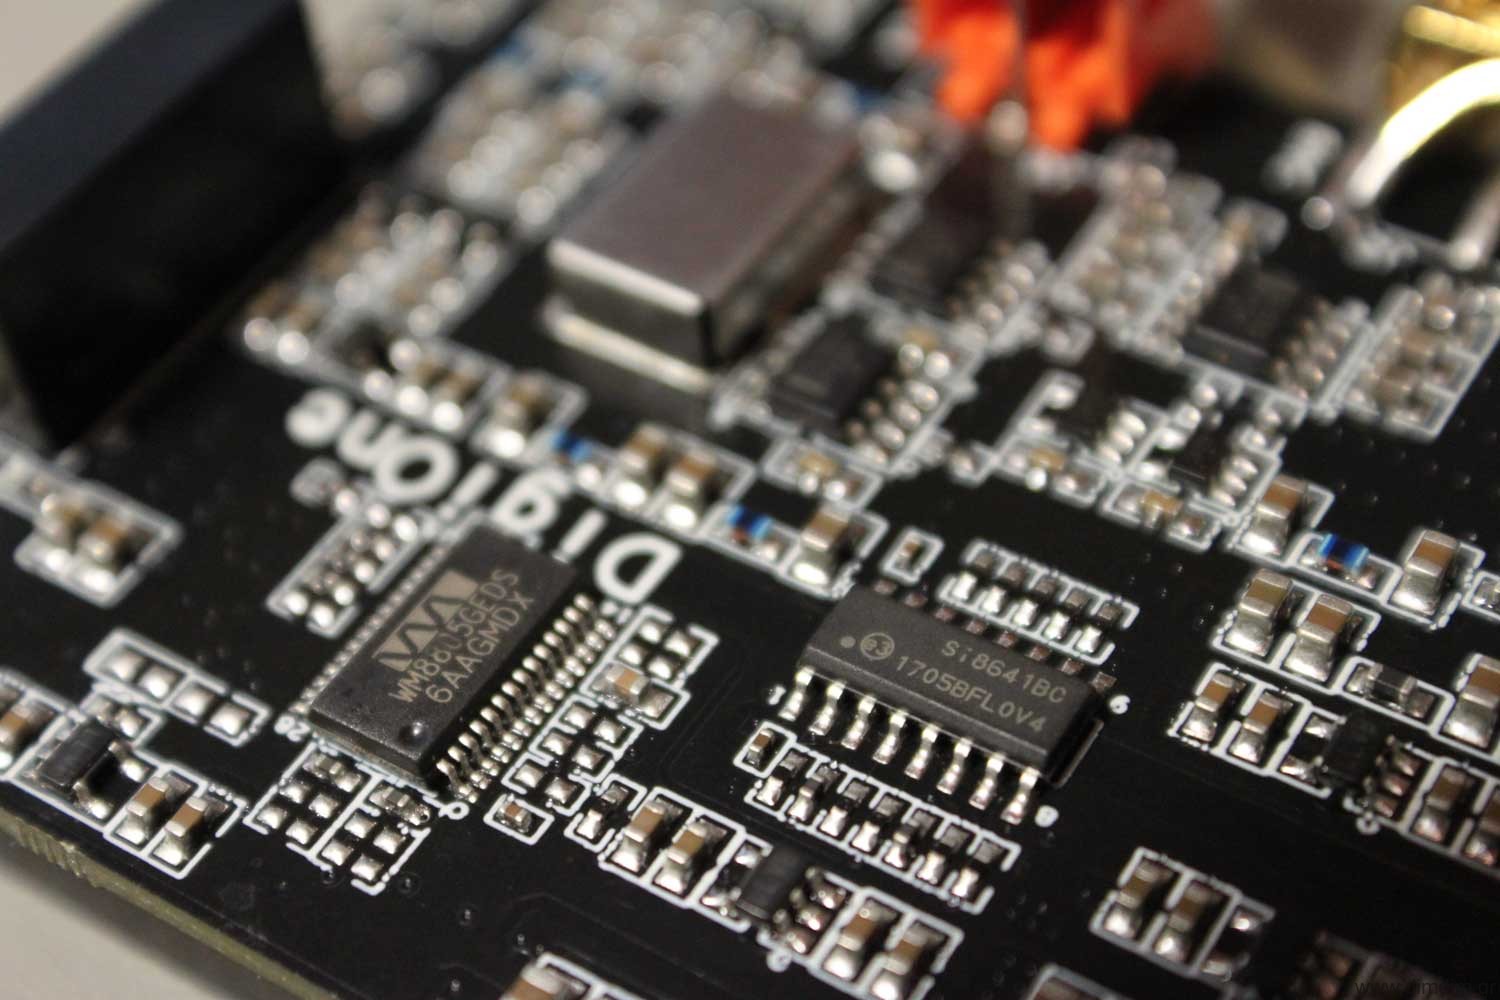
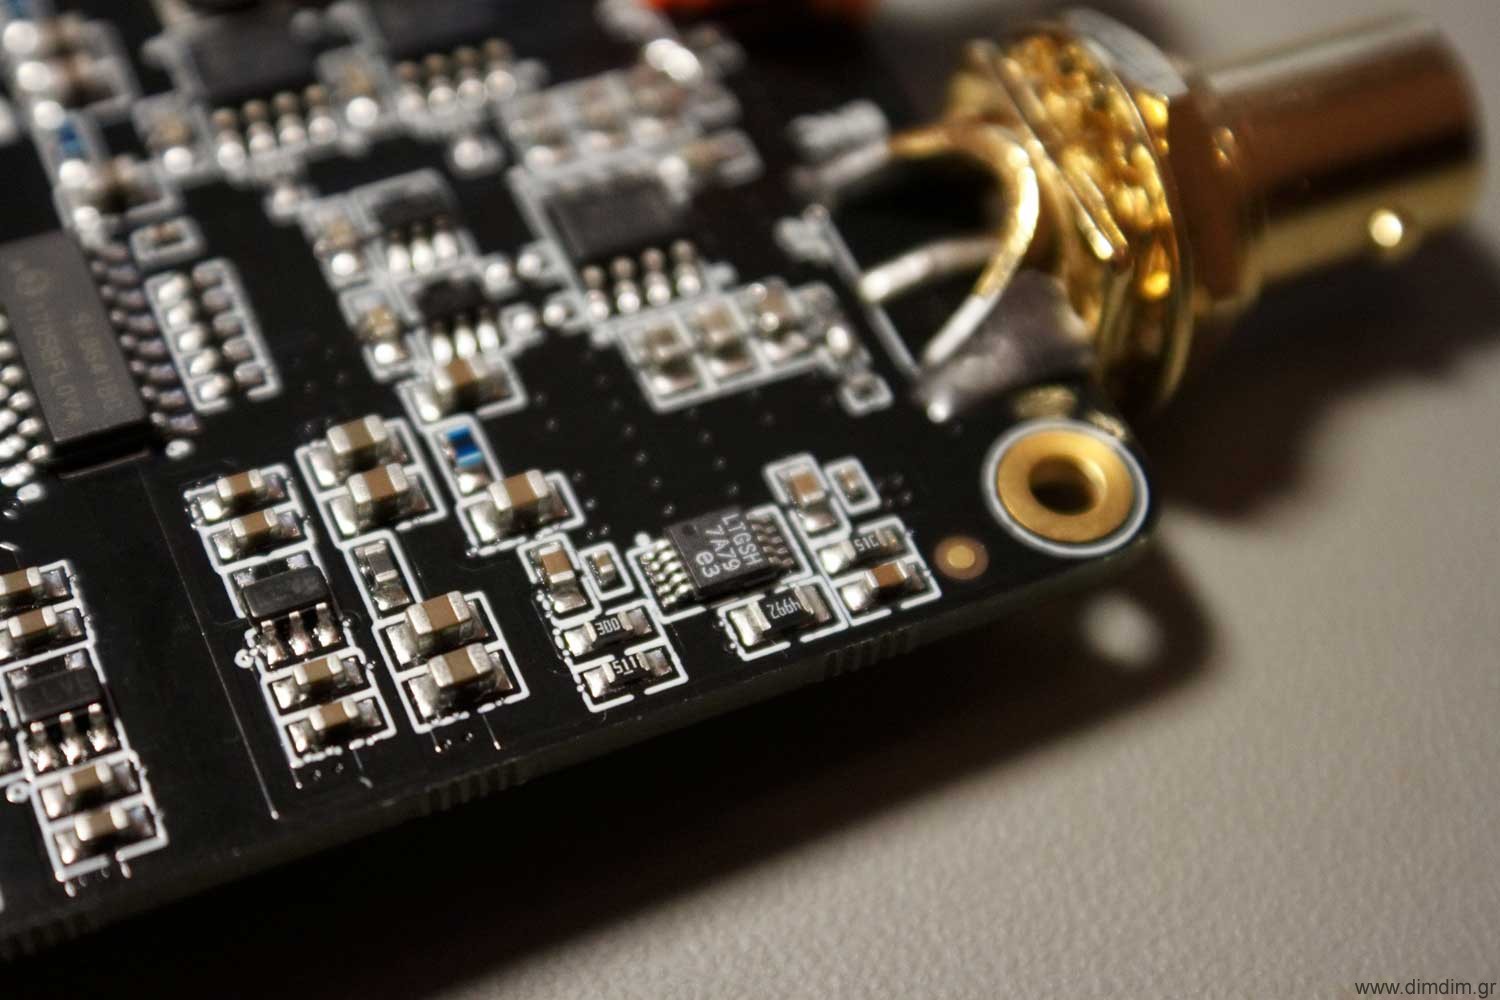
The DigiOne utilizes a WM8805 to convert the RPi’s I2S signal into s/pdif. The WM8805 is run in master mode, so as to minimize jitter due to the RPi’s problematic I2S clocking scheme. The WM8805 is clocked by the same oscillators that are used to reclock the s/pdif signal.

The WM8805’s s/pdif output goes through an Si8641 150MHz galvanic isolator and is passed to the “clean” side of the board.

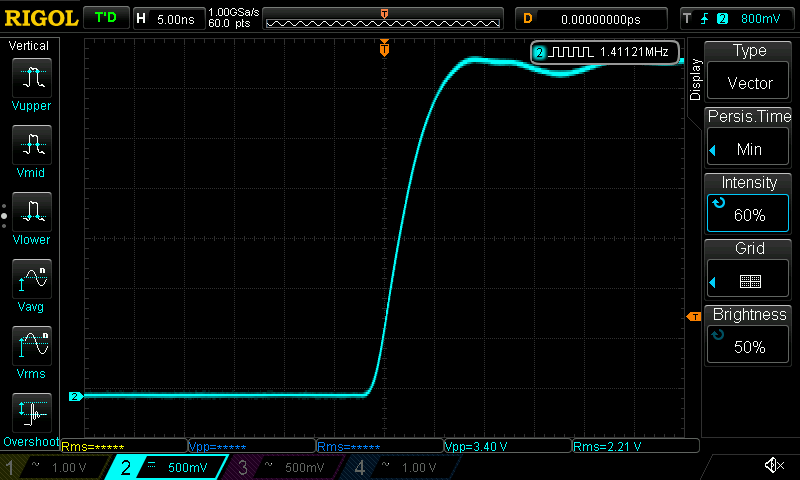
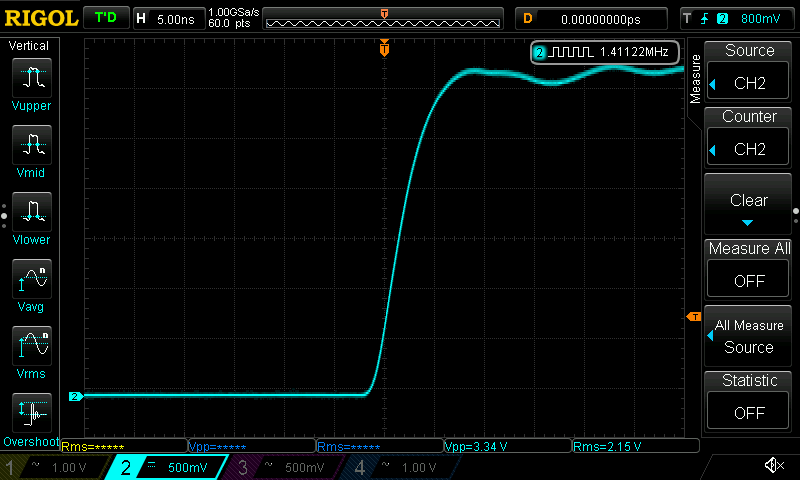
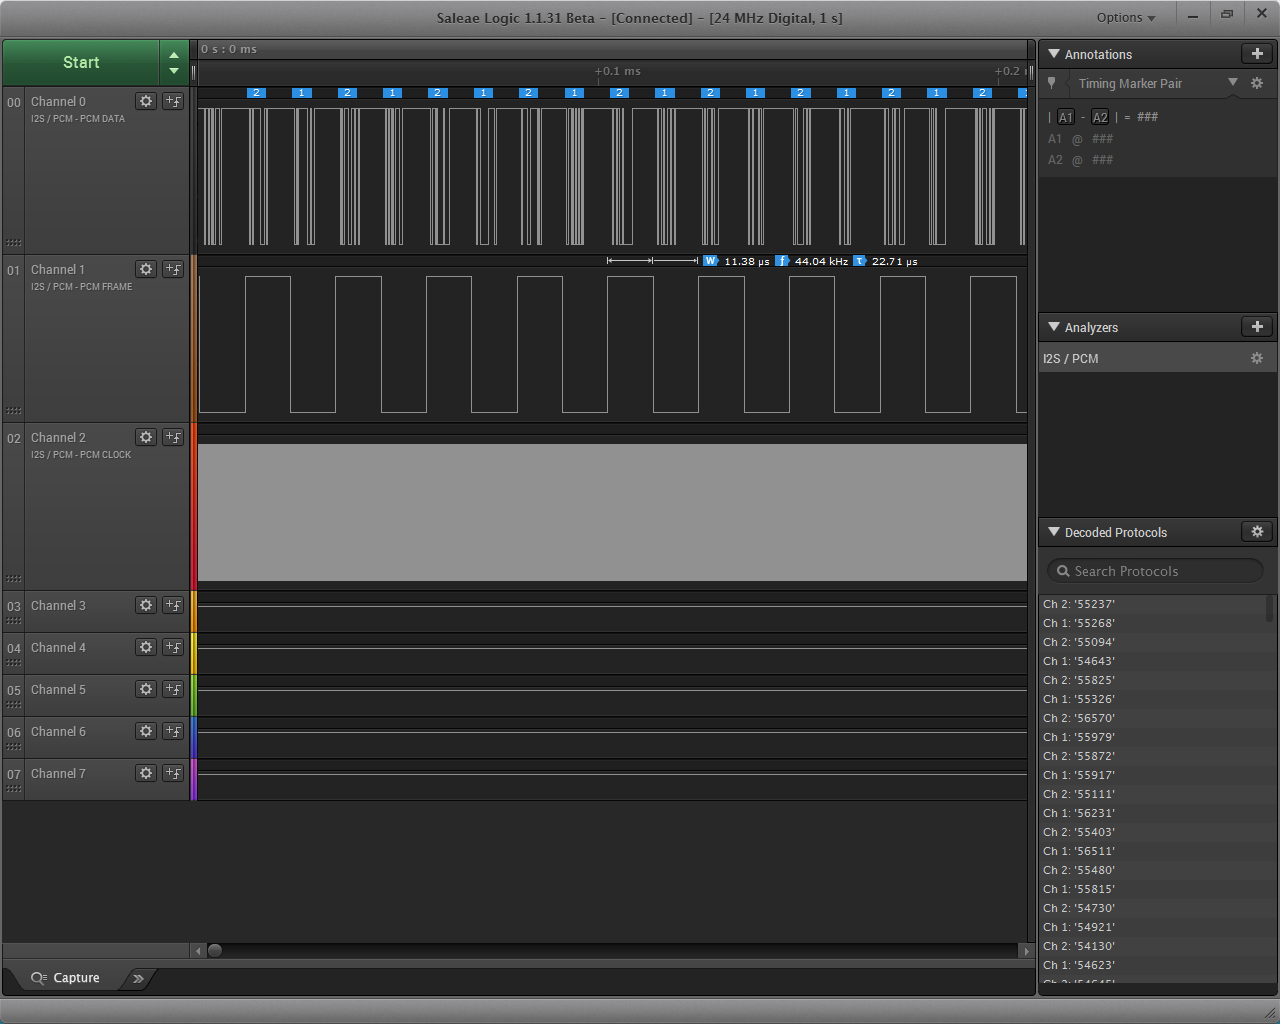
There the signal is reclocked by a high quality flip-flop clocked by high quality NDK oscillators (housed inside a metal box, used for shielding against EMI/RFI). There exist two oscillators, one for the 44.1K family and one for the 48K family of sampling rates. The output of the oscillators is put through NB3L553s for buffering and isolation.

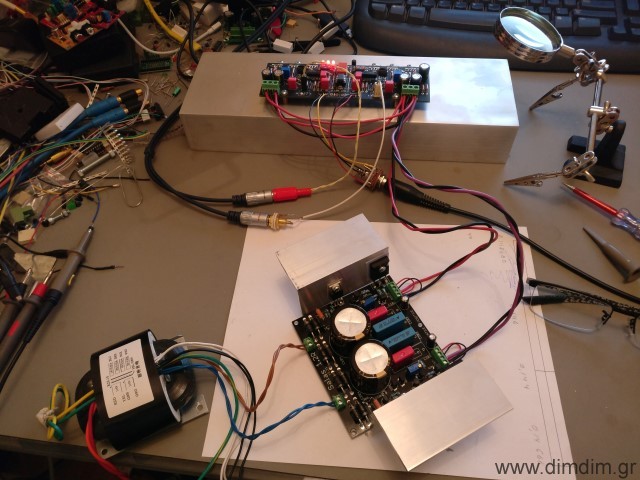
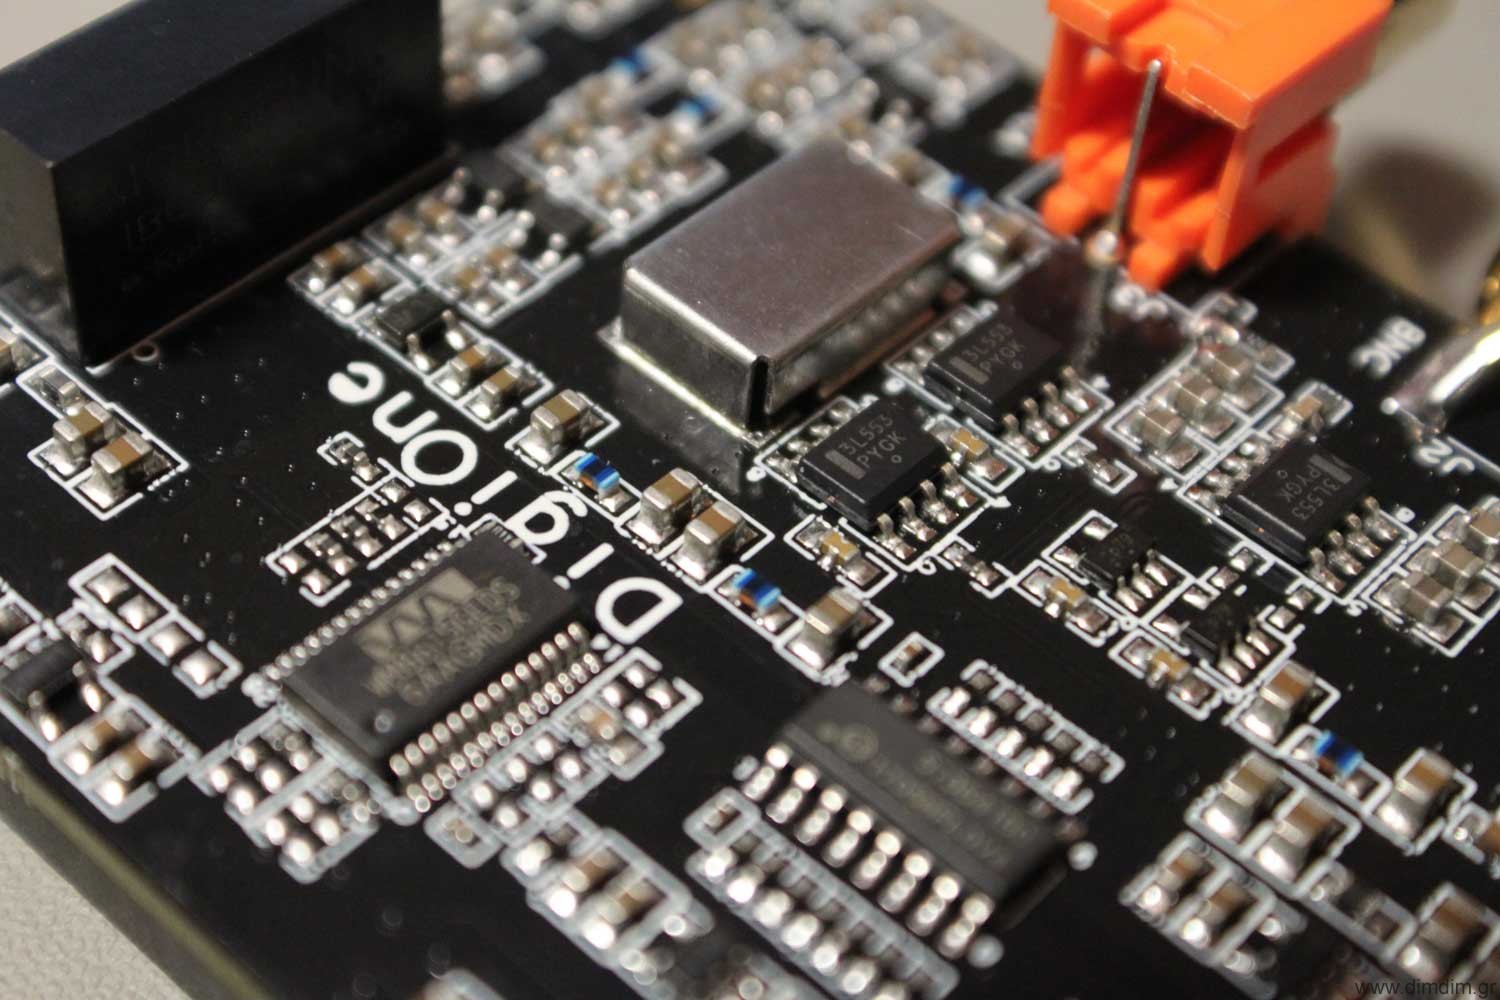
The entire isolated part of the board is powered by a DC-to-DC converter that offers galvanic isolation. Following this converter there exist a large number of LDO regulators and filter components. An LT3042 regulator is used to power one of the most critical parts of the circuit: the flip-flops that do the final reclocking.

So, very solid engineering all around. But how well does it sound?

The answer is, surprisingly well for the money.

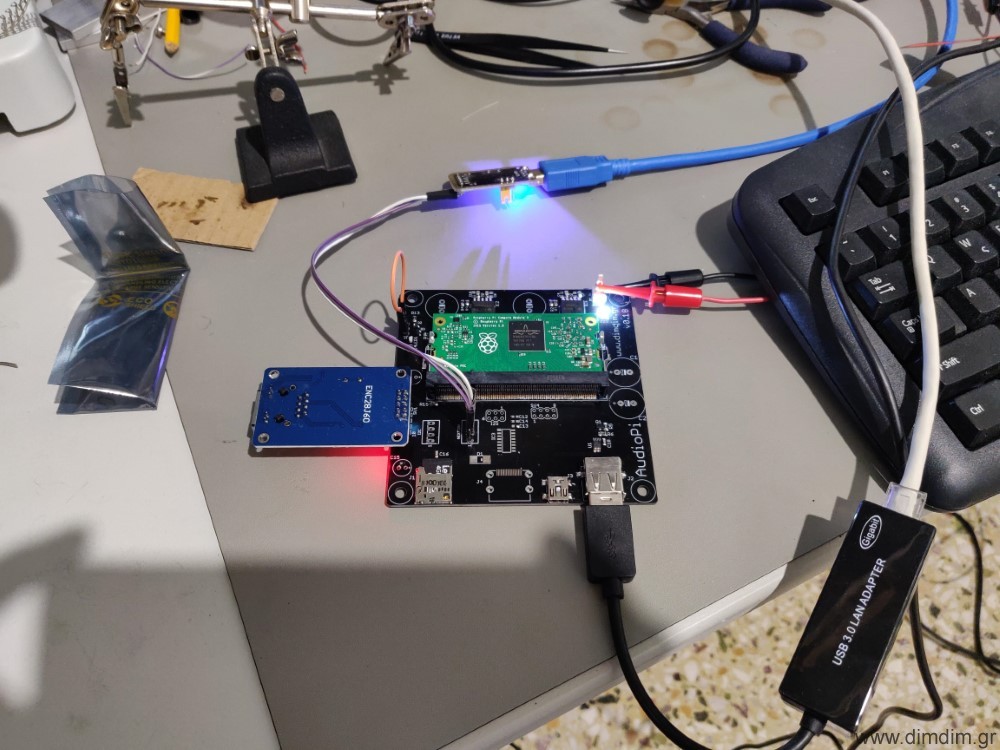
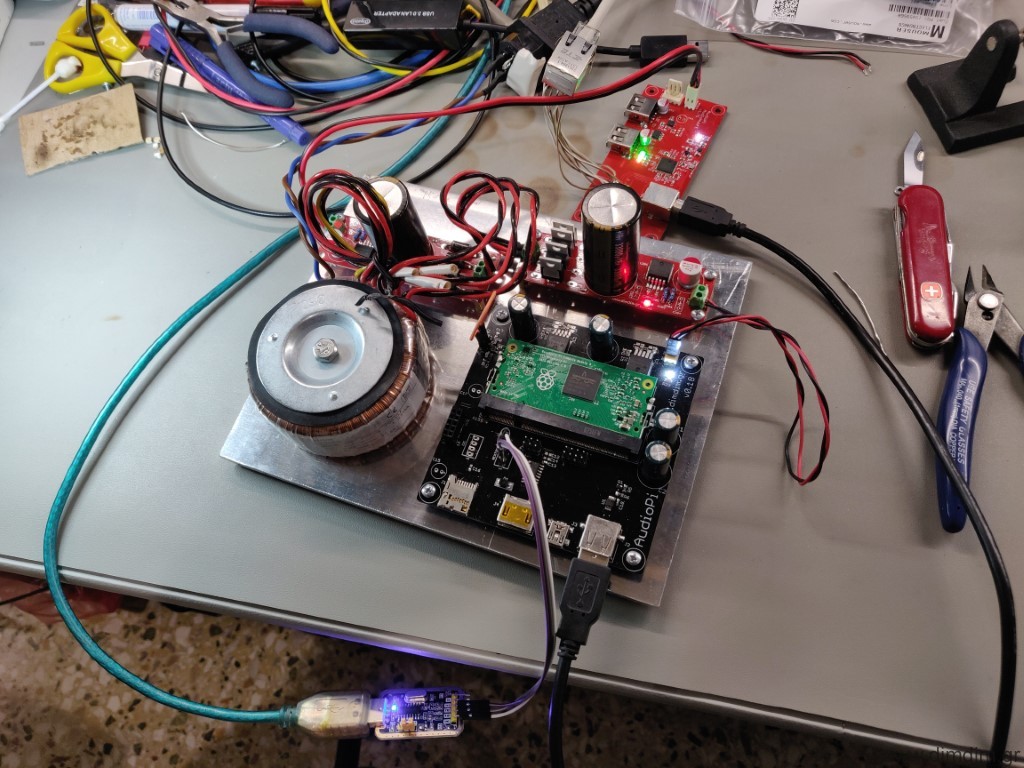
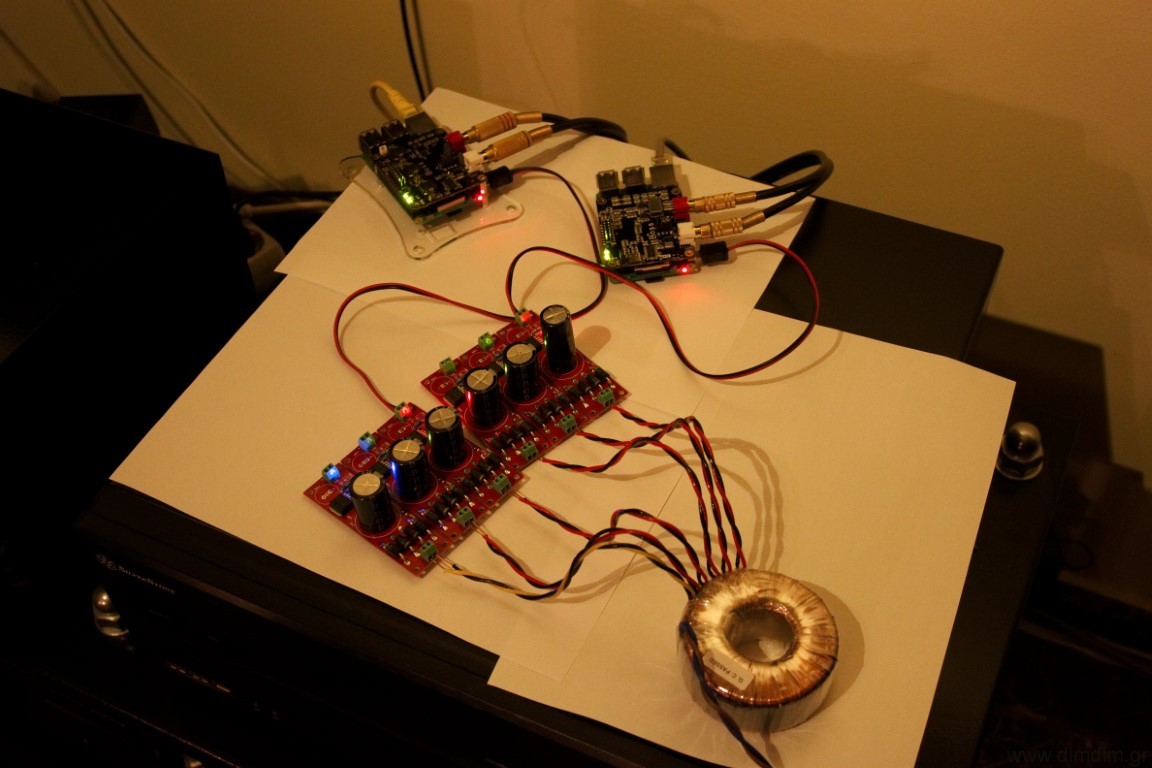
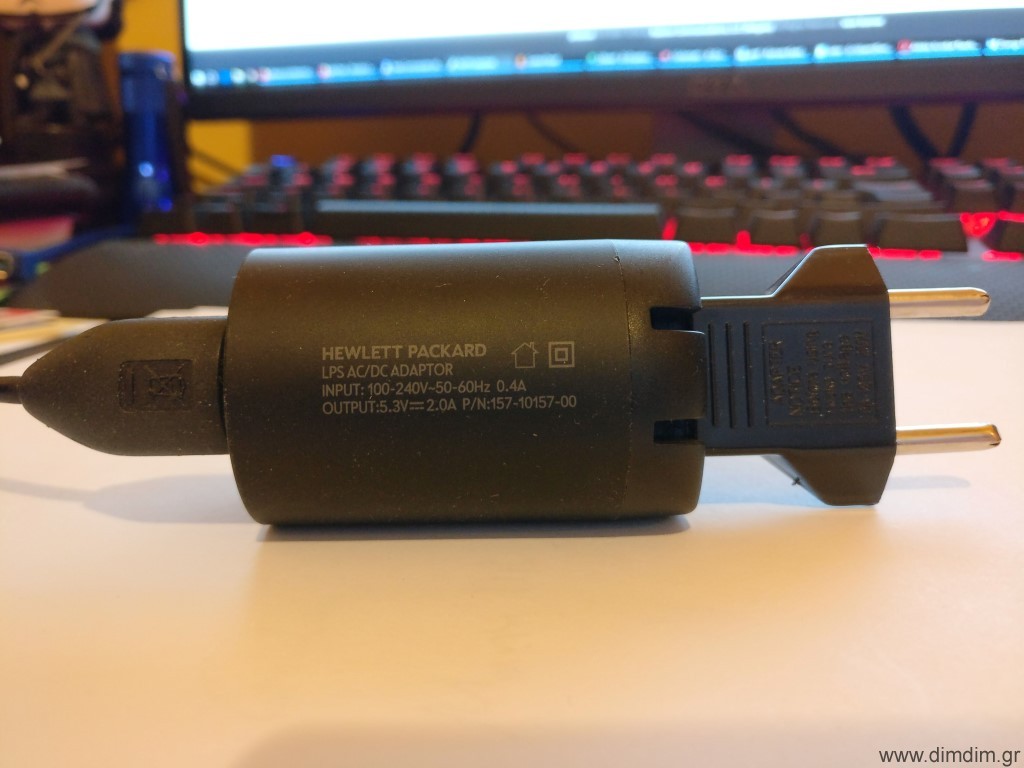
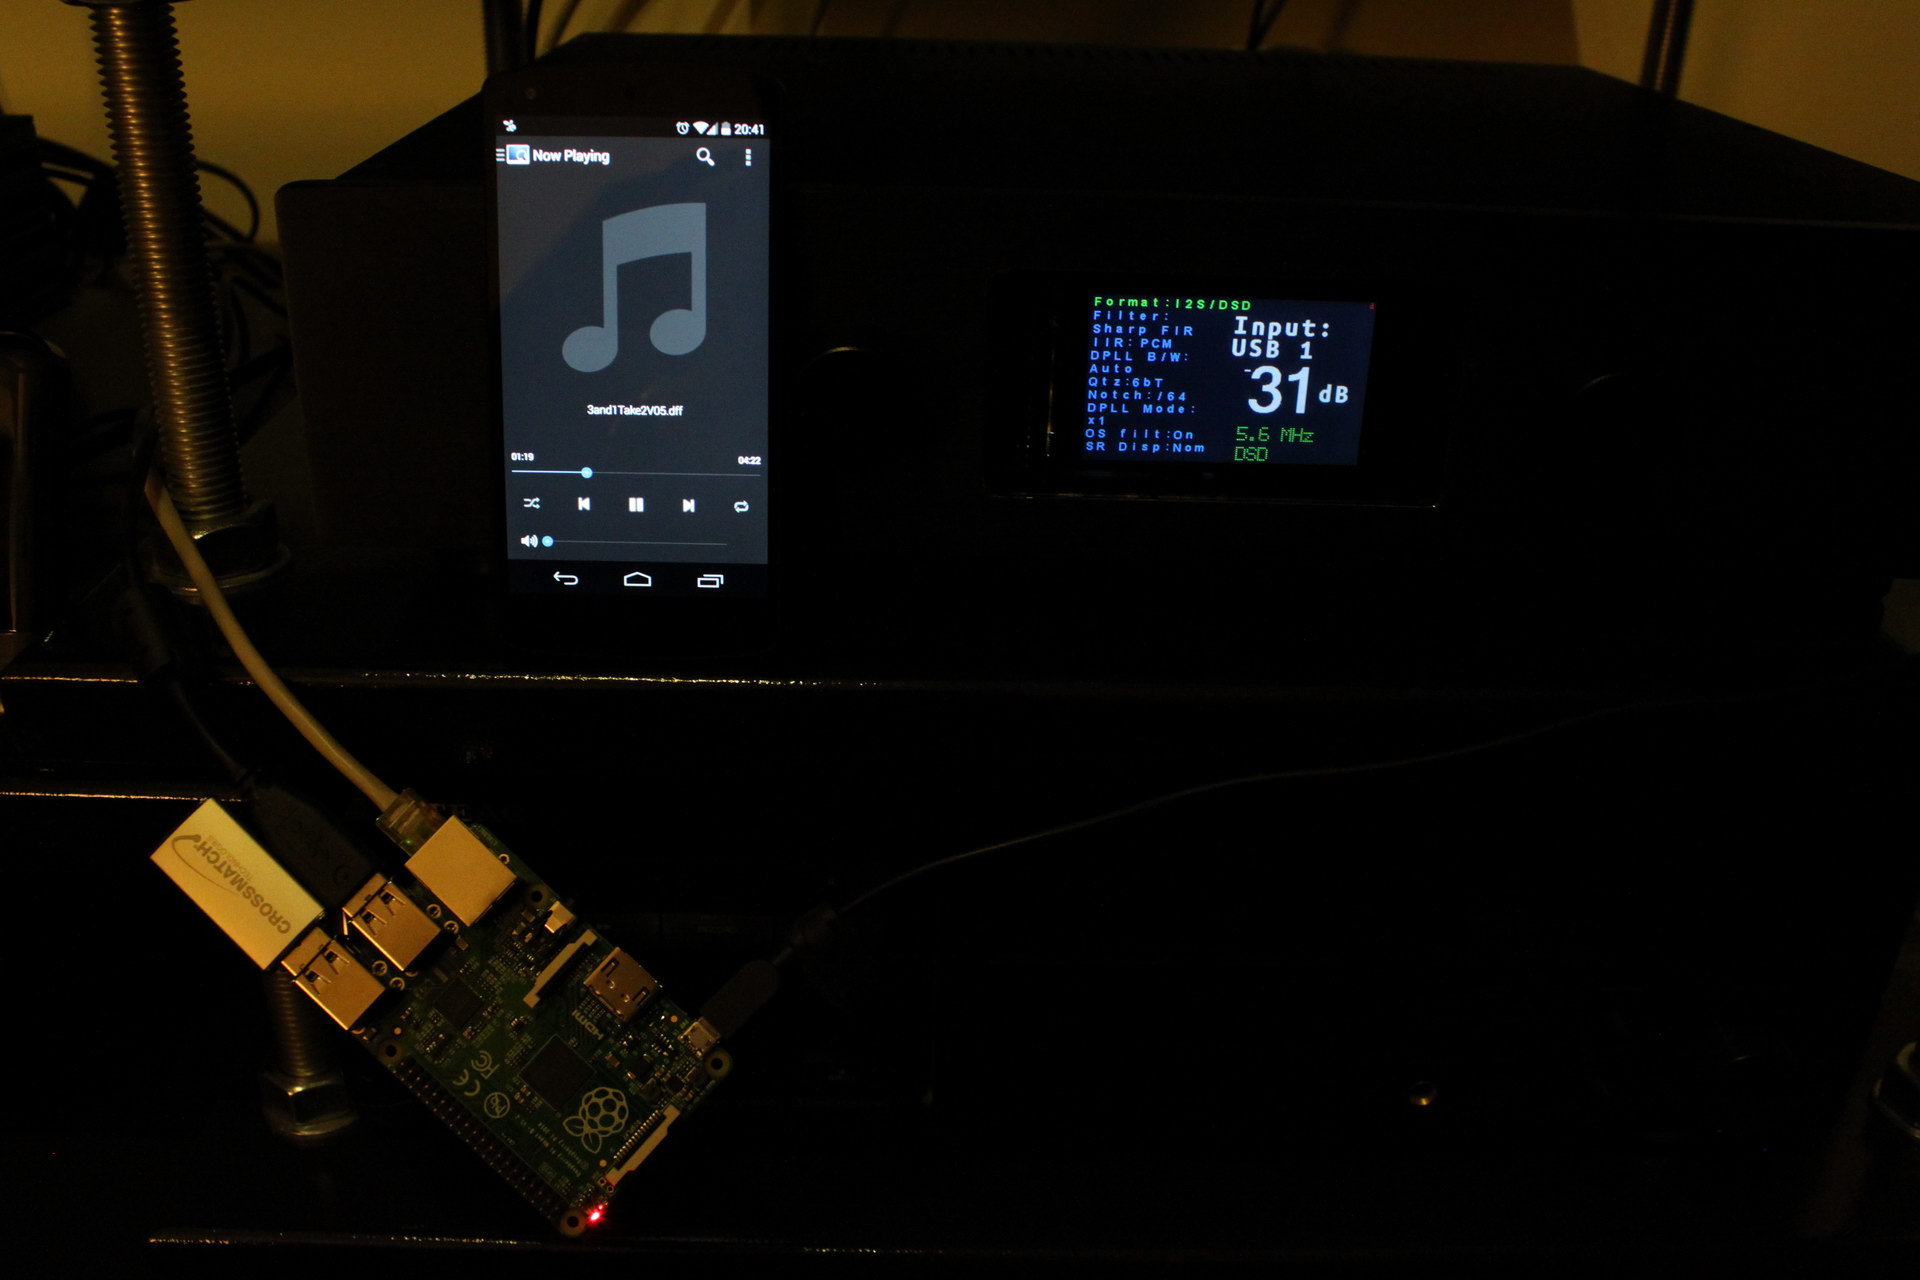
My RPi stack included an RPi 3 with the DigiOne, powered by Salas’ new L-Adapter power supply and running Archphile. The music was coming from my NAS. No audiophile ethernet switches were employed. 😛
Pitted against that I had my Logitech Squeezebox Touch running the EDO plugin for up to 192K s/pdif from its coax output and my relatively pricey Pioneer DV-LX50 Universal Player (using its coax s/pdif output).

The music used was Dire Straits’ SACD album (having selected its CD (and not SACD) layer) which was also accurately ripped to my NAS.

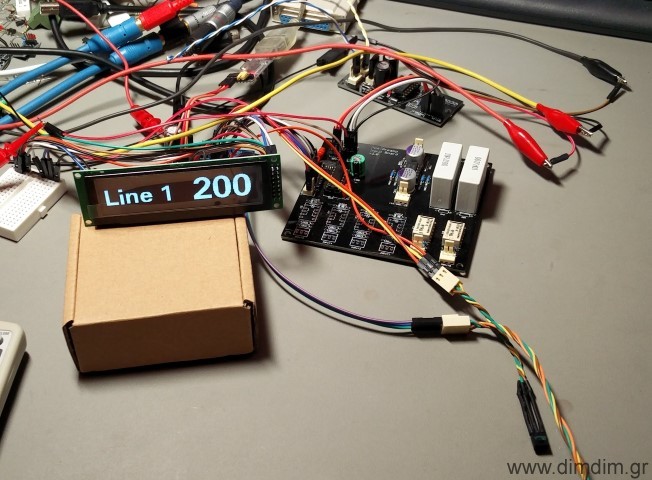
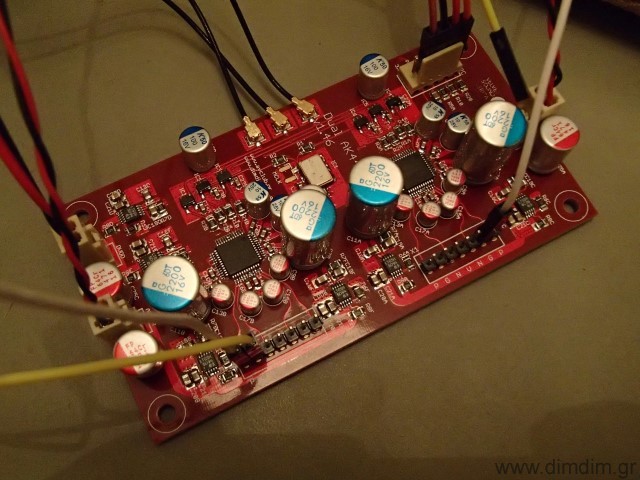
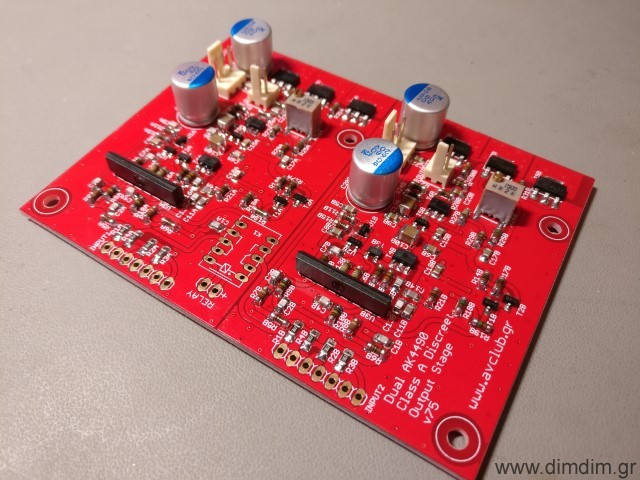
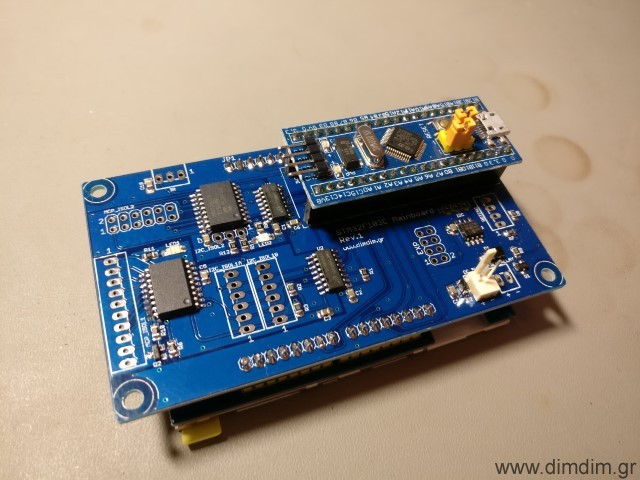
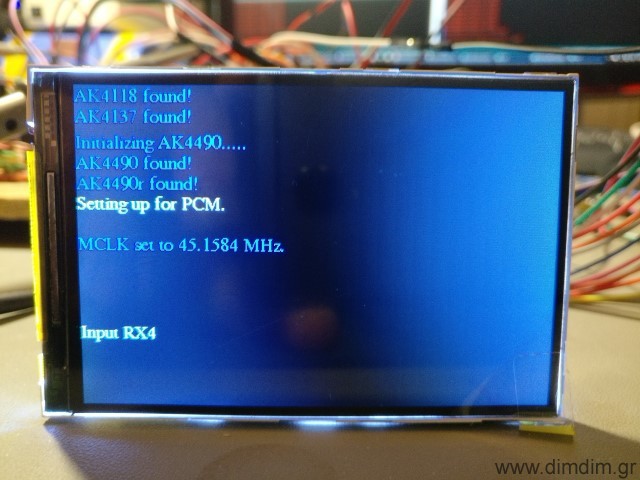
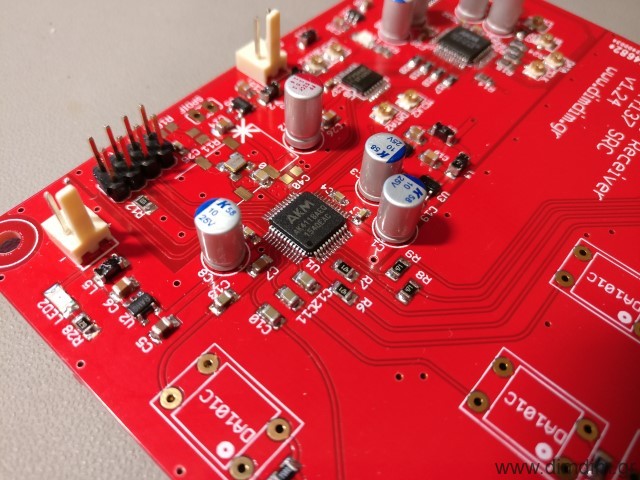
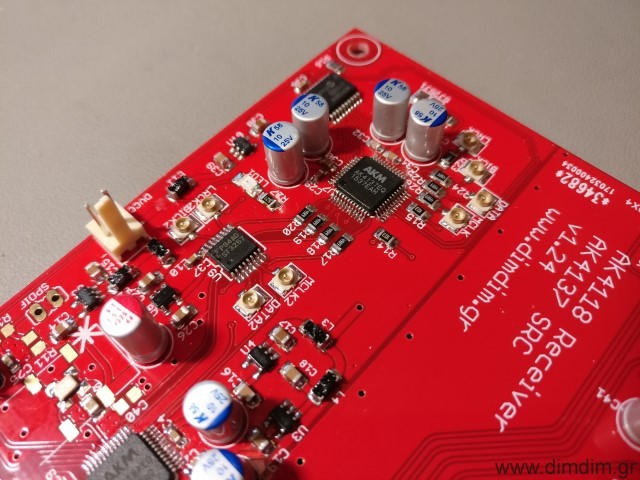
Output from the s/pdif transports went into an AK4118-based s/pdif receiver of my own design which in turn feeds my dual mono AK4493 DAC. The DAC’s output goes through a Salas DCG3 preamp into my Hypex amp.

First up was the Pioneer. It had been a while since I had listened to it through its s/pdif output so I was in for a bit of a shock. Its output sounded coarse, strained, tiring. For a moment I thought that it was due to the SACD’s mastering (the CD layers of SACDs are rumored to be mastered intentionally bad so as to give the impression that the SACD layers sound even better than they actually do), but that changed when I switched to the Squeezebox. Things got noticeably better, actually listenable. Not exactly close to what I had been accustomed to using the Squeezebox’s USB port, but closer.
Then I switched to the DigiOne. Wow! All of the “coldness” of the music was gone, the stage gained depth and width, the music became more detailed and lifelike. This was definitely a step up.

I would dare say that this s/pdif setup came in fact close in SQ to my USB setup. This was a very pleasant surprise.

Now I need to do some A-B testing between the DigiOne and the USB output of the RPi. So to-be-continued..

An “Audio Grade” Raspberry Pi

Not much free time these days so updates have been slow.. but I have a lot of interesting stuff cooking in the back burner.

One of them is an audio grade RPi.

Essentially it will be a Compute Module 3 on a mainboard loaded with ultra low noise linear power supplies and some necessary peripherals.

The idea came to me quite some time ago but it wasn’t until last November that I decided to actually go ahead with it.

The proof-of-concept PCBs for the mainboard were done by December.

It appears that even the PoC board, with average quality power supplies, has a cleaner I2S output compared to a standard RPi3 powered by an equivalent linear power supply:

RPi 3:

Audio grade Pi:

The next part was the PoC board for the USB Hub & Ethernet controller. That took a bit more time and a 4-layer PCB with numerous 0402 sized components but it too ended up just fine (with the exception of a bad RJ45 footprint..).

So now I have a fully functioning set of boards with average quality power supplies that already performs better than my Squeezebox Touch as a USB transport.

Next step is to design a single board integrating all of the components plus ultra high quality power supplies.

That will probably be a summer project..

Allo.com Boss vs. Boss 1.2

All right, this one is long overdue..

Allo.com was kind enough to send me their revised “Boss 1.2” RPi HAT DAC so that I could do a comparison to their already “best VFM” Boss DAC (that I had looked at about a year back).

For reference, this is the old Boss:

and this is the new one:

The new DAC features improved clocking (making use of the new “audio grade” “SDA” oscillators from NDK), improved powering scheme (including the addition of a USB type C port for dedicated external power as well as a new layout), and improved filtering capacitors in the output stage.

In order to do a fair comparison, I had to keep all external parameters the same. That meant using two identical Raspberry Pi 3 boards, running the same distribution (Archphile), with same settings, powered from separate but identical power supplies, using the same audio cables, into 2 inputs of my preamp.

Both of the DACs had run for several hours (or even days..) as a “burn-in period”.

Power was delivered through a couple of identical custom-made USB power-only cables and data came in from a file server located several rooms away, through a single ethernet switch.

Control was through Archphile’s ympd web-based MPD client.

I sync’ed the playback of the RPis as best as I could and I set about switching between the two DACs by selecting either one or the other input in my preamp. The volume needed no adjustment – the two DACs output the same signal amplitude (not measured but fairly certain..).

I used a small number of test tracks, representative of both high quality recordings as well as contemporary pop music.

After some considerate going back and forth, I came to a conclusion. The new Boss 1.2 is a definitive improvement on the original Boss. The differences are not night-and-day, but they are there.

The 1.2 manages to have better bass extension, without sacrificing control. It also does a better job of placing the instruments in space, while also managing to sound more realistic – the vocals sound more real, the acoustic guitar sounds more like an actual guitar, and so on.

All of these “symptoms” are classic signs of less jitter being present in the system. So Allo.com’s choice of new audio-grade oscillators and the changes they made to the power supplies have paid off.

Good job keeping the title of “best VFM DAC HAT”. 🙂

Linear power supply for the Raspberry Pi: is it worth it?

Pretty much everyone agrees on this one, still, it took me a while to get on the bandwagon. Probably because I am not using an RPi as my main transport..

In order to test this I needed a proper linear power supply, capable of outputting at least one “real” amp at 5V. It would also have to be as low noise as possible. After some searching I ended up picking the TPS7A4501 for the job. Since its output voltage is adjustable, it would also come in handy for various projects. So I designed a PCB that would do a proper job of “hosting” the regulators along with the necessary rectification and filtering stages and had a bunch of them made.

I also ordered a proper custom-made toroidal transformer, one that would have 5 secondary windings, each of them outputting 6VAC at 1.5A and one sixth winding outputting 3V at 2A. The end game would be to replace all of the RPi’s on-board switching regulators with linear ones.

But for starters I’d just power the RPi with 5V via its USB port. Here are a couple of RPi 3s being powered by my linear supplies. This setup would be used to compare the Allo.com original Boss with its new “v1.2” version. More on that in another post.

Power draw on the linear power supply was measured to be at about 500mA @ 5V.

My “reference” 5V SMPS is this one:

It’s an old but beefy switching mode power supply from an old HP tablet. It’s specc’ed at 5.3V @ 2A.

In order to be as impartial as possible, I took the setup to a friend’s house and had him and a couple of other friends audition the RPi powered either from the SMPS or by my linear power supply.

In both cases, the RPi was running Archphile and was connected to my upgraded-with-ES9028Pro-and-Mercury-Buffalo III DAC via USB.

The difference between the two power supplies was immediately obvious. It was like with the SMPS we had an at-best mediocre source – DAC combination, while with the linear power supply the setup became “proper”, it sounded “in-place” among my friend’s high performing system. The sound stage became better defined, the detail level went up, overall the presentation was more realistic. In other words, it was like the jitter of the system went down, but perhaps the noise levels in the system also decreased.

In other words, IMHO no serious audiophile should be powering his RPi by a run-of-the-mill 5V SMPS, even if he is using it as “just a USB transport”.

Winter 2017-2018 teaser :-)

So many projects, so little time.. Here’s a teaser on what’s to come:

PGA2311-based preamp, with multiple inputs board, controlled by a custom Arduino, with an OLED screen.

Salas DCG3 preamp, powered by custom Salas Shunt Reg 1.2R.

MPD TFT display for Rasberry Pi, controlled by an STM32.

Ian’s Multichannel FIFO.

Allo.com’s DigiOne RPi HAT.

Dual Mono AK4490 DAC with on-board Si570 programmable oscillator and reclocking, Single ended Class A discreet output stage, Arduino controlled with STM32 controller and 3.5″ TFT screen.

Arduino controlled AK4118 based s/pdif receiver, with AK4137 SRC.

The Raspberry Pi: Audio out through I2S

There are currently four ways to get audio out of the RPi:

  1. Use the audio out 3.5mm jack. It’s very easy to get it to work, but the sound quality is pretty bad, since it uses PWM to generate the sound. Due to that, its real resolution is in the neighbourhood of 11 bits. We have no use for that.
  2. Use the HDMI port. It works OK, but is useless to us audiophiles.
  3. Use a USB to I2S adapter, such as an Amanero or an XMOS-based device. Now we’re talking. They work quite well, and the quality of the I2S signal is dependent largely on the technology used (CPLD vs. XMOS, etc) as well as the quality of the on-board clocks. The problem is that they add another link to the audio chain, as well as increase the cost. Remember, the RPi is supposed to be a low cost solution.
  4. Use the GPIO pins of the RPi to get direct I2S output. This sounds way more interesting, right? Let’s try that!

According to several sources on the Net, this is the pin out:

Raspberry_Pi_B_Plus_I2S_out

You will probably notice that the RPi does not support MCLK output. This means in practice that your DAC will need to have its own on-board clock (or internal PLL / oscillator or whatever). We can live with that.

Luckily, my Buffalo III has its own clock (of course it does!) and thus can be connected quite easily. Let’s try that:

IMG_8297_resize

Now we have to configure the software for I2S output. For my distribution of choice, Archphile, it’s a piece of cake: http://archphile.org/howto/i2s-dacs-and-the-raspberry-pi/

Audio playback works just fine!

Well, almost fine..

You see, in theory the RPi has a bit of a problem with its I2S output. Since the only clock onboard the RPi is a 19.2MHz crystal, it should have trouble generating proper clocks for its I2S output. For example, for 44.1KHz audio, the LR Clock must be running at precisely 44.1KHz. That is not possible, since the frequency is not a multiple of 19.2MHz. Thus, the frequency can be either 19.200.000 / 435 = 44.138KHz or 19.200.000 / 436 = 44.0366KHz. This is a limitation of the Broadcom BCM2835 in conjunction with the 19.2MHz crystal and there is nothing that can be done.

In order to confirm the theory, I decided to run a few tests. I hooked up my logic analyzer to my RPi, set it up for I2S output, and fed it some 44.1KHz music.

IMG_8453_crop_resize

I took 1 sec worth of samples with my logic analyzer, configuring it for I2S signal. I got this:

logic analyzer 4

The PCM Clock is already appearing a little dodgy. Let’s zoom in:

logic analyzer 5

logic analyzer 6

As you can see, the pulses do not have the same duration. They appear to alternate between two values. So it is obvious that the signal has jitter. A lot of jitter. Since we’re here, let’s have a look at the LR Clock signal as well:

logic analyzer 7

logic analyzer 8

The duration of the pulses appears to alternate between 11.33μS and 11.38μS, giving respectively 44.12KHz and 44.04KHz, values very close to the ones I calculated previously.

So, the theory is sound and the RPi’s clock is not up to snuff by strict standards. What this means is that the RPi’s I2S output is not capable of “Hi End” audio transmission. It is essentially not bit perfect (edit: this is not correct, strictly speaking. It is in fact bit perfect, it is just not “proper”.).

In the real world, chances are that this problematic clocking will not be particularly audible under normal circumstances, say with a normal-specc’ed sound system. But an audiophile should definitely steer clear of the RPi’s I2S output, instead opting for a USB to I2S interface.

The Raspberry Pi: Low cost music streamer

Enter the Raspberry Pi B+:

Raspberry Pi B+

It features:

  • A Broadcom BCM2835 SoC processor running at 700MHz
  • 512MB of RAM
  • A Micro SD slot for storage
  • A 10/100Mbps Ethernet port
  • 4 x USB2.0 ports
  • An HDMI output port
  • An analog audio / composite video output port
  • A 40-pin expansion header, exposing 26 x GPIO ports
  • A camera and a display interface port

Somehow they have managed to cram all that in an almost credit-card sized PCB.

And it costs less than 40€.

It runs Linux (of course..). There is a large number of general-purpose distributions available, as well as a few custom built ones. One of them is Openelec (an XBMC Media Center distro), another one is Volumio (an audiophile music player), a third one is SqueezePlug (it emulates a number of Media Servers, like Logitech Media Server, MediaTomb, MiniDLNA, etc. It also works as a Squeezebox (client)), etc.

So far, my favorite distribution is Archphile, an audiophile linux distribution. It may not have the polished look of Volumio or play 1080p video like Openelec, but is plays music wonderfully through a USB port (or through I2S if you are more of a DIYer).

So, what am I doing with it? I wanted to put a music streamer in my kitchen. I already have two Squeezeboxes in other rooms, so for the kitchen I thought I would try something more interesting.

But along the way, I discovered that it is a lot more useful than that. A very useful (and very rare) feature it has is the ability to bitstream DSD audio (a.k.a. SACDs):

RPi outputting DSD to Buffalo DAC

Raspberry Pi B+ outputting DSD to my Buffalo DAC

So now I’m considering adding an RPi network music transport to my main system.