Soekris dam1021 update

Hi guys, long time no see.

Easter time here, so I have some time to spare, so here it goes.

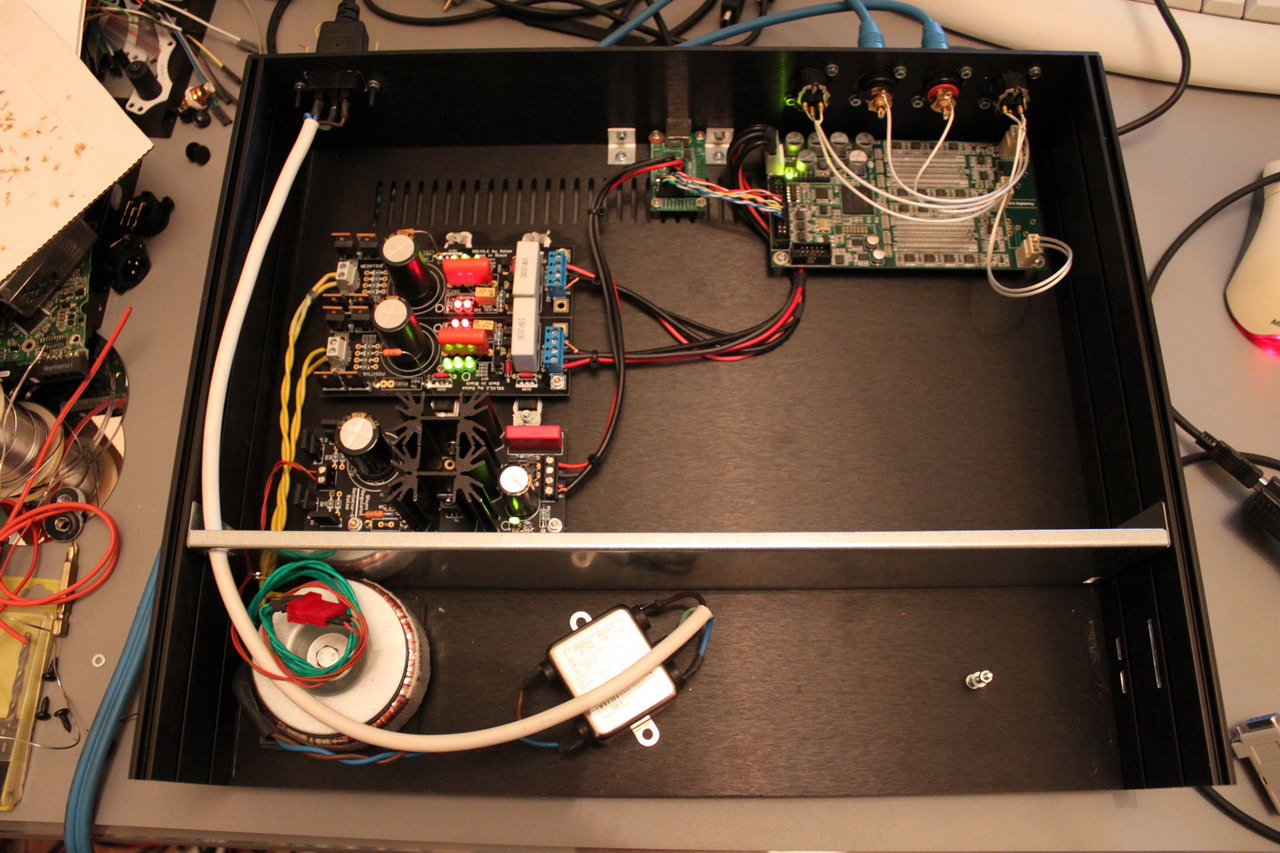
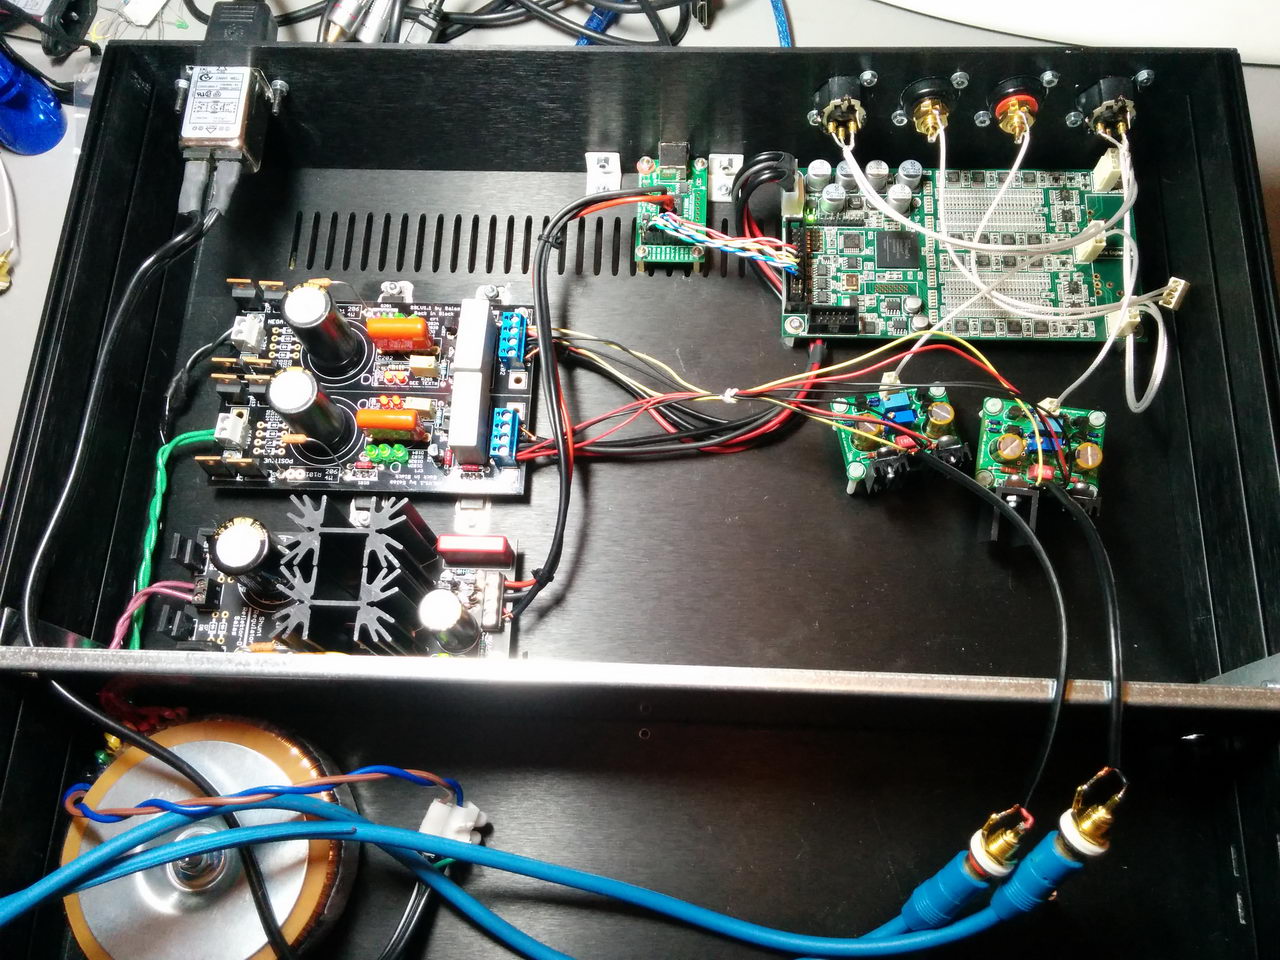
Update on my DAM build

My Soekris has had a number of upgrades performed to it over the last 2-3 years that I haven’t posted about and it’s about time that I did.

The first upgrade was a switch from Salas BiB 1.1 to an UltraBiB 1.3. I wrote about the upgrade on the official UltraBiB thread:

I was (and still am actually) one of the lucky few that got to beta test Salas’ new baby.

This thing is remarkable.
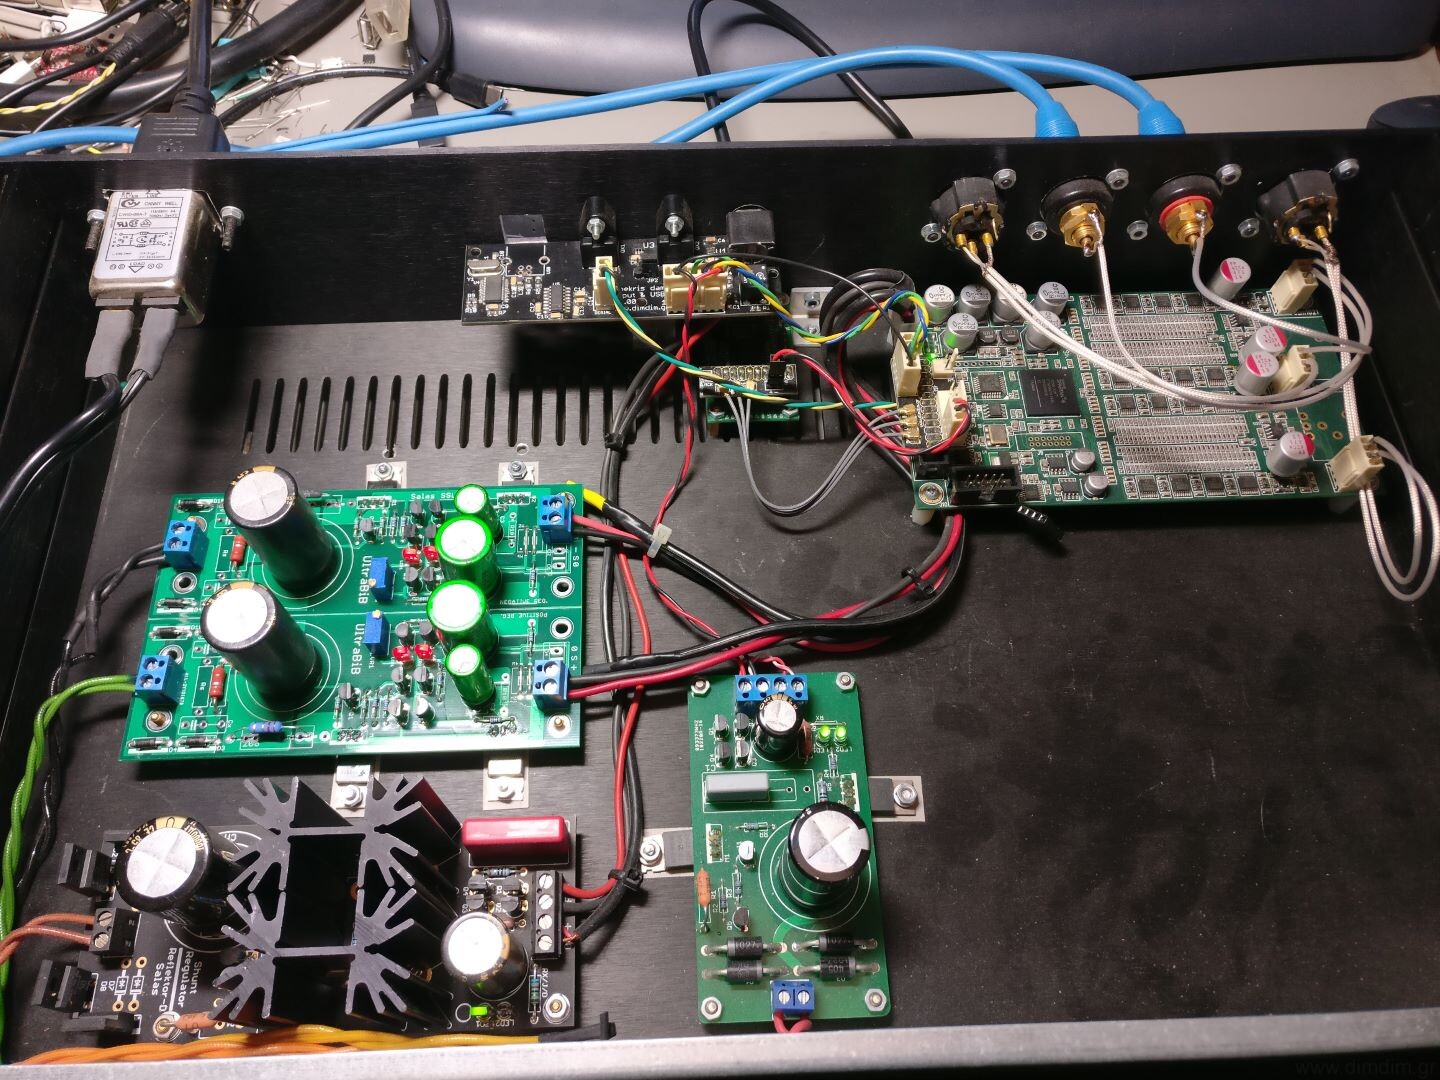
When we swapped it in place of the BiB 1.1 in my Soekris, the improvement was immediately obvious and not subtle. There was a general improvement in clarity and silence, but the biggest improvement (imho) is that the music appeared to have more energy in the lower mid area, where before it was kind of “dry”. This was with Salas’ very first prototype, built with standard (non-boutique) components. The board that I built with audio grade capacitors in the filter bank and MUSE BP caps in the output sounded even better.

I do need to experiment further with different brands of caps (especially in the C2 & C3 positions) but in any case this is an excellent power supply, substantially better than the BiB 1.1, both subjectively (the way it sounds..) as well as objectively (measured performance).

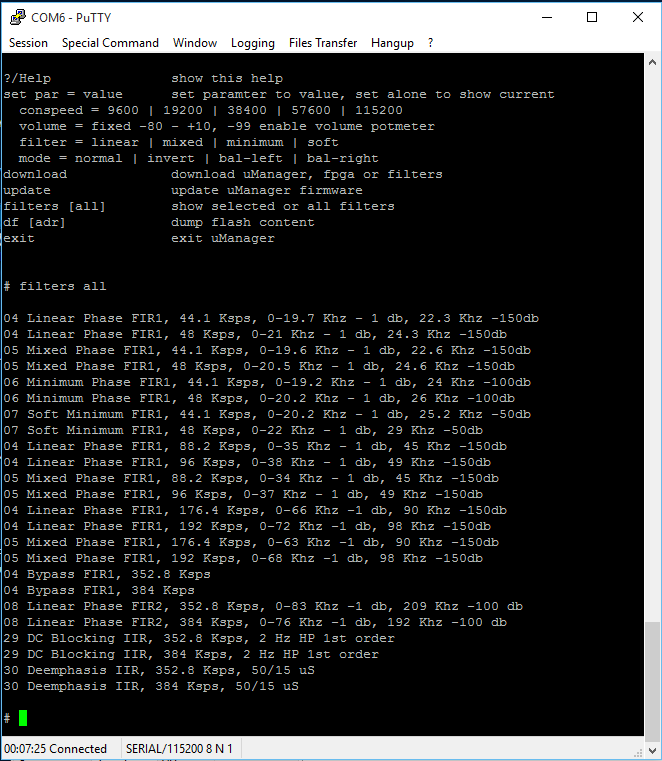
The next upgrade was when I upgraded my firmware to the newer firmware (rev.1.21) that doubles the number of supported filter taps from 2K to 4K. Even the basic / included filters provided a substantial improvement in imaging and detail. Definitely a worthwhile upgrade.

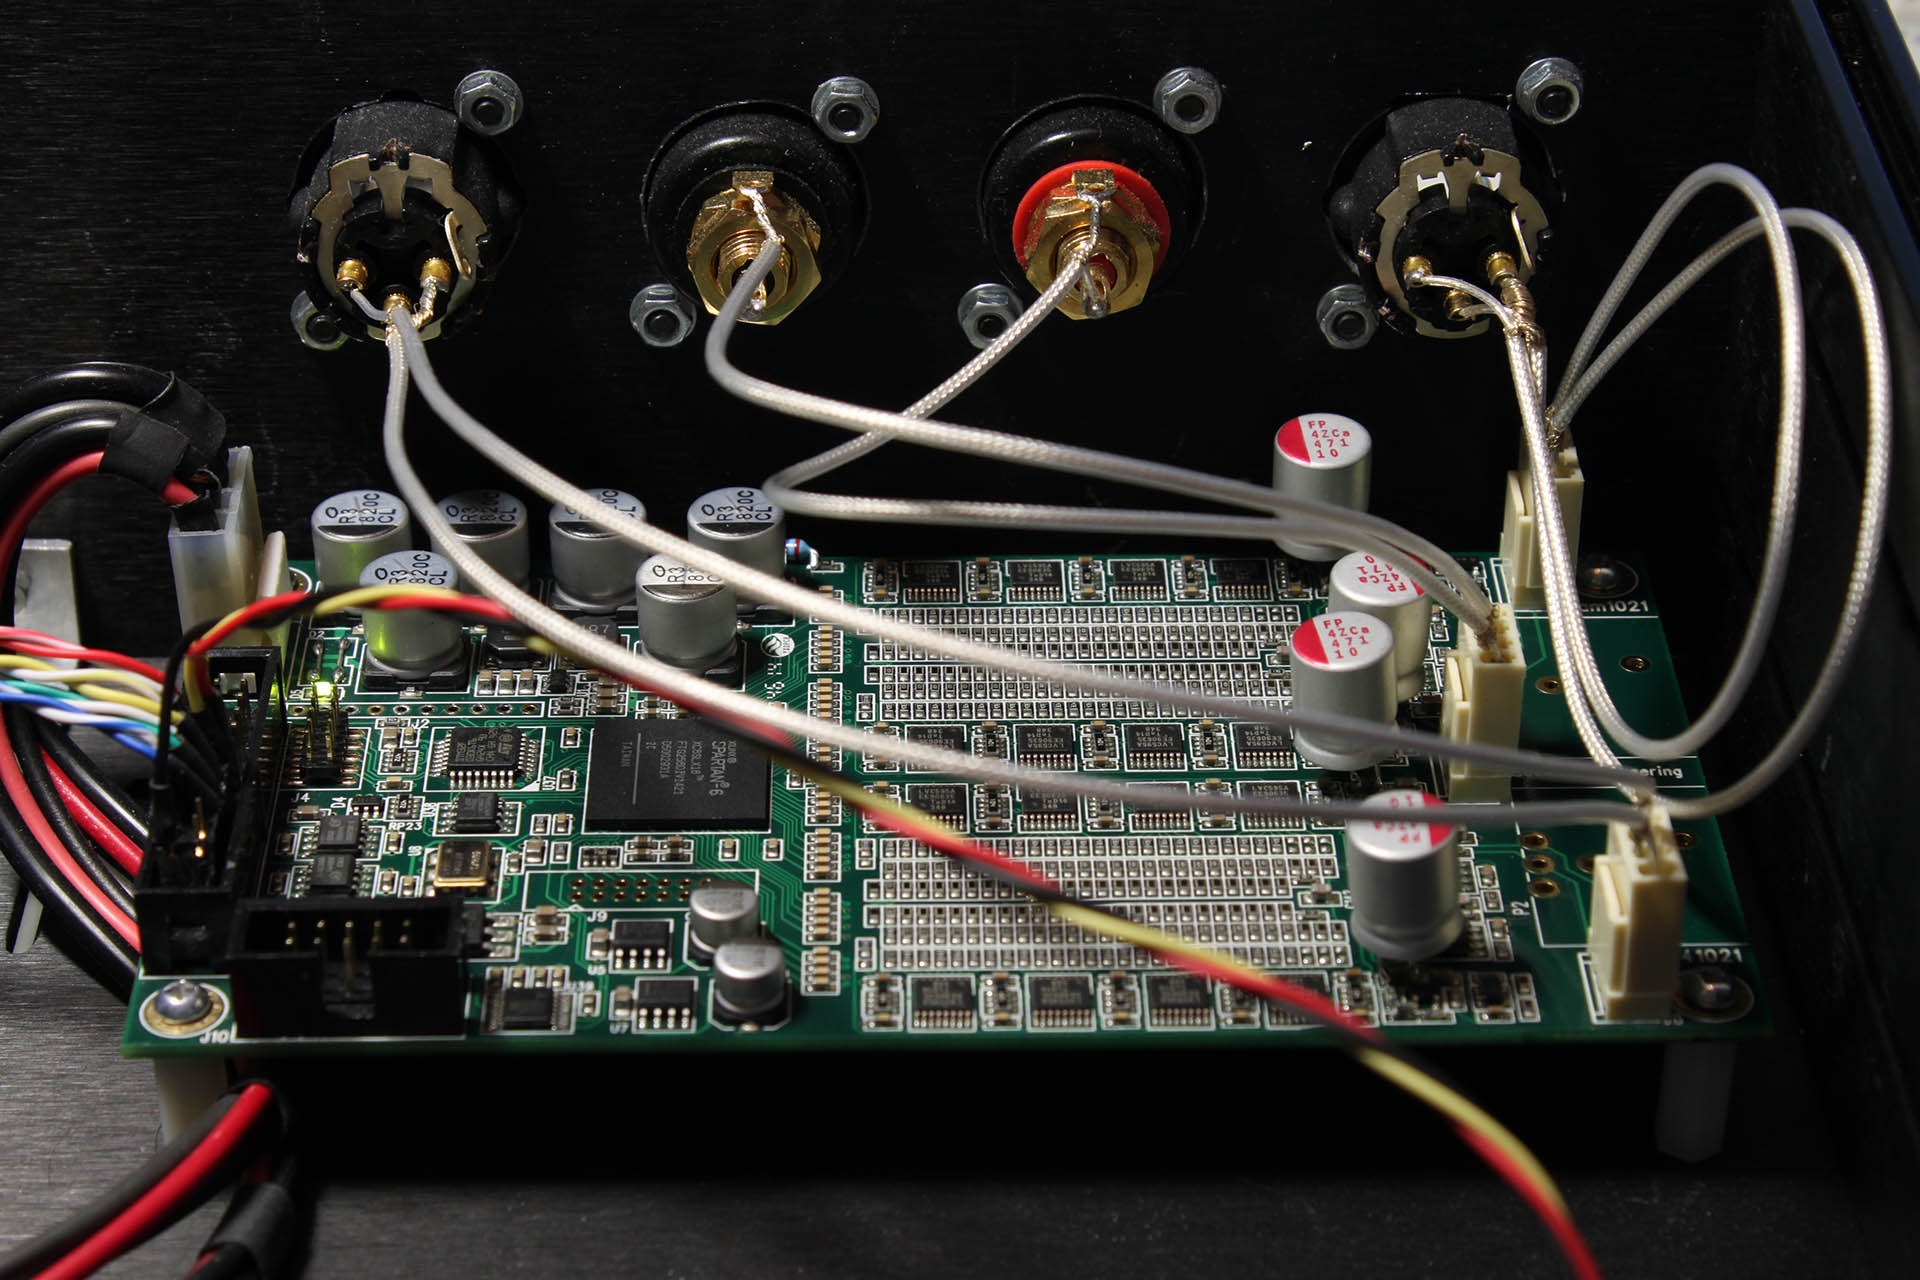
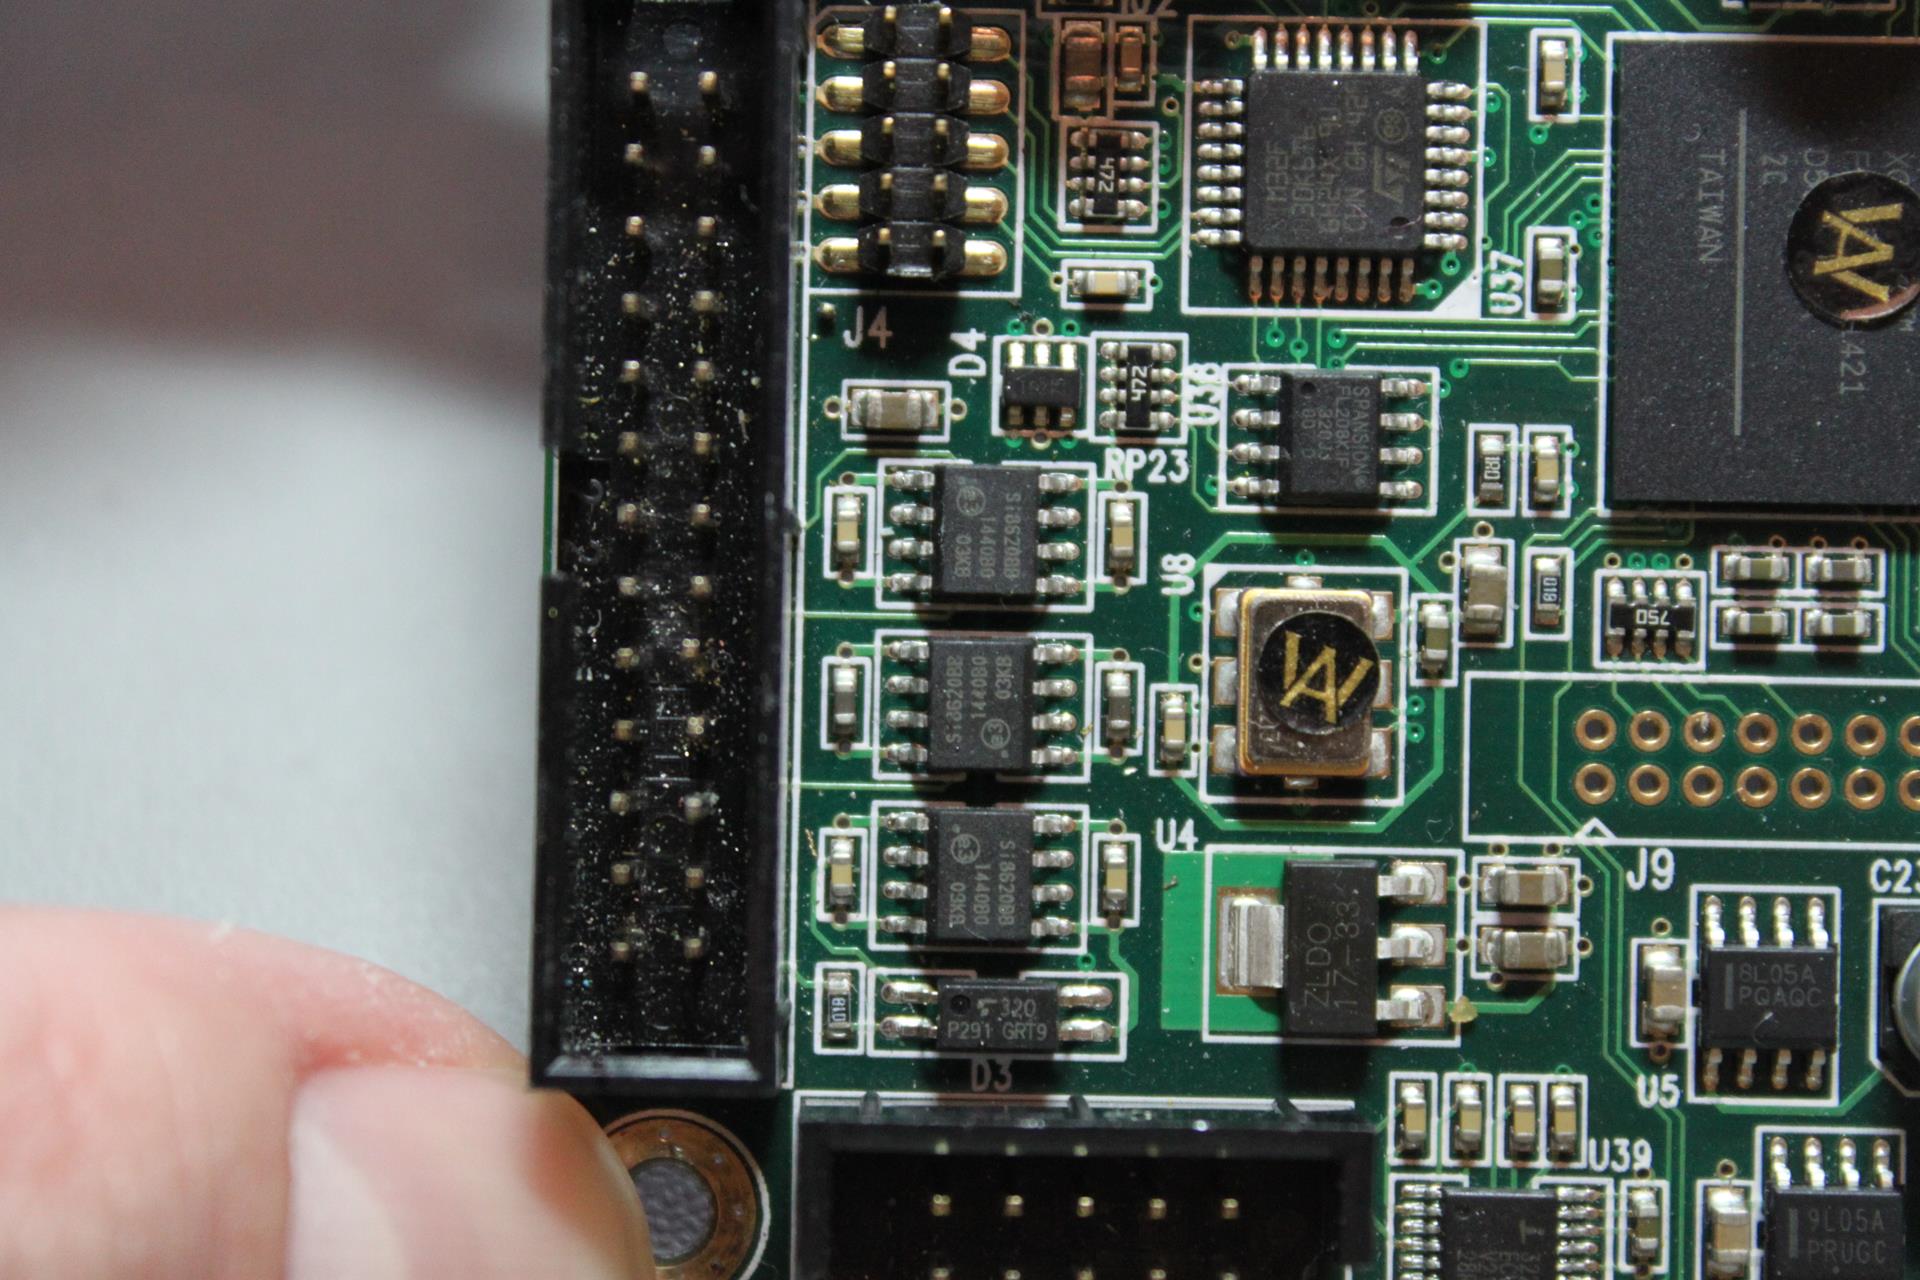
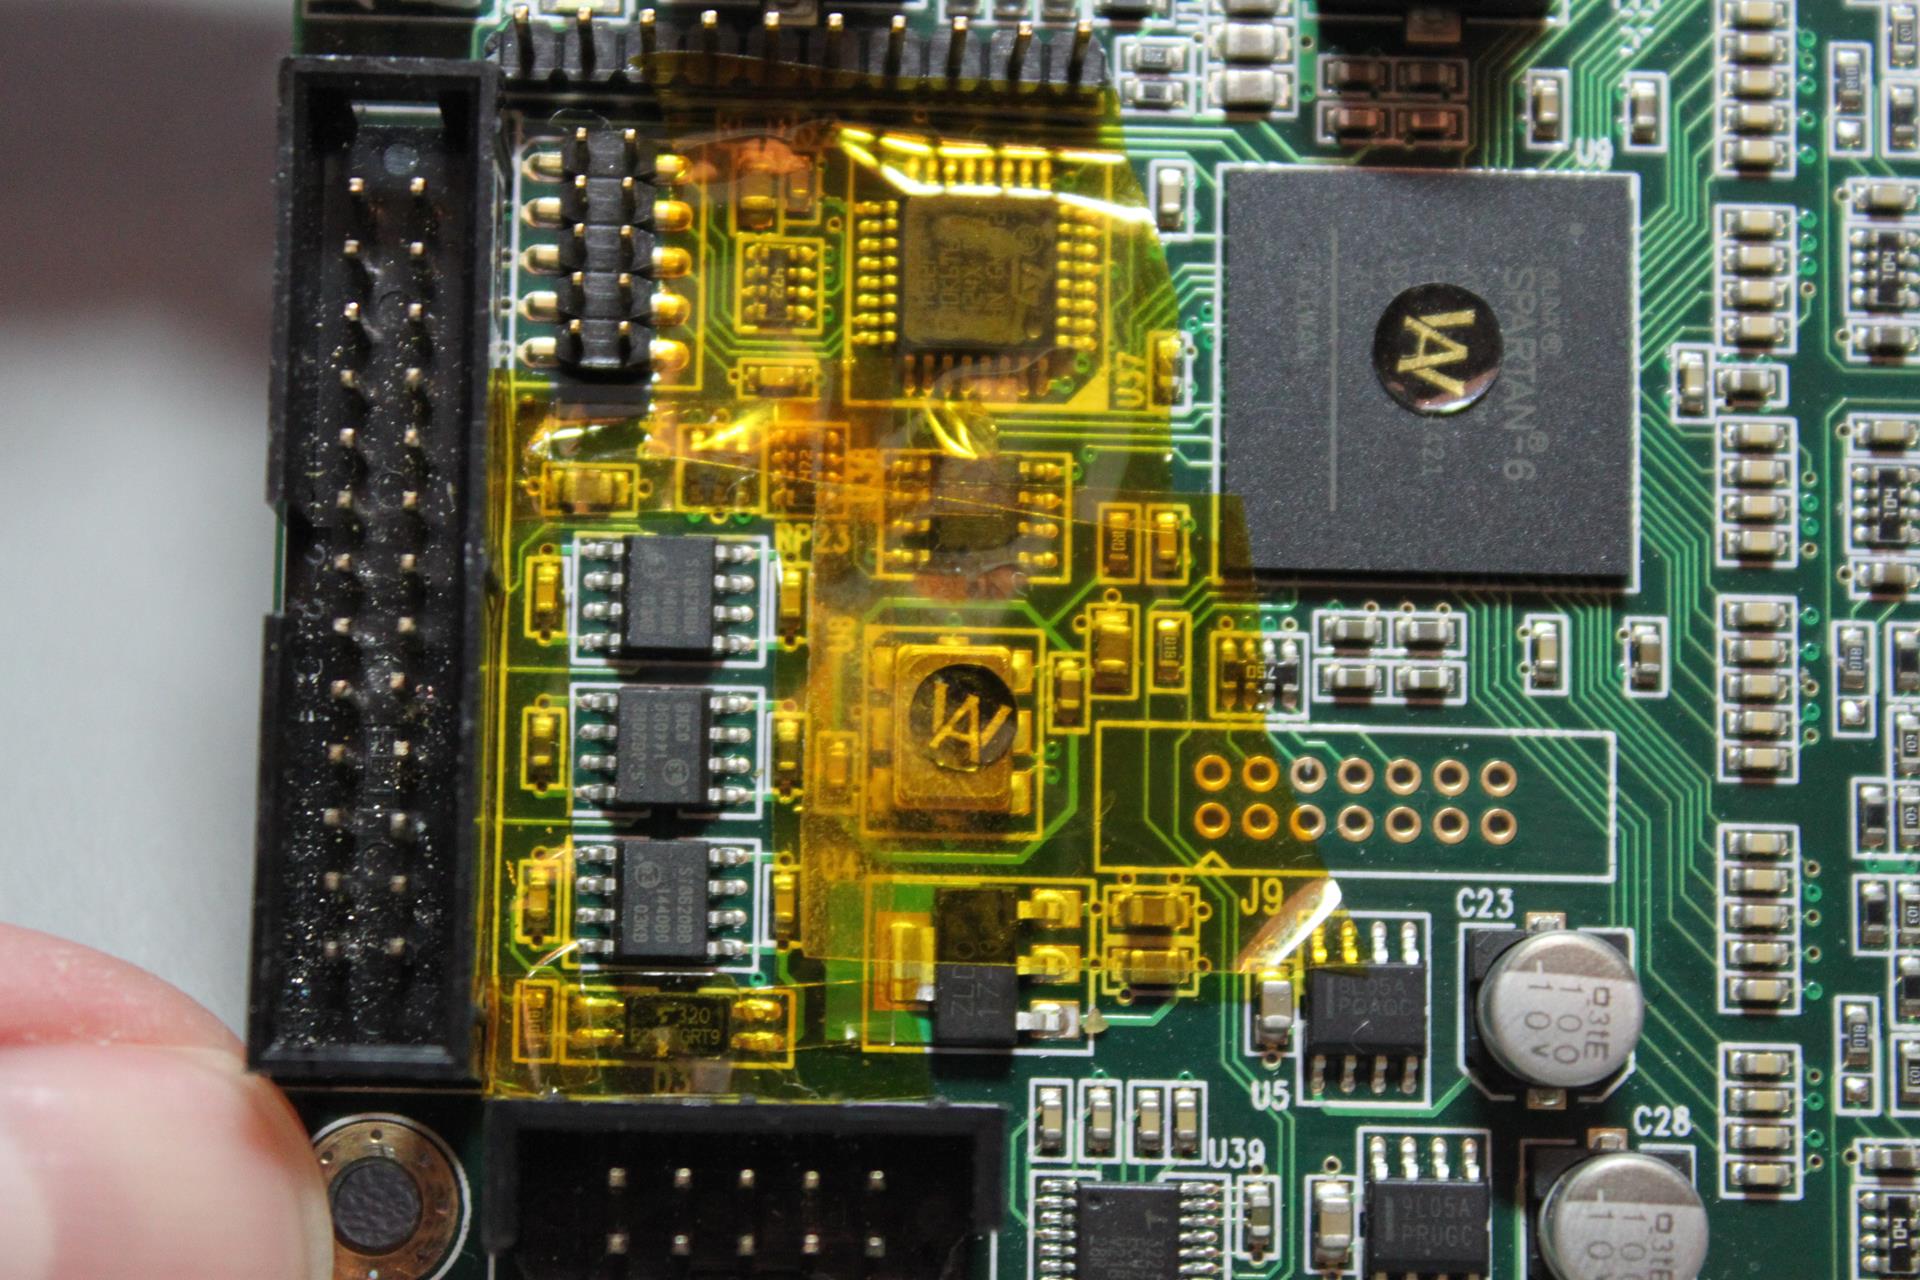
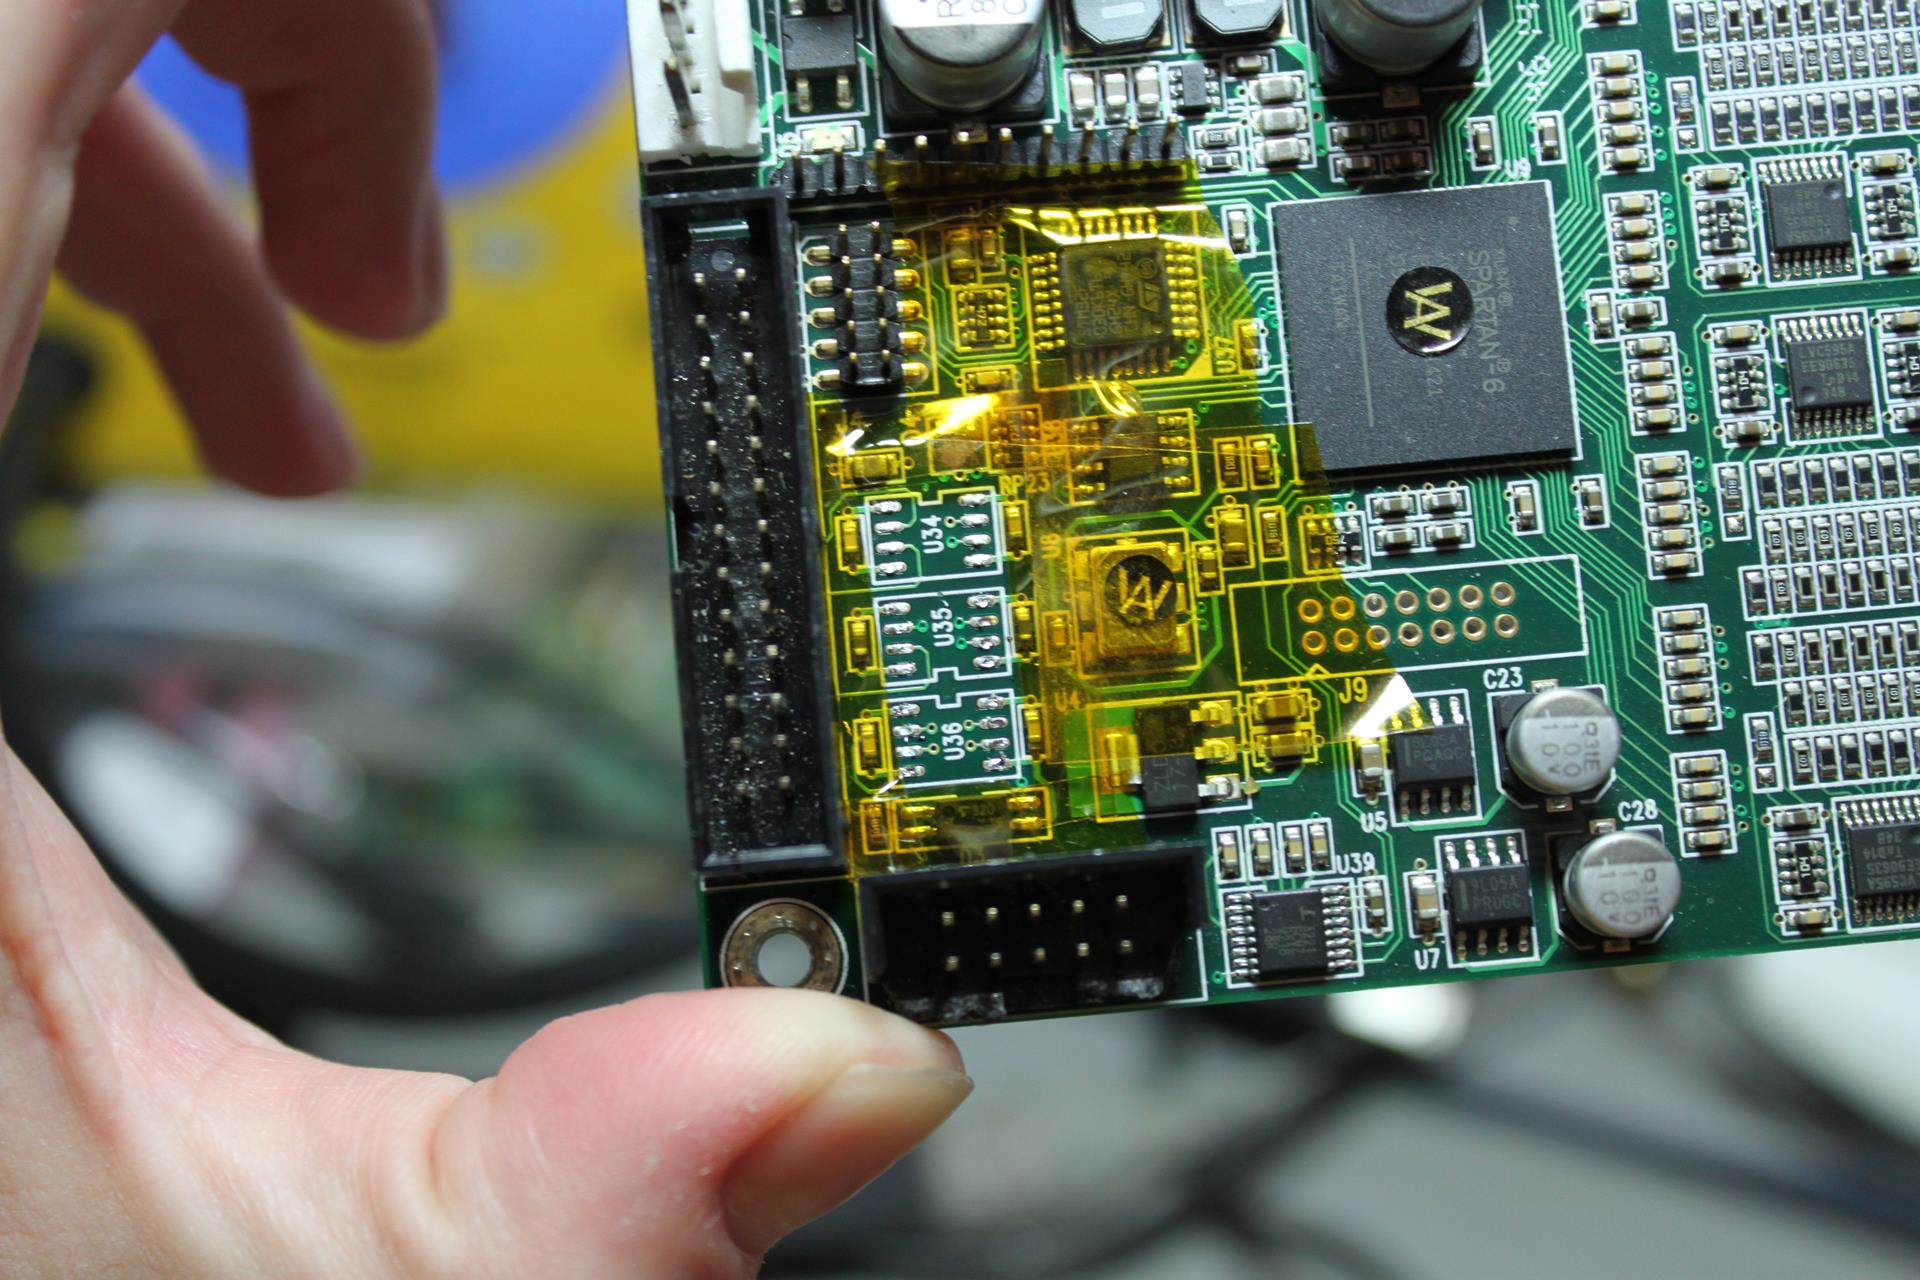
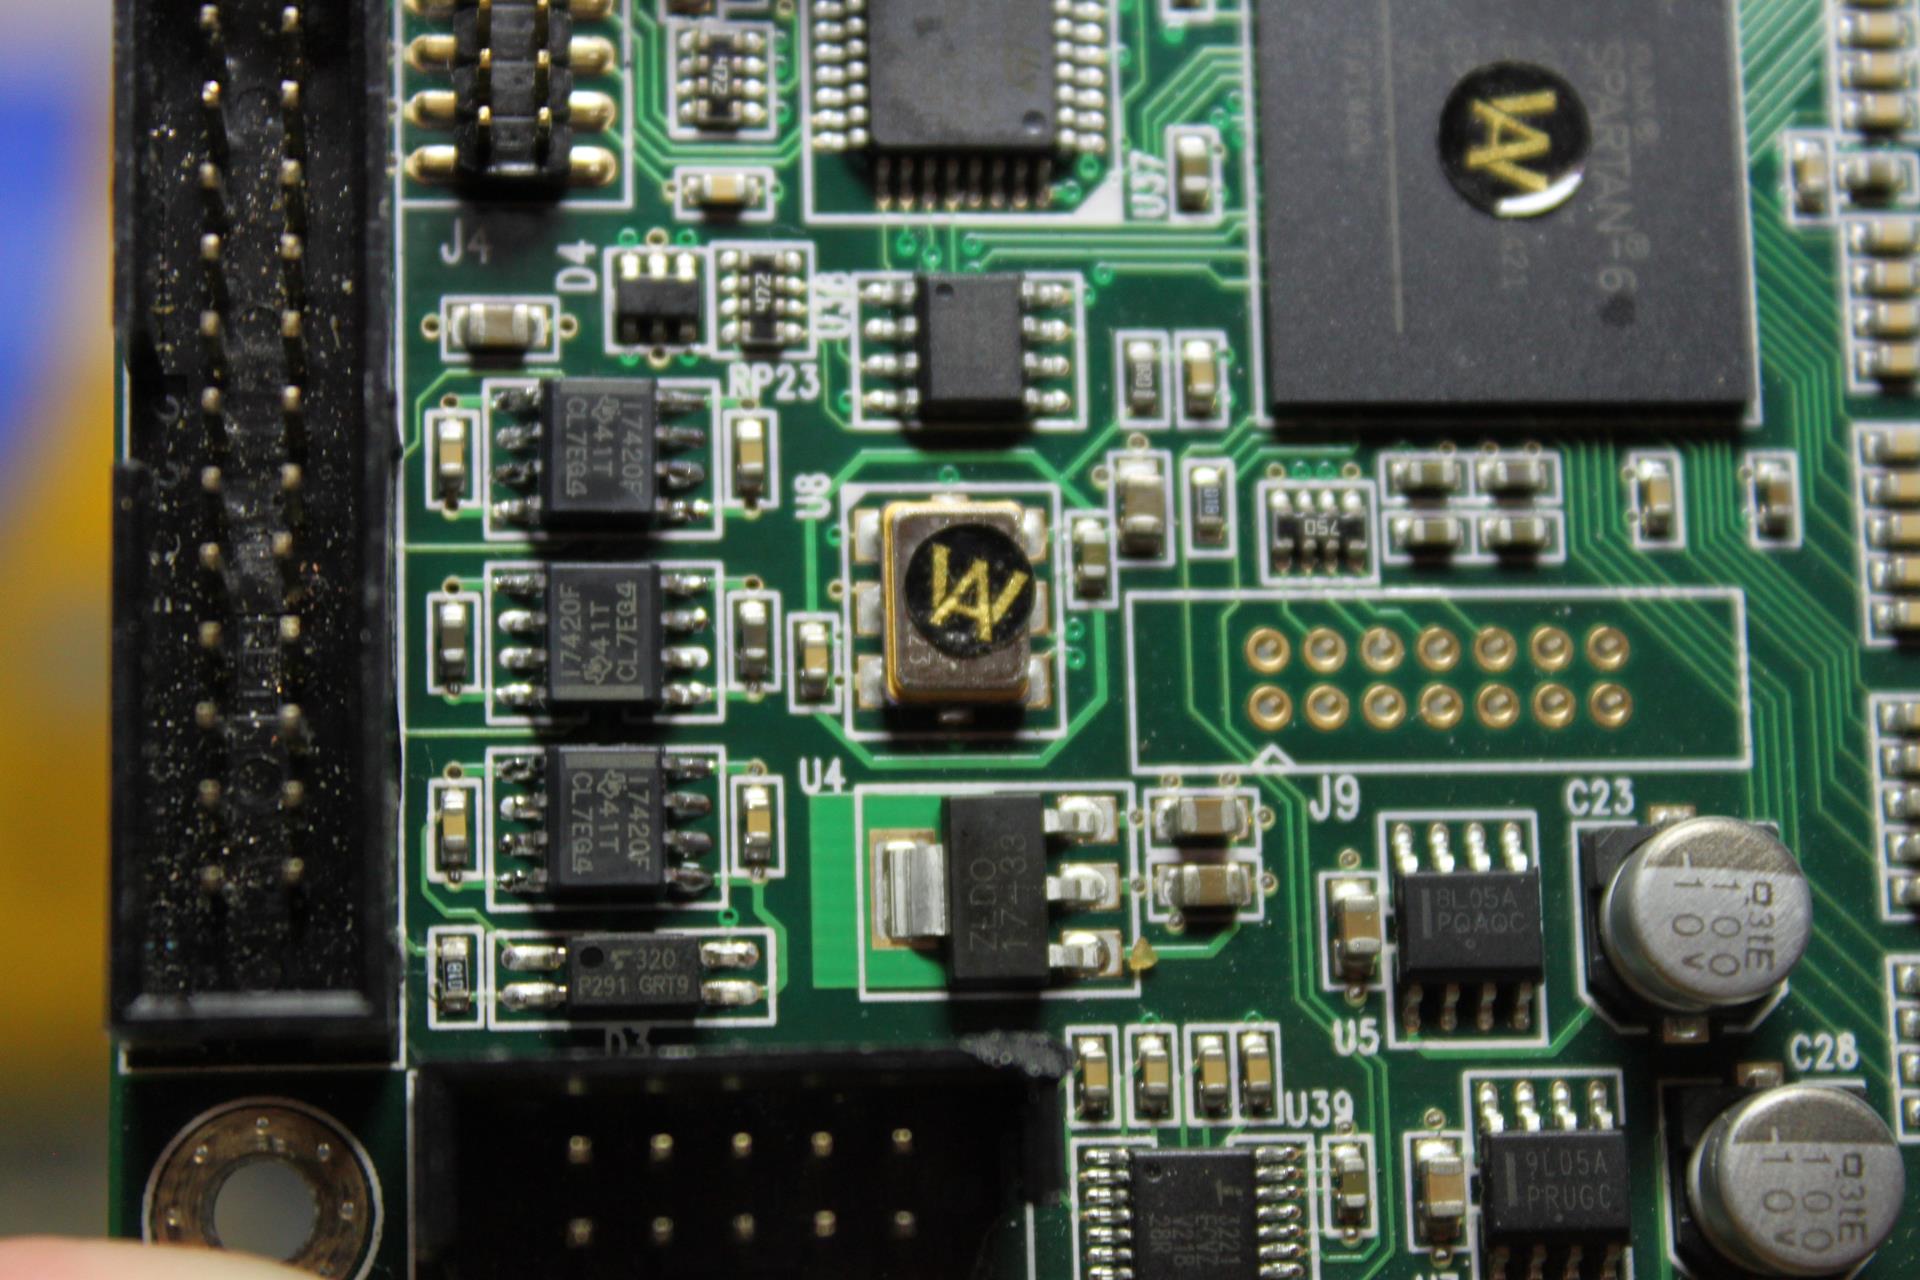
The final upgrade was the design and implementation of my own XMOS-based USB receiver, specifically for the DAM:

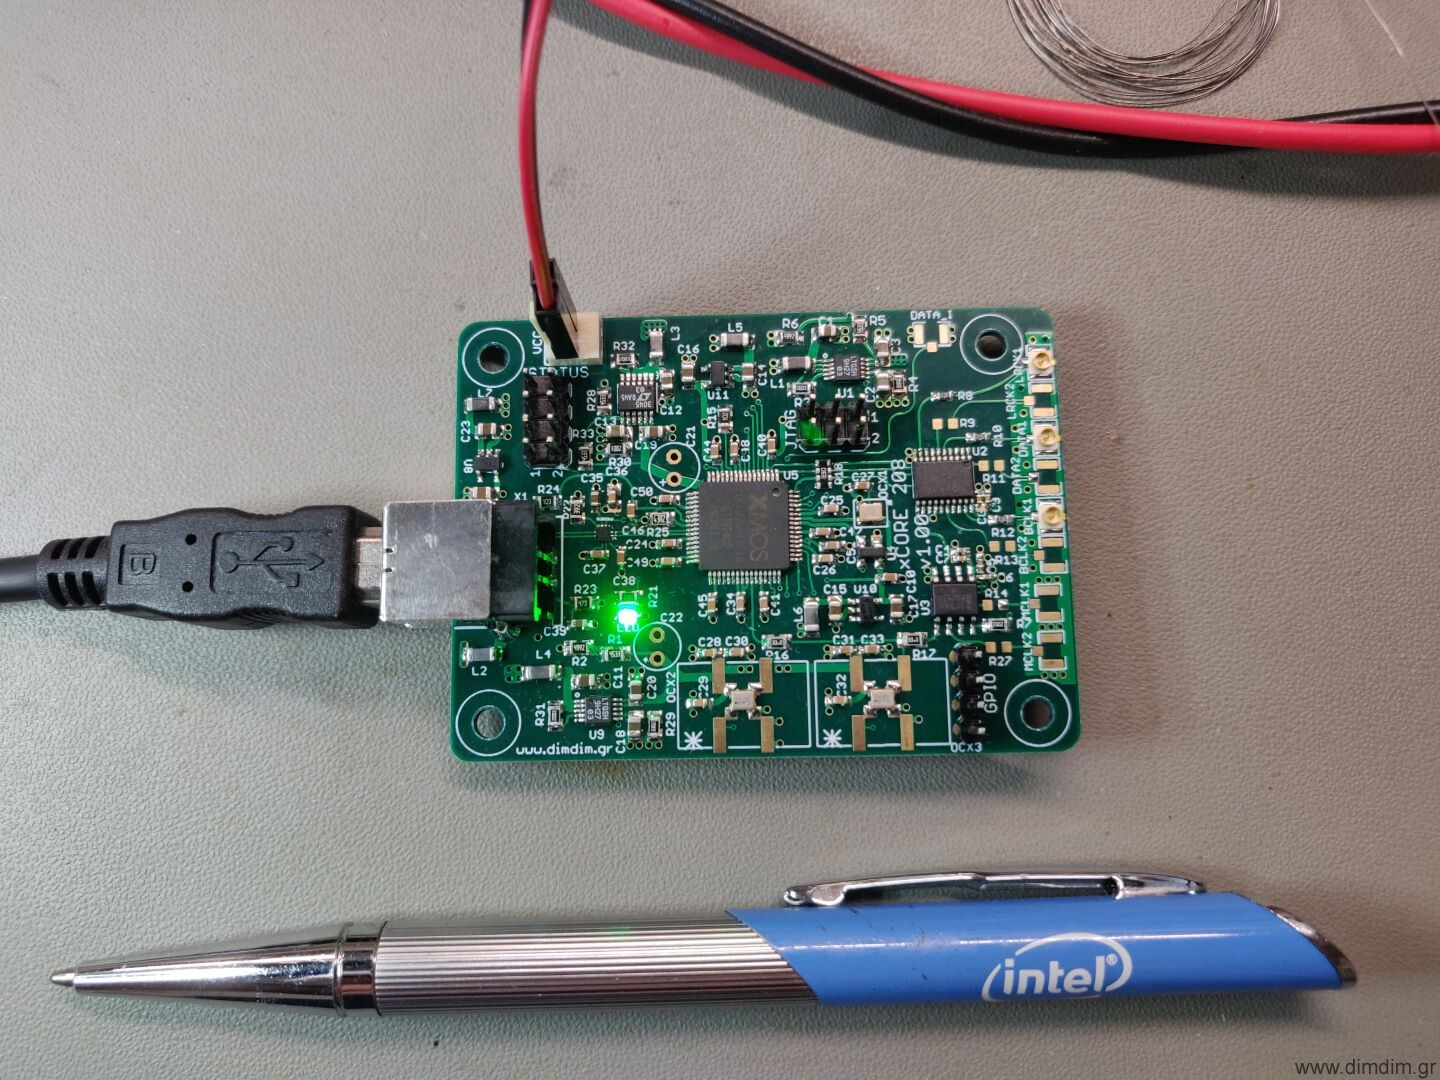
The idea was to include just the right mix of features that would make sense for the DAM1021. So, I did include ultra low noise LDOs (LT3045 & LT3042), SDA oscillators, reclocking with a Potato FF, but I skipped galvanic isolation since the DAM already supports it.

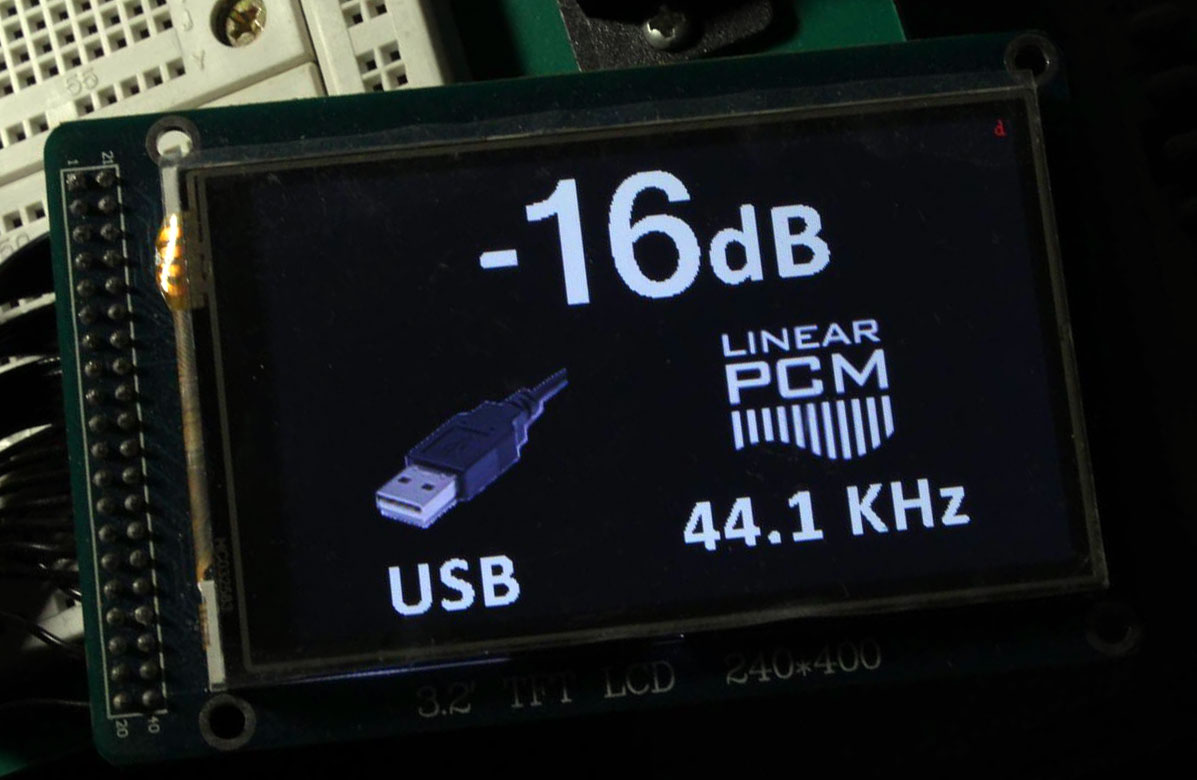
The improvement it made in sound quality was remarkable. It’s funny how all digital devices that are supposed to be immune to I2S signal quality turn out to be.. well.. influenced by I2S signal quality. The USB receiver that it replaced was the DIYINHK XMOS receiver that I have used in my DAM, which was pretty decent at the time of purchase. But the newer XMOS family (XUF208) coupled with the ultra low noise LDOs and the reclocking apparently did the trick.

The funny thing is that the prototype I built was actually tested in a good friend’s DAM and has been living there ever since. Someday I’ll build another one for my DAM. For the time being, I’m busy with my AKMs and ESS’.

Update on the DAM board offering.

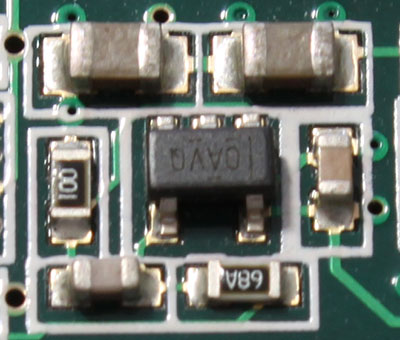
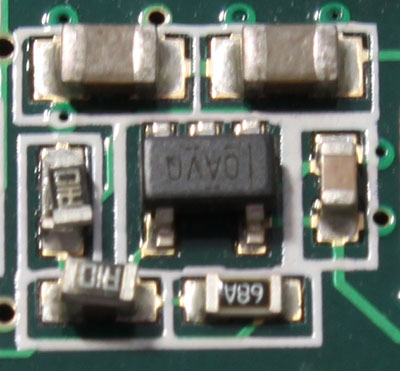
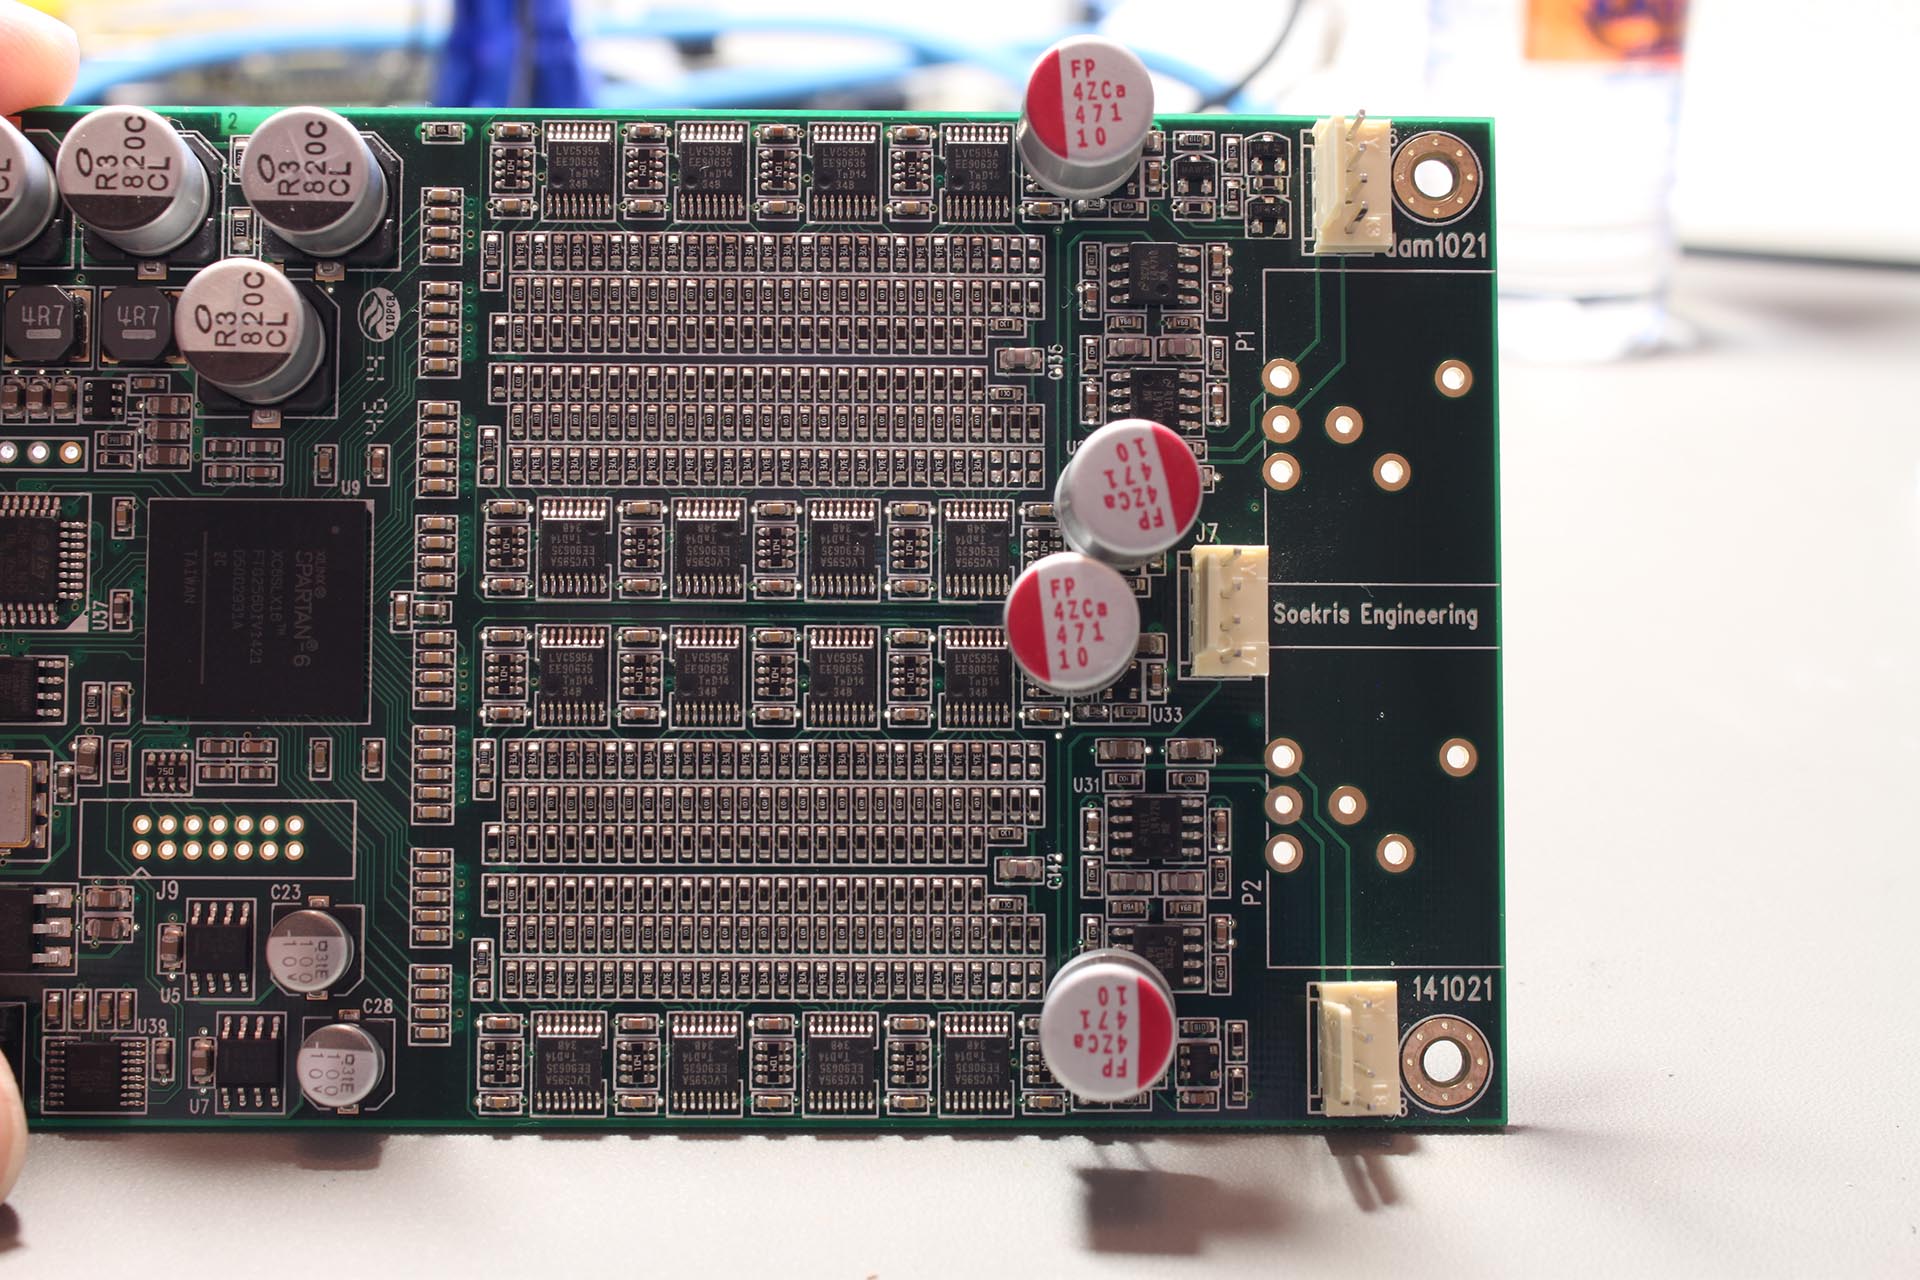
A few days ago Soren announced Rev. 7 of the DAM1021:

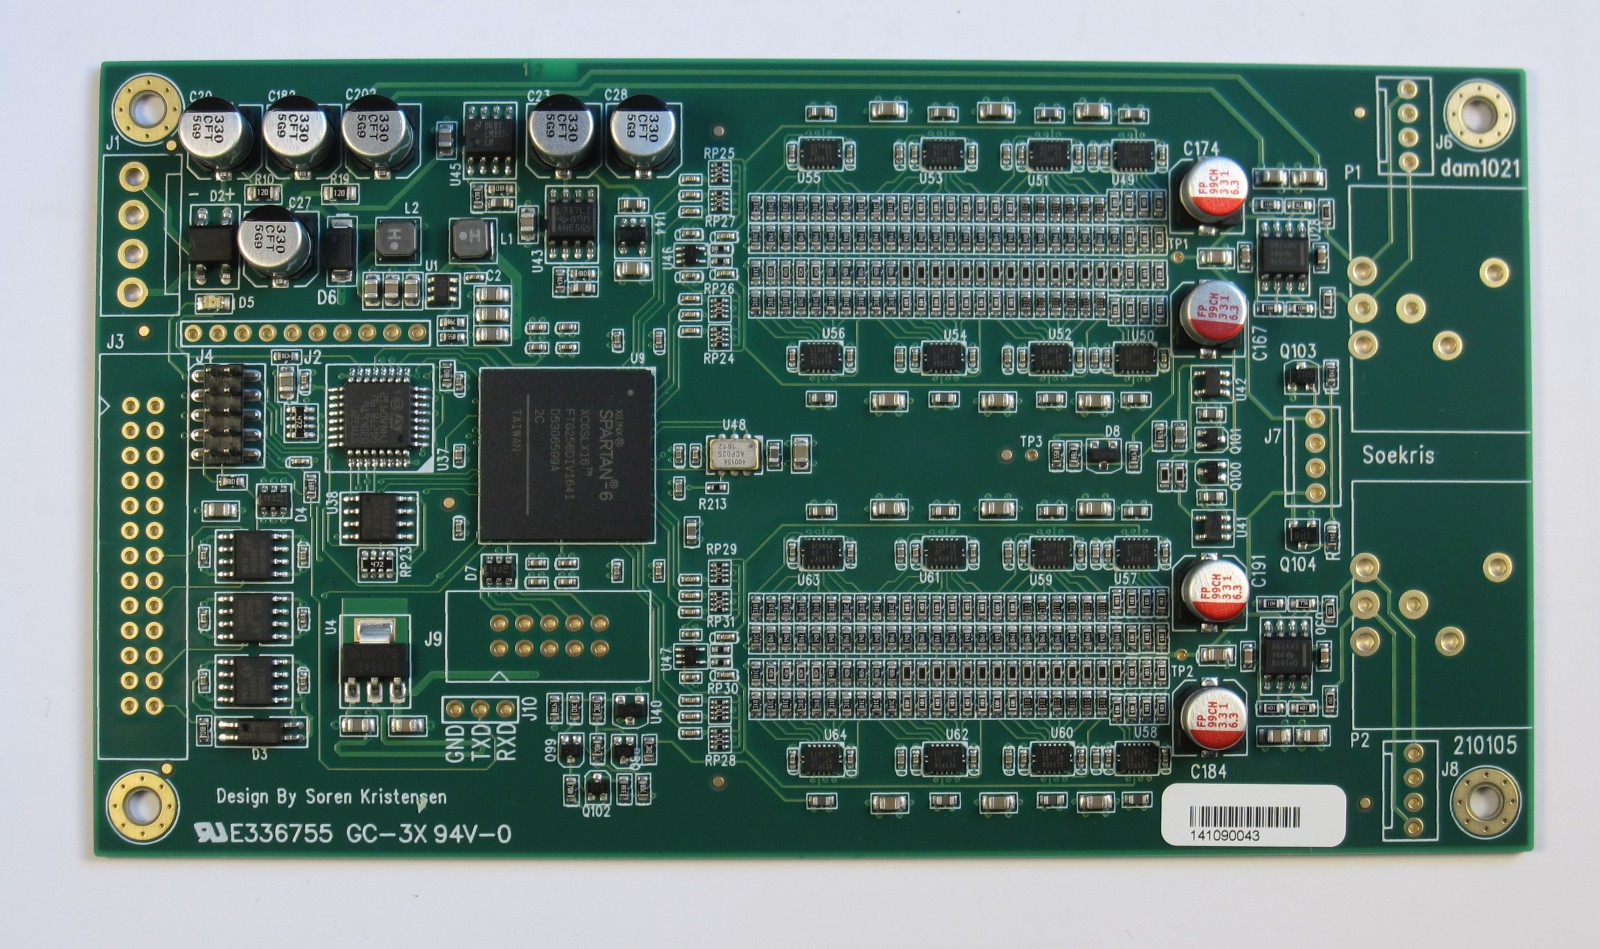
(picture courtesy of soekris.dk)

According to Soren, the new boards will include the following changes / improvements:

1) it use the same FPGA and same uC as usual, so should be able to use same firmware, there are some differences, so new firmware are needed and will autodetect board.

2) The shift registers are now also in the smaller qfn packaging as used on other boards, so I don’t need to stock the tssop types anymore….

3) Output shift registers now running at 1.4M/1.5M sample rate, making FIR2 filter different. Will require new filter file, but plan to use same filter file for both old and new boards, firmware will load filters as needed.

4) The R-2R network is now 24+3+1, ie 24 bit classic R-2R network, 3 bit thermometer network, plus the sign, total 28 bits.

5) Yes, still same Si514 clock, but now in a small package (like I use on other boards), and it drives the shift registers directly, no added jitter by going though the FPGA. People who want to bitch about the Si514, please go elsewhere, we have heard you multiple times….

6) The clock Power supply is separate and use a LP2907 low noise regulator.

7) New vref supplies, like used on the dac2541. For those who want details, yes it use a opamp with transistor buffer, with a polymer output capacitor. Lower vref impedance from DC to Megahertz.

8) Those are powered at +-5.4V from LM317/LM337 pre regulators.

9) Output opamps are opa1678.

10) Power in are now DC only, optimal is +- 9V.

11) The board is mechanical and almost electrical compatible with previous version of the dam1021.

12) J9 is 4 bits user i/o, planning to use it for additional SPDIF inputs.

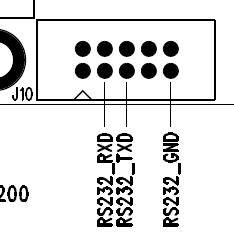
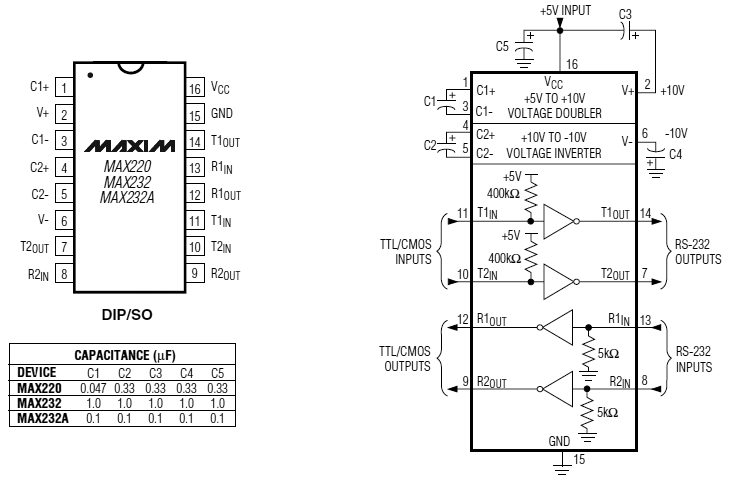
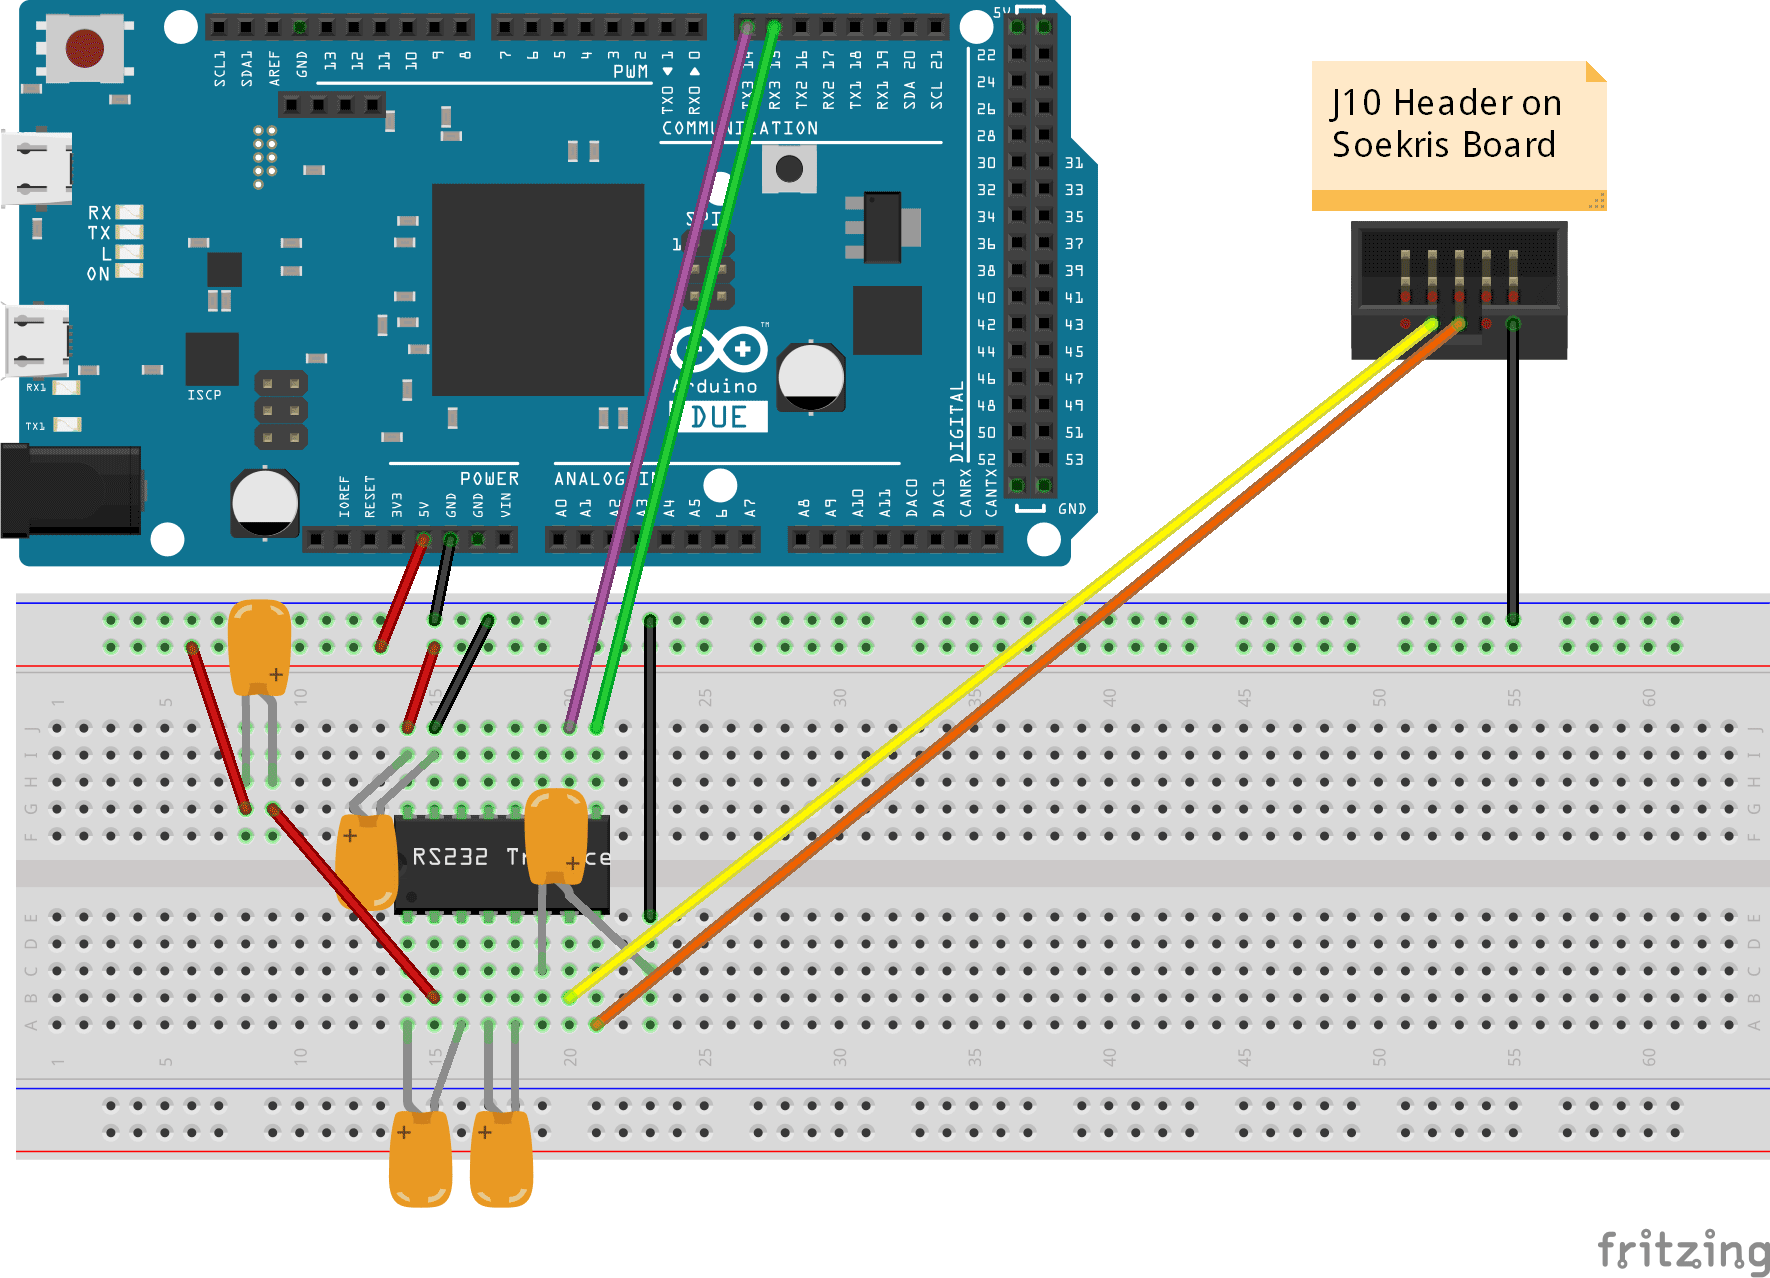
13) The non isolated serial management port is now TTL levels, not real RS232 levels. So get the right USB to serial adapter….

So quite a few changes, with the most significant being the Si514 having its own regulator (mentioned at a later post in the thread) and driving the shift registers directly. Plus new VREF supplies.. These improvements should be pretty audible.

It looks like the only flavor that will be available will be the dam1021-12.

We’ll see how it will go.

Soekris dam1021 Frequently Asked Questions & Resources

It’s been almost 3 and a half years since the introduction of the dam1021 to the DIY audio community.

In these 3 years there have been sold close to 2500 units (according to a serial no. that I noticed on a picture of a rev.5 unit) that have made a large number of audiophiles very happy.

The dam’s main thread at diyaudio.com is about 740 pages long, and while the first post has been edited to keep the specs and the firmware info up to date, there are still certain questions that keep popping up over and over again.

In this post I’ll try to address as many of them as I can.

F.A.Q.

Q: Where can I get firmware, manuals, etc?
A: http://www.soekris.dk/download.html

Q: What are its power requirements?
A: According to the manufacturer, power should be supplied by a transformer with two secondaries at 7 to 8 volts AC. The transformer should have a rating of at least 5VA. Alternatively, you may power it by a bipolar DC power supply outputting between +/-7.5 and +/-15 Volts. Power consumption is ~160mA for the positive rail and ~60mA for the negative.

Q: Does it support DSD?
A: Yes, DSD64, DSD128 and DSD256 (only native) has been supported since firmware rev. 1.06 (released May 2016) through the I2S input. DSD does get converted to PCM in order to be converted to audio by the R2R ladder (obviously.. we’re talking about an R-2R DAC).

Q: How do I control input selection?
A: Input selection is done either by connecting switches to J3 (see manual for more details) or by commands sent through the dam’s serial ports. There also exists an “auto input selection” feature.

Q: How do I control volume?
A: Either by connecting a pot to the relevant pins on J3 (see manual) or by commands sent through the serial ports.

Q: What if I want to add IR remote control?
A: You’ll have to use a microcontroller like an Arduino. I’ve done two such projects, ArDAM1021 and ArDAM1021 Lite.

Q: How do I upload new firmware?
A: Through the serial port(s). See: https://www.dimdim.gr/2015/02/soekris-r-2r-firmware-upgrade/

Q: What is the latency from digital input to analog output?
A: About 1mS. link

Q: How come the new firmware (rev. 1.19) does not play as loud as the older firmwares?
A: According to the manufacturer “The new 1.20 firmware and 4K filters have zero at -2 dB, the dam1021 then add 1 dB gain, resulting in zero at -1 dB with 1 dB margin, ie when volume level is set to 0 then it’s 1.26V rs output at resistor network, about 1.9V at buffered single ended and 3.8V buffered balanced.” link

Q: Is there a way to run truly “NOS”?
A: Yes: http://www.diyaudio.com/forums/digital-line-level/269776-filter-brewing-soekris-r2r-post5452884.html  ???  Beware that the specific filter is not compatible with the current DAM firmware (rev 1.19), since it now supports 4K taps (it used to support 2K taps).

Q: Can I use a pair of them as a 2-way digital crossover?
A: Yes, in theory you can, but it’s not fully supported by the manufacturer. Read below to understand why that is so.

Q: Can I sync several DAMs, for example to implement a digital crossover?
A: According to the manufacturer “multiple dam1021 running on same clock will sync to within a few uS” link

Q: How do I actually implement the HP and LP filters?
A: You need to design your own custom filter files and load them. “the dam1021/dam1121 have the hardware with support for up to 15 IIR biquad filters per board” link Not for the faint of heart.

Q: I have “ Rev x”, do I need to do power mods?
A: If you have a Rev. 1 board you do need to perform the mods. Later revisions are OK. Rev. 5 has 20 x 100uF Samsung caps so definitely no need for power mods. link

Q: What can I do to make the DAM sound better?
A: a) Don’t use the buffered outputs. Their SQ is inferior to the unbuffered outputs.
b) Use a proper power supply. The better the PS, the better the sound. In my experience, the best one so far is the Salas UltraBiB.
c) Use a custom filter pack. Beware that custom filter packs may not support DSD or take advantage of the increased available number of taps made possible by the latest (rev 1.19) firmware.
d) Be sure to insulate the screw mounting holes from the (grounded) chassis by using non-conductive screws or some other method.

Q: I’m feeding my dam1021 audio from my RPi’s I2S output. Why does some music play fine while some does not?
A: Most audio RPi distributions output whatever they find in the music file without altering it, like for example a 44.1K/16bit FLAC file will produce a 16bit I2S signal. But the dam1021 only supports 32bit I2S signals. The solution is to force the RPi to only output 32bit I2S. Different audio distributions have different ways of accomplishing that.

Q: What does the dam1021’s output buffer schematic look like?
A: The circuit has changed since the first revision. The current (rev.4&5) circuit looks like this: http://www.diyaudio.com/forums/vendor-s-bazaar/259488-reference-dac-module-discrete-2r-sign-magnitude-24-bit-384-khz-post5347636.html


Resources

Official thread on diyaudio.com: http://www.diyaudio.com/forums/vendor-s-bazaar/259488-reference-dac-module-discrete-2r-sign-magnitude-24-bit-384-khz.html
Filter brewing thread: http://www.diyaudio.com/forums/digital-line-level/269776-filter-brewing-soekris-r2r-147.html
Soekris’ DAC implementations : http://www.diyaudio.com/forums/digital-line-level/267948-soekris-dac-implementations.html
Wiki: http://www.diyaudio.com/wiki/Soekris_R2R_DAC?
HiFiDuino : https://hifiduino.wordpress.com/
Randytsuch : http://randytsuch-audio.blogspot.com/2015/11/soekris-r2r-dam-dac.html
moredamfilters.info: https://web.archive.org/web/20161025204639/http://www.moredamfilters.info/

..and of course my posts about the dam1021:

Main Soekris DAC page: https://www.dimdim.gr/diyaudio/soekris-dam1021-sign-magnitude-r-2r-dac/
dam2012 s/pdif inputs board page: https://www.dimdim.gr/diyaudio/soekris-dam1021-spdif-usb-board/
ArDAM1021 page: https://www.dimdim.gr/arduino/ardam1021-project/
ArDAM1021 Lite page: https://www.dimdim.gr/arduino/ardam1021-lite-project/
dam1021 Vref mod : https://www.dimdim.gr/2015/09/soekris-dam1021-vref-mod/
dam1021 firmware update info : https://www.dimdim.gr/2015/02/soekris-r-2r-firmware-upgrade/

Let me know if I missed anything (I’m sure I did..).

I’ll try to keep this FAQ updated.

Soekris DAM1021 s/pdif Inputs Board

I made a little s/pdif input board for my Soekris:

2015-12-05 16.41.34 (Large)

It has a coax input, two Toslink, and it includes a USB-to-serial adapter so as to facilitate easy update of the DAM’s firmware.

It also has an on-board low noise LDO for the Toslink modules and their switch, plus one more LDO for supplying the 1.2V necessary for the coax port.

More info to follow..

Soekris dam1021 Vref mod

It took me a while to get to it, but I finally managed to perform the Vref mod on my Soekris.

I opted for a variation on the “factory mod” with larger organic polymer capacitors.

But before I get to the actual modding, I’d like you to take a minute to appreciate just how small a 0603 part really is. This is a 0603 resistor compared to a regular 1/4W resisitor. It is that small.

0603_comp_to_0.25W

I would not recommend to anyone to attempt this mod without some form of magnification. I used a run-of-the-mill magnifying glass with good results, but it would have been nicer (on my eyes) if I had a proper microscope.

Also, it is crucial to have a soldering iron with a very fine tip, and by very fine I mean needle point. I use an Antex CS18 with a 0.12mm tip.

So, let’s get started. This is one of the “stock” Vref regulators:

Vref_bef

We plan on soldering these 0.1R resistors on top of the existing parts:

Vref_to_be

You should start by putting a little soldering paste on the existing solder joints. Do not skip this step – it will make your job a lot easier.

Then add some solder on one of the two joints of the existing part so as to tin it. Then place the new part on top of the existing part and heat the tinned joint while holding the new part in place with some forceps. I usually just press lightly on top of it to keep it in place. Use needle-point forceps.

Upon heating, the solder should melt and stick to the new part as well. Then go to the other side of the part and solder it.

Once the new part is secured in place I usually go back to the first joint and add some more solder, just to be sure.

Repeat this for all 8 resistors.

Then it was time to soldered on the capacitors. I had decided to go with the Nichicon NS 470μF / 10V parts. They sport 10mΩ ESR which is perfectly adequate.

I bent one of their leads so that it came closer to the other one, so close that the distance between them was exactly the length of the X5R capacitor they were meant to be soldered on. I then cut them to the proper length (a.k.a. as short as possible). I proceeded to tin both of their leads and then soldered them on top of the existing capacitors. It was a lot easier than soldering the 0603 resistors.

When I was done the Vref regulators looked like this:

Vref_done

And the entire board now had the well-known “modded” look:

Vref_done_full_board

Since I had the board out and the soldering iron hot, I figured I would also do the “power thump” mod, by soldering a 27.1K resistor to the points designated by Soren:

thump_mod

The entire procedure took me a little over an hour.

Vref_mod_mounted

Now I have to have a listen to see what’s changed..

Soekris dam1021 ArDAM Project update

Three weeks back I released the first public alpha of the ArDAM code, stating that it was very very alpha. I was meaning every word of that sentence.

Since then, Soren has released the new firmware for the DAM and I have resumed work on the project. Today I am happy to release the first usable version of the code (v0.74):  ArDAM1021 Code (54682 downloads )

ArDAM1021-v0.74-2

Changes include but are not limited to:

  • Tons of bugfixes (volume control, source selection, etc etc).
  • Filter selection either by remote or via rotary encoder (in the settings).
  • Option of displaying white text & graphics on black background as well as the “original” look.
  • New encoder code (it requires a new library).

The download now also includes all the necessary fonts. Let me know what you think.

The project’s page will be edited later today.

Soekris dam1021: First major firmware update

A few hours ago Soren released the much-anticipated new firmware for the dam1021: http://www.diyaudio.com/forums/vendors-bazaar/259488-reference-dac-module-discrete-r-2r-sign-magnitude-24-bit-384-khz-328.html#post4421518

According to Soren, these are the changes to the firmware:

* PLL Clock Sync at sample rate change cut down to less than 0.2 second
* Isolated Serial port now works, note that port is at 3.3V cmos level
* Serial Port now interrupt driven, no character loss at high speed
* Volume Control now is -80db to +10 db, and phase bug fixed
* Volume Control also now have zero crossing detect
* Power Off plop can be reduced to 1/3 by adding a single 27K4 resistors, see picture attachment
* FIR1 filters doubled in size, so max 2032 coeff @ 44K/48K, 1016 @ 88/96K, 508 @ 176/192K, 127 @ 352/384K
* You can now select four sets of filters, named Linear, Mixed, Minimum and Soft.
* FIR1 coefficients are now 1.31 format, filters should be good down to around -150 db
* Stock filter now have improved deemphasis filter
* Input Source Select bug fixed
* New mode setting: Normal, Inverted, Balanced Left, Balanced Right
* The tiny bug on signal saturation on -full scale fixed
* Should now be possible to do balanced and crossovers by parallel the inputs and connecting the isolated serial ports together, more details to follow

I had some difficulty uploading the new firmware but that was due to Windows 10 and ExtraPuTTY not playing along very well. I got an “Error File not found!” message when I was trying to upload the file. When I went to a Windows 8.1 machine everything went as expected. One thing – do not forget to give the “update” command once you have uploaded the code followed by a “y” and return. When the procedure is complete and upon power cycling the board (and entering the “+++” command) you should get something like this:

soekris after upgrade crop

Both the uManager and FPGA revisions should be 0.99.

The uManager has a few new options:

soekris after upgrade 2 crop

Plus these are the new built-in filters:

soekris after upgrade filters all crop

First impressions are very good. The dam now locks much faster to incoming signals, so fast that it’s near instantaneous:

Plus we have very good news on the serial control department. Not only has the isolated serial port been enabled (to be tested asap..) but the RS232 port seems to no longer have problems with my Arduino controller. It probably had something to do with the “Serial Port now interrupt driven, no character loss at high speed” fix. So development of the ArDAM1021 code becomes high priority. 🙂

Zero crossing detection seems to be working fine too – no more glitches during volume adjustments.

All in all I would say this is a pretty good upgrade. Kudos to Soren.

Now looking forward to DSD support on the next upgrade.

Soekris dam1021 Arduino Control Code

A few days ago Soren announced that the release of the new firmware for the dam1021 was close.

In light of that announcement I have decided to release the Arduino code that I had written a few months back, even though it is not quite finished.

2015-07-31 18.15.44_res

I am doing this to help fellow Arduino & dam1021 enthusiasts in their quest of remote-controlled color TFT bliss.

So, for now, no real documentation – this is no polished piece of software, but it works (for the most part).

Since it is based on the TFT HiFiDuino code, you can get started by reading its documentation. It should not be hard to get started with this. The code itself also contains useful comments.

I should remind you that the dam1021 at the moment only “talks” real RS-232, meaning that a circuit that converts the TTL level serial port of the Arduino to a real RS-232 port is necessary.
However, we were promised that with the firmware upgrade the second, isolated TTL serial port would be enabled, so here’s hoping..

Also, I have come across a strange problem with the serial communication with the dac. In the beginning all is well but after a while the dam no longer responds to the commands that are sent by the Arduino. However, it (the dam) is still sending data back to the Arduino – when the sampling rate changes, the new SR is displayed properly on the TFT.

I have verified that the Arduino is indeed sending the commands to the dam:

DS1Z_QuickPrint21

DS1Z_QuickPrint22

I hope the problem gets sorted out in the new firmware release.

Anyway, here is the code: ArDAM1021 Code (54682 downloads )  The project also has its own page: https://www.dimdim.gr/arduino/ardam1021-project/

Let me know what you think. I promise to put more work into it in the next few weeks..

Soekris R-2R: Damaged isolator fix

A friend of mine had a little accident with his DAM1021 which resulted in him frying the on-board isolators.

We are talking about these three ICs, with part number “SI8620BB-B-ISR”.

IMG_9719

It turns out that the specific ICs are at their End Of Sale, so both Mouser and RS did not have them in stock. Luckily, it turns out that the TI ISO7420FEDR is a good alternative. Unfortunately, it is also about 2.5 times the price of the Si part, but what can you do.. The order was placed, in time the ICs were delivered, and it was time to do the work.

This is what my workbench looked like:

IMG_9717

You see the DAM board, a collection of different width Capton tapes, the ISO7420FEDR ICs and my favorite set of tweezers. In the far right you see part of my magnifying glasses. They are necessary for repairs of SMD stuff.

What you don’t see is my hot air rework station which is also necessary.

First I had to use Capton tape to cover the “innocent” components close to the isolator chips. The hot air could damage them if I was not careful.

IMG_9721

Using the hot air rework station, I desoldered the offending ICs:

IMG_9723

And using my normal soldering iron I managed to solder in the replacement ICs:

IMG_9727

It may not look as good as the original solder work, but the board is now as good as new. 🙂

Soekris R-2R: Sound impressions with Salas BiB PS & alpha20 line stage

A couple of days ago I took my DAM and headed out to a good friend of mine to do some listening tests.

My DAM at the moment is powered by a Salas BiB at 12VDC. It has a DIYINHK XMOS based USB to I2S interface powered by a Salas Reflektor-D at 3.3VDC. The same power supply powers the isolated side of the DAM.

IMG_9263_resize(note that this picture is a bit old. I have since swapped the transformer for the one shown in the next picture plus I have used an IEC with a built-in filter)

The first objective was to assess the importance of a good DC power supply instead of a plain transformer. In order to do that I took with me an extra 50VA toroidal with 2 x 7V windings.

My friend’s system consists of Magnepan speakers, a DIY fet-based preamp and DIY power amp (solid state, 60KG monster). It is widely regarded as a very revealing and non-forgiving system. Any change in any of its components (or a component withing the components) is clearly heard.

The DAM was connected to the preamp through its unbuffered outputs.

We gave the system some time to warm up (it was probably a couple of hours) and then sat down to listen. We started with the DAM as it was, with the Salas BiB. We then unplugged the Salas and hooked up the plain transformer.

The change was immediately obvious. The sound thinned, it became more harsh in the high end. It also lost resolution and detail. Going back to the BiB made all the good qualities come back.

Thus, I can definitely recommend a proper DC power supply for the DAM. I cannot say whether it was the Salas that did the work or that any DC power supply would do the same, but the improvement was definitely there. Note that I have the BoM for the Salas BiB I built in the Soekris’ page.

The second objective was to assess the difference that could be made by using a “proper” output stage after the unbuffered outputs.

So I built a pair of AMB alpha20 line amplifiers. I set their gain to 2 and powered them temporarily by the same Salas BiB that powers the Soekris.

2015-03-27 01.36.57_resize

Note that my DAM outputs roughly 1V RMS at its output @ 0db since I’m using a filter that includes attenuation at FIR2 (I can’t really remember which one it is though..). This meant that the alpha20 brought its output to a nice 2V RMS.

Going back and forth between using the alpha20 and just the unbuffered outputs, the conclusion was that the alpha20 removed a small amount of the “magic” of the DAM while not really helping in anything besides output volume. I was hoping that it would help improve the dynamics of the DAM – its Achilles’ heel IMHO. In my friend’s system the DAM sounds “flat” compared to his other sources (a heavily modified Sony 50ES cdp, a Buffalo 3 DAC, and an Aune S16). However, this “flatness” is not particularly obvious in other more forgiving systems.

So, my assessment of the DAM so far is as such: It has great detail, exceptional mid-range, proper bass, it is a little soft on the highs, but its main problem is the dynamics. It can sound a bit “flat”, with this “quality” either accentuated or minimized, depending on the rest on the system.

If there was a way to improve its dynamics, to make it more “aggressive”, it would be a stellar performer (with a proper DC power supply of course). As is, it is just great VFM.

Soekris R-2R: Interfacing to an Arduino

The Soekris dam1021 has a serial port (J10).J10-serial
This serial port serves a number of purposes:

1) It is used for uploading firmware updates via the uManager prompt.
2) It is used for uploading filter values via a software utility (not yet released).
3) Outputting info on currently selected Input, Sampling Rate and Volume level.
4) Controlling things by receiving commands. Up to now, we can select Input and change the Volume. More commands might be added in the future (or already exist, but are not yet documented by Soren).

In order to do all those things, one has to interface to this serial port. In this post I detailed how to interface a computer to this port (so as to perform a firmware upgrade). Now it is time to do the same for a microcontroller, say an Arduino.

The problem is, microcontrollers use different voltage levels compared to the “classic” RS-232 serial protocol. In order to make these different things talk to each other, we need to use what is called an “RS-232 Receiver / Transmitter” IC. Such ICs are pretty commonplace, since they are found inside of most devices that come with RS-232 interfaces. The “classic” IC that is used is the Maxim MAX232. It is very low-cost but it is also an old design, requiring 5V (instead of 3.3) and 5 x 1μF capacitors. There is a much newer version of the chip, the MAX3232, operating with a voltage between 3V and 5V and requiring much smaller caps (0.1μF), but it is not as widely available as the MAX232. Since I was in a hurry to get things up and running, I chose what I could find locally in stock: a MAX232.

MAX232

This meant that I had to power it with 5V and use 1μF tantalum or ceramic capacitors, but what the heck. I was in a hurry.

After reading the MAX323’s data sheet I ended up with this:

RS-232-interface_v2_bb
(click on the picture for a higher resolution version)

You will notice that I am using Serial3 of the DUE to talk to the DAM DAC. Any serial port could be used, but I chose Serial3 because it was practical – it will be easy to route these specific pins on the shield that I am designing.

Once I verified that the above circuit worked, I built it on perfboard to keep handy:

MAX232_interface

The above circuit works in general but has some trouble with the DAM DAC. It works just fine upon power up but at some point loses communication with the DAC. The only way to restore communication is to power cycle the DAC. I am not sure what the problem is, but I suspect that it has to do with the power management features of the ICL3221 chip used on the DAM. I have ordered an ICL3221 to use in place of the MAX232, in hope that everything will work fine when I use this (at least in theory) fully compatible IC.

Stay tuned.