Driving the Fostex T50RP MK3 headphones

After too many years of abstinence from headphones, I was given as a present a pair of Fostex T50RP MK3s.

These headphones have an excellent VFM, having true planar magnetic drivers at a price point of ~150€.

This is what they look like on the inside:

Fostex inside (Medium)

Picture borrowed from here: http://www.head-fi.org/t/763009/fostex-new-rp-headphones-t50rpmk3-t40rpmk3-and-t20rpmk3/375#post_12077324

There is a drawback though, and that is their low sensitivity. ~92dbs mean that my current cell phone has no hope of making them rock. No chance at all. Same goes for pretty much any USB-powered DAC/headphone amp. So anyone serious about driving these headphones needs to look into a proper headphone amplifier.

I said to myself that I should try to build a proper amp with parts that I already had lying around, so I looked at my stockpile. I realized that I had a brand new pair of AMB alpha20 class-a line amplifiers, rated at 3.0Wrms into 33Ω with a ±18VDC power supply.

AMB alpha20

The T50RP are 50Ω and can handle up to 3000mW, so I thought that they would be a good match.

Powering the alphas by my bench power supply, I connected them to my audio card’s line out (an Auzen X-Meridian) and hooked up the headphones. The result was impressive. The alphas delived sound that was clear, crisp, with very little distortion. Plus they managed to achieve SPLs well into eardrum-damaging territory. Good.

Next up was the power supply. I had a set of Salas BiB shunt regulators that were collecting dust, so they would do just fine.

Salas BiB 1.1 alpha20

I set them up for a CCS current of ~300mA.

The case would be a Modushop.biz Galaxy 1U aluminum one that I had bought for a project that never went beyond the design phase.

I was missing a transformer that would fit inside the 1U case, so I bought a 25VA unit from Mouser.

At last but not least, I needed a 1/4″ TRS jack that could be mounted on a 10mm thick aluminum face. Neutrik had the perfect part for the job:

nj3fp6c-bag

So, all I ended up purchasing was the trafo and the 1/4″ jack. Nice.

2015-11-29 17.57.20_resize

So now I had a functioning headphone amplifier.

The next step is to add a USB to I2S interface, a DAC, some sort of volume control, another power supply to power them and an Arduino & Screen to control them. Space might be an issue..

DIYINHK XMOS Multichannel 32ch USB to/from I2S/DSD SPDIF Interface

About a month ago DIYINHK released a USB to I2S interface board based on the brand new and all-powerful XMOS xCORE-200 chip.

xcore-200-microcontroller
cXU216[1]

The specific chip used by DIYINHK is the middle-of-the-line XU216-512 which corresponds to some pretty serious horsepower: 16 logical cores for a total of 2000 MIPS, 512KB SRAM, 2MB FLASH.

IMG_0622_res

So, what can we do with all this horsepower you say? It’s simple. Tons of channels of high-resolution audio. Plus I2S inputs, besides the usual outputs. Plus DSD1024. Plus use a cool OLED display as a VU meter.

The board I bought came with the default firmware, which supports:

  • 6 channel 384kHz I2S output
  • 4 channel 384kHz I2S input
  • spdif output
  • OLED VU meter
  • Volume up/down control button

Here is a video of it in action:

A maximum 32 channels can be supported with the right firmware (not provided by DIYINHK).

DIYINHK XMOS multi 1
DIYINHK XMOS multi 2

The board (a 4-layer design, btw) comes with three high quality NDK NZ2520SD Ultra low phase noise oscillators. There is provision for powering two of the oscillators externally, by removing a ferrite bead and applying power through one of the headers.

The board is not USB powered. It needs a relatively beefy 3.3V power supply, capable of providing a maximum of 800mA (even though a typical power consumption is in the neighborhood of 570mA). Beware, a weak power supply or an inadequate connector will cause to board to not power up.

It comes with a fully featured Thesycon driver for Windows. Linux & Mac OS don’t need a driver.

An interesting detail is that the Windows 10 driver that is available only supports stereo operation and no multichannel (v2.26). If you want multichannel you’ll have to go back to Windows 7 (v1.67) (or perhaps Linux or Mac OS, it isn’t clear..).

DIYINHK’s site says that the latest available driver is v2.26, but I did not find such a driver in their downloads section, so I emailed them about it. They sent me a link for an even newer driver, v3.20.

DIYINHK XMOS Driver 3.20 1
DIYINHK XMOS Driver 3.20 2
DIYINHK XMOS Driver 3.20 3
DIYINHK XMOS Driver 3.20 4
The board has a ton of exposed I/O, split into three 0.1″ headers. These are the pinouts, according to DIYINHK:

xmos-multichannel-high-quality-usb-tofrom-i2sdsd-spdif-pcb

Now, if these pinouts look somewhat cryptic to you, you are not alone. I will try to clarify things a bit.

This is the most interesting header:

Header 1

I have marked in red the power supply input. It is a good idea to use all of the pins for making the connections, since ~800mA is nothing to sneeze at.

The pins in green are the I2S outputs. For 2 channel operation you will need to connect the DATA, BCK & LRCK pins. The rest of the output channels should be available at pins DO2, DO3 and DO4. I say “should” because I haven’t tested them. I should repeat that multichannel operation with the provided driver is only possible at the moment with Windows 7 (and possibly Linux & Mac OS).

The pins in yellow are the I2S DATA inputs. For 2 channel operation you will need to connect the DIO1, BCK & LRCK pins. The rest of the input channels should be pins DIO2, DIO3 and DIO4. The same multichannel restrictions I mentioned above apply to the I2S inputs.

The OLED screen is connected to one of the side headers, like this:

xmos-multichannel-high-quality-usb-tofrom-i2sdsd-spdif-pcb (3)

DIYINHK XMOS OLED IMG_0636 (Medium)

The left header is the XSYS connector for uploading firmware to the XMOS.

Next up: connecting it to my PCM4222 EVM ADC board.

HP Proliant Microserver Gen8

I’ve been a fan of HP’s Microserver line for many years. I bought my first one in 2011, my second one in 2013 and my third one a few days ago. All of them are running non-stop since I bought them. They have proven to be true Proliant servers, in the sense of having good reliability and build quality.

But the latest one (Gen8) is by far the most “Proliant” of them all (more on that later).

2015-12-22 00.39.59

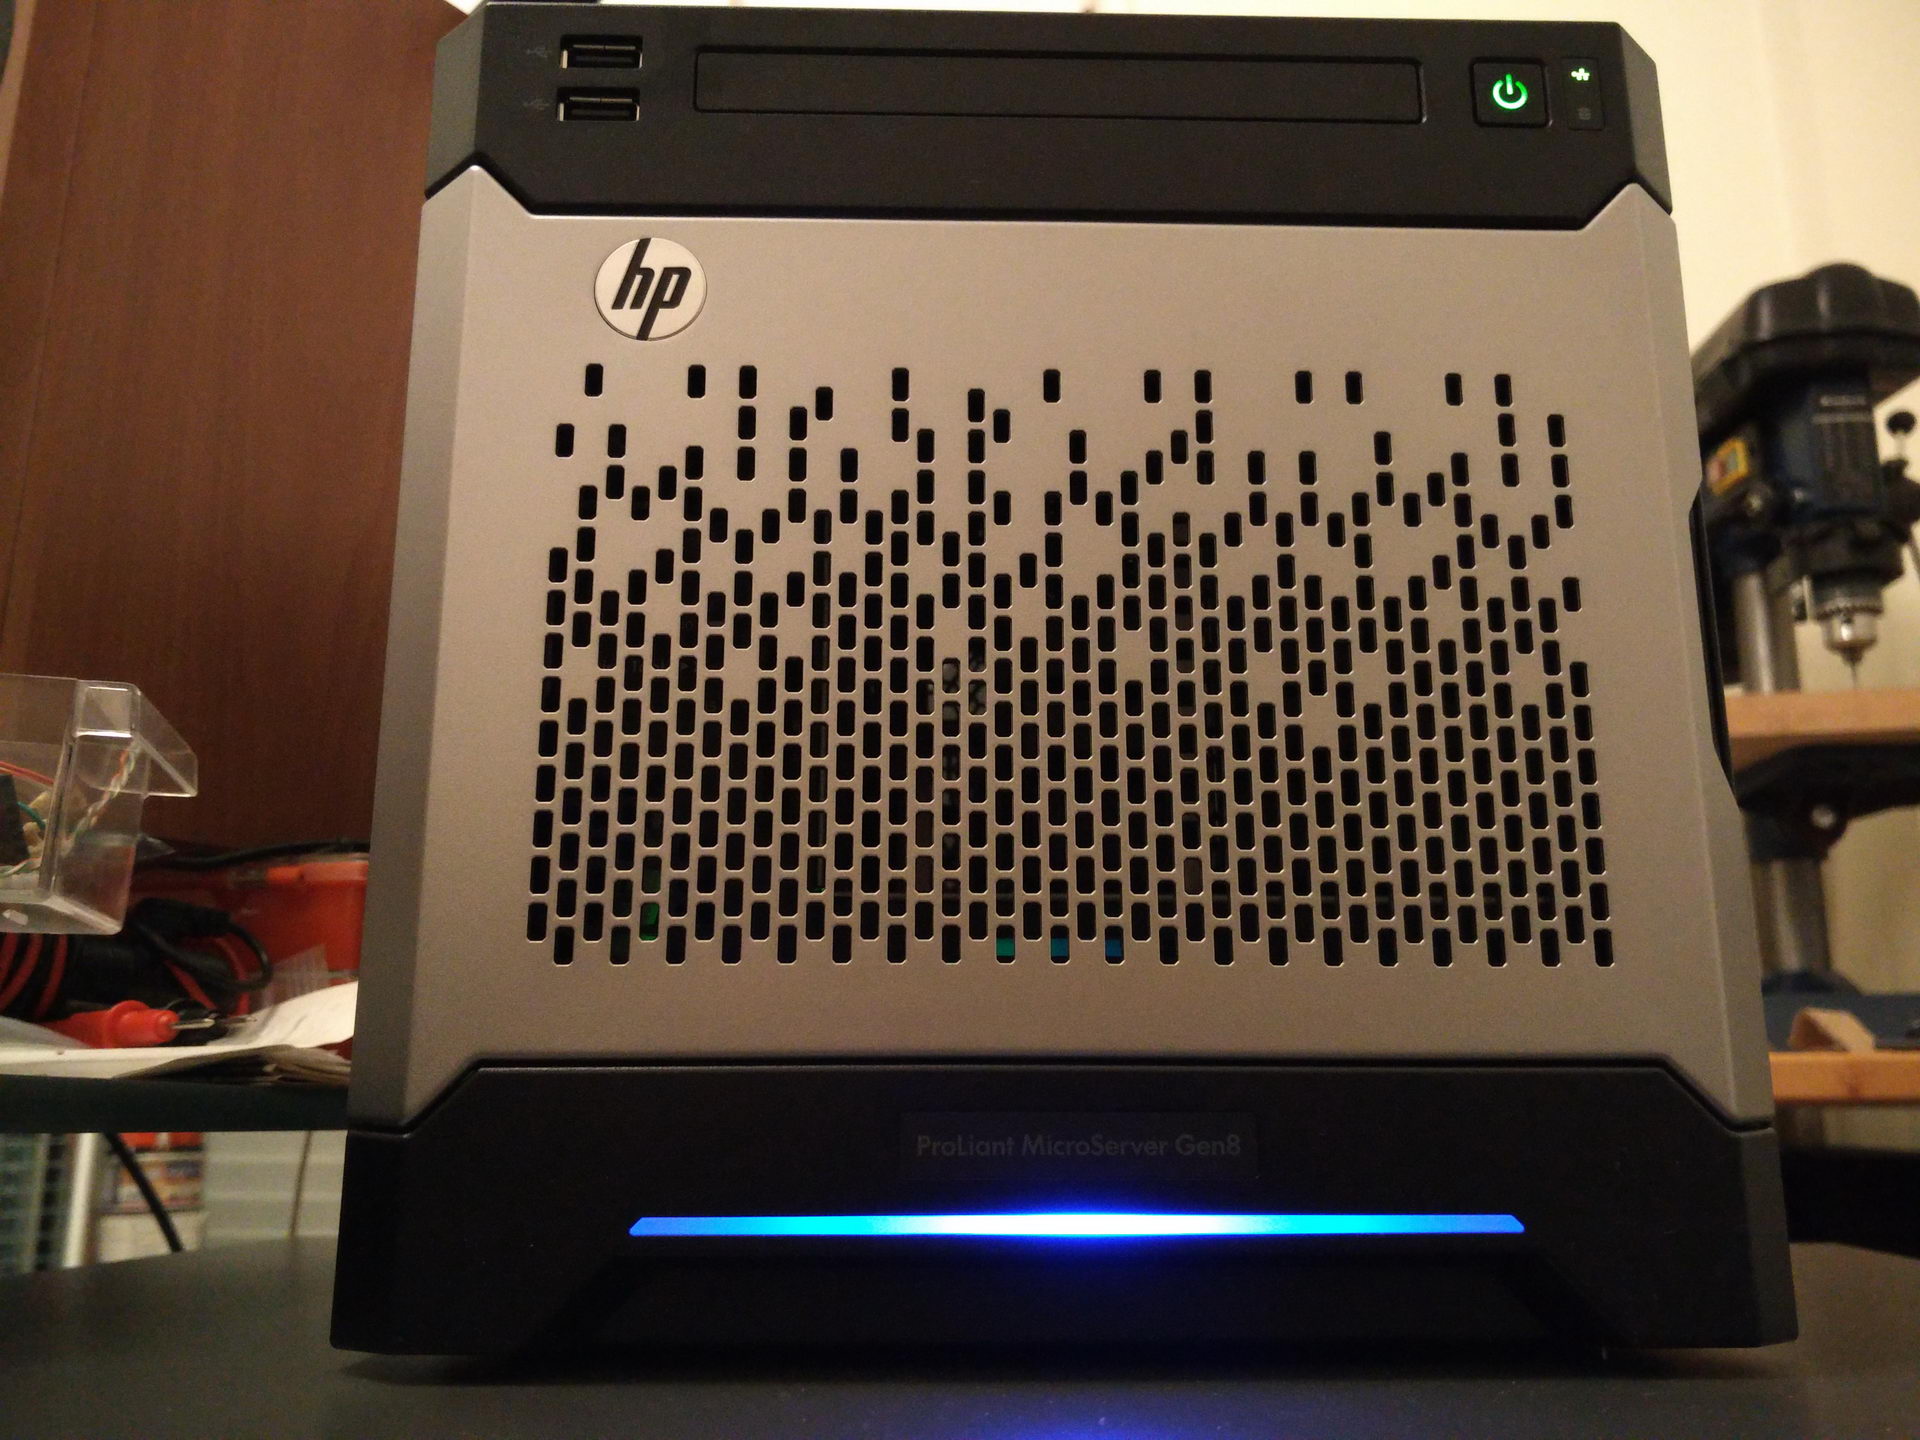
Let’s start by getting the specs out of the way. I bought the 819185-001 model, which comes with:

  • One Intel® Celeron® G1610T (2.3GHz/2-core/2MB/35W) Processor
  • 4GB (1 x 4GB) PC3L-12800E DDR3 UDIMM
  • HPE Ethernet 1Gb 2-port 332i Adapter
  • HPE Dynamic Smart Array B120i Controller
  • 150W Non-Hot Plug, Non-Redundant Power Supply
  • HPE iLO Management Engine

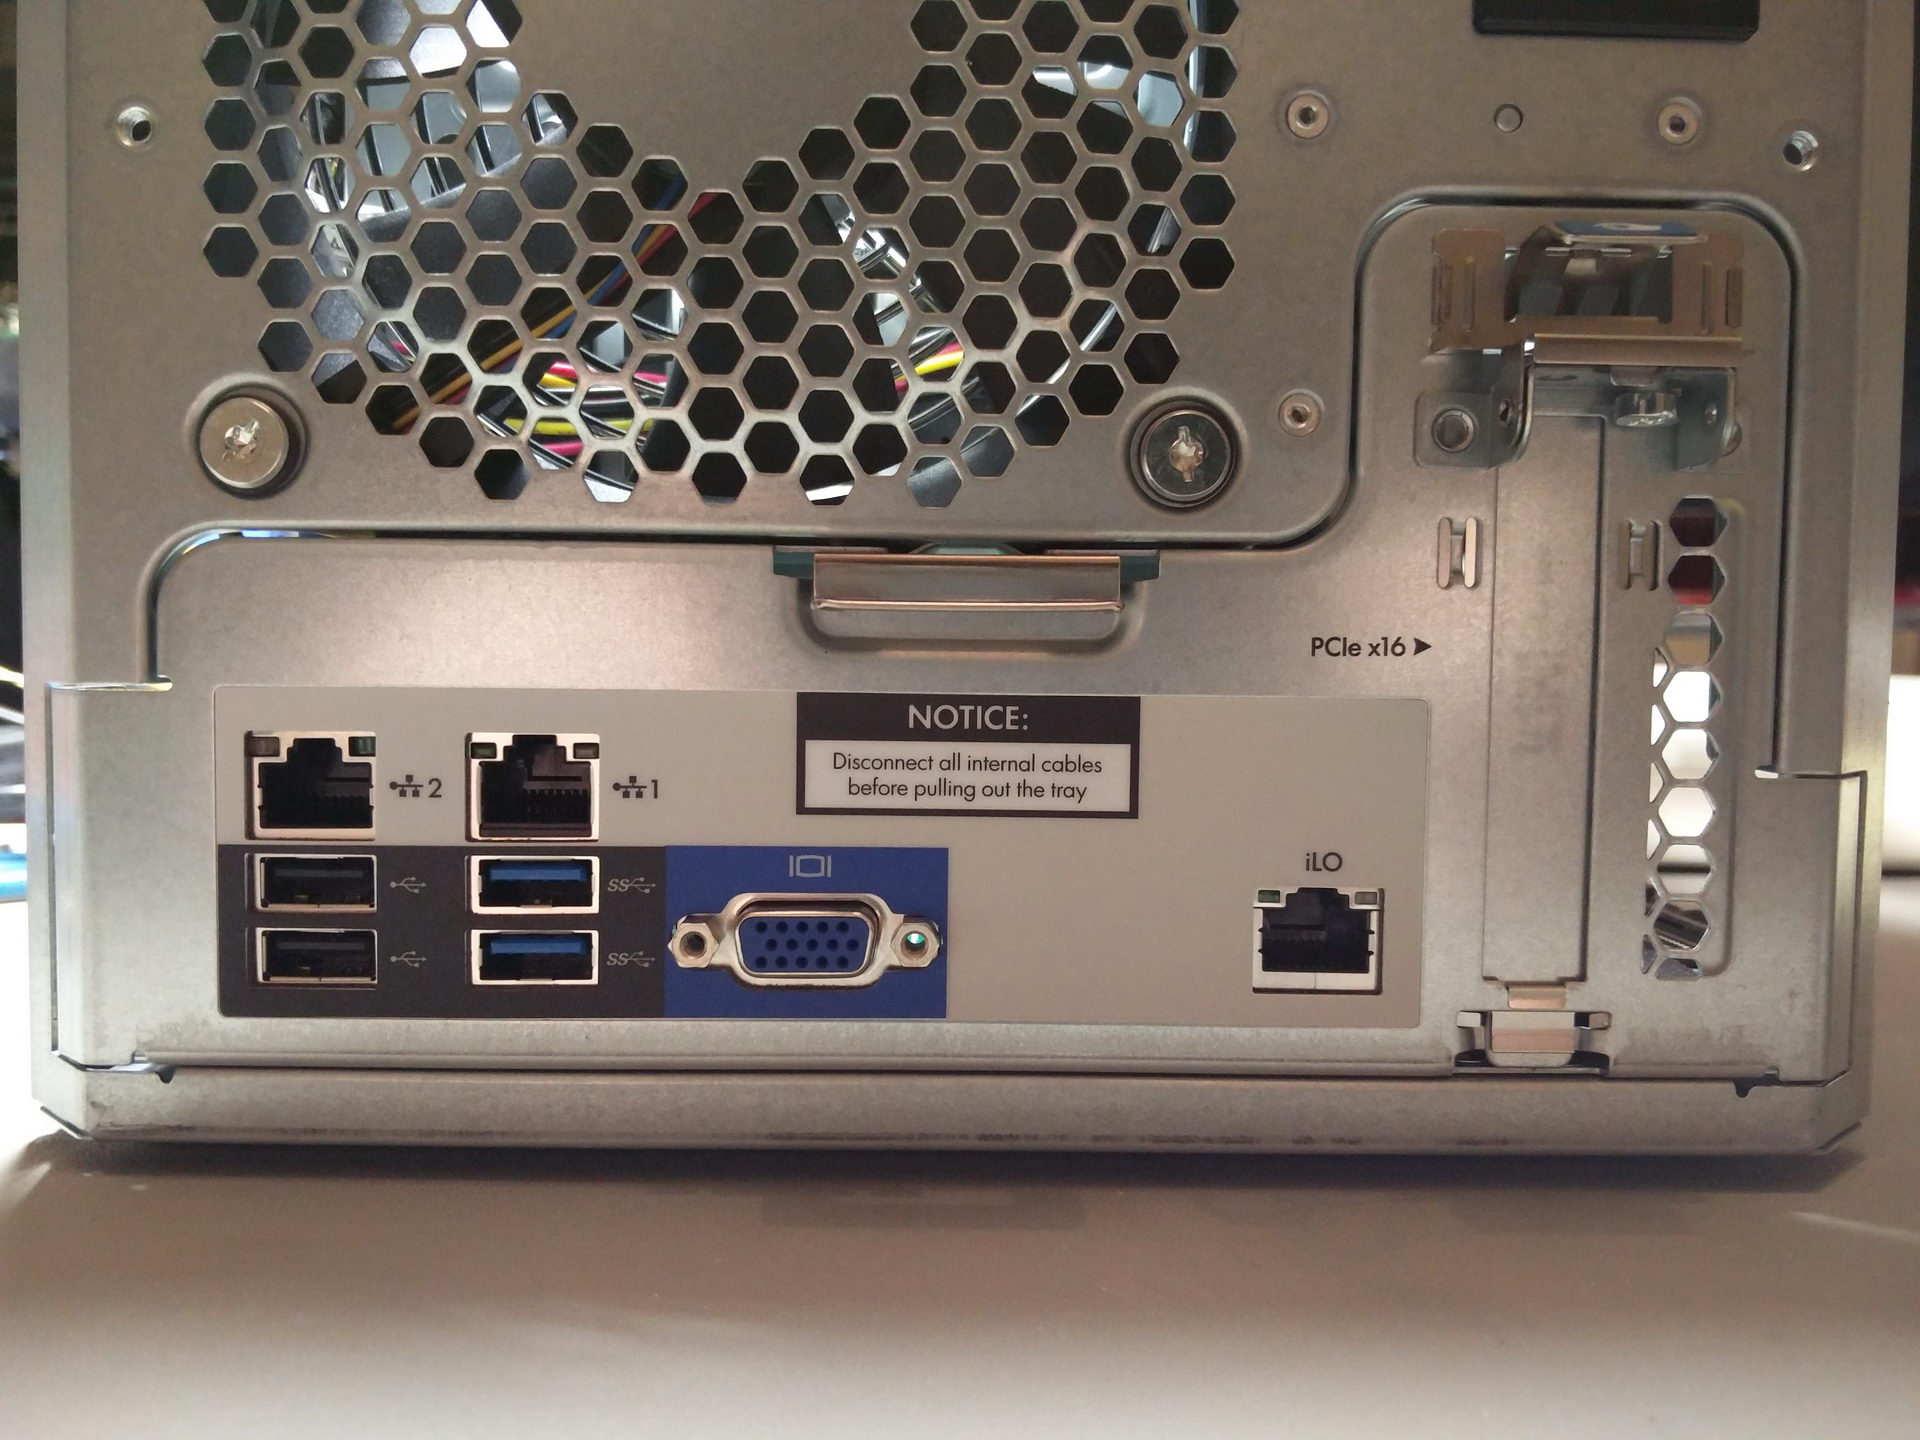
It has pretty good connectivity, since it comes with 7 x USB ports (2 of them USB 3.0), 3 x GbE Ports (one of them is the dedicated iLO port, more on that later), one PCIe x16 slot, etc.

2015-12-21 19.18.20

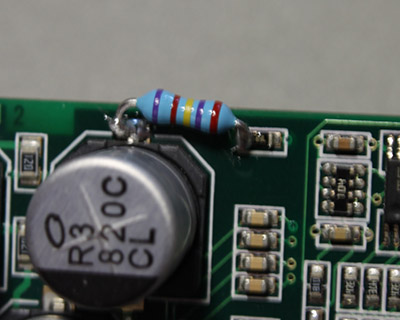
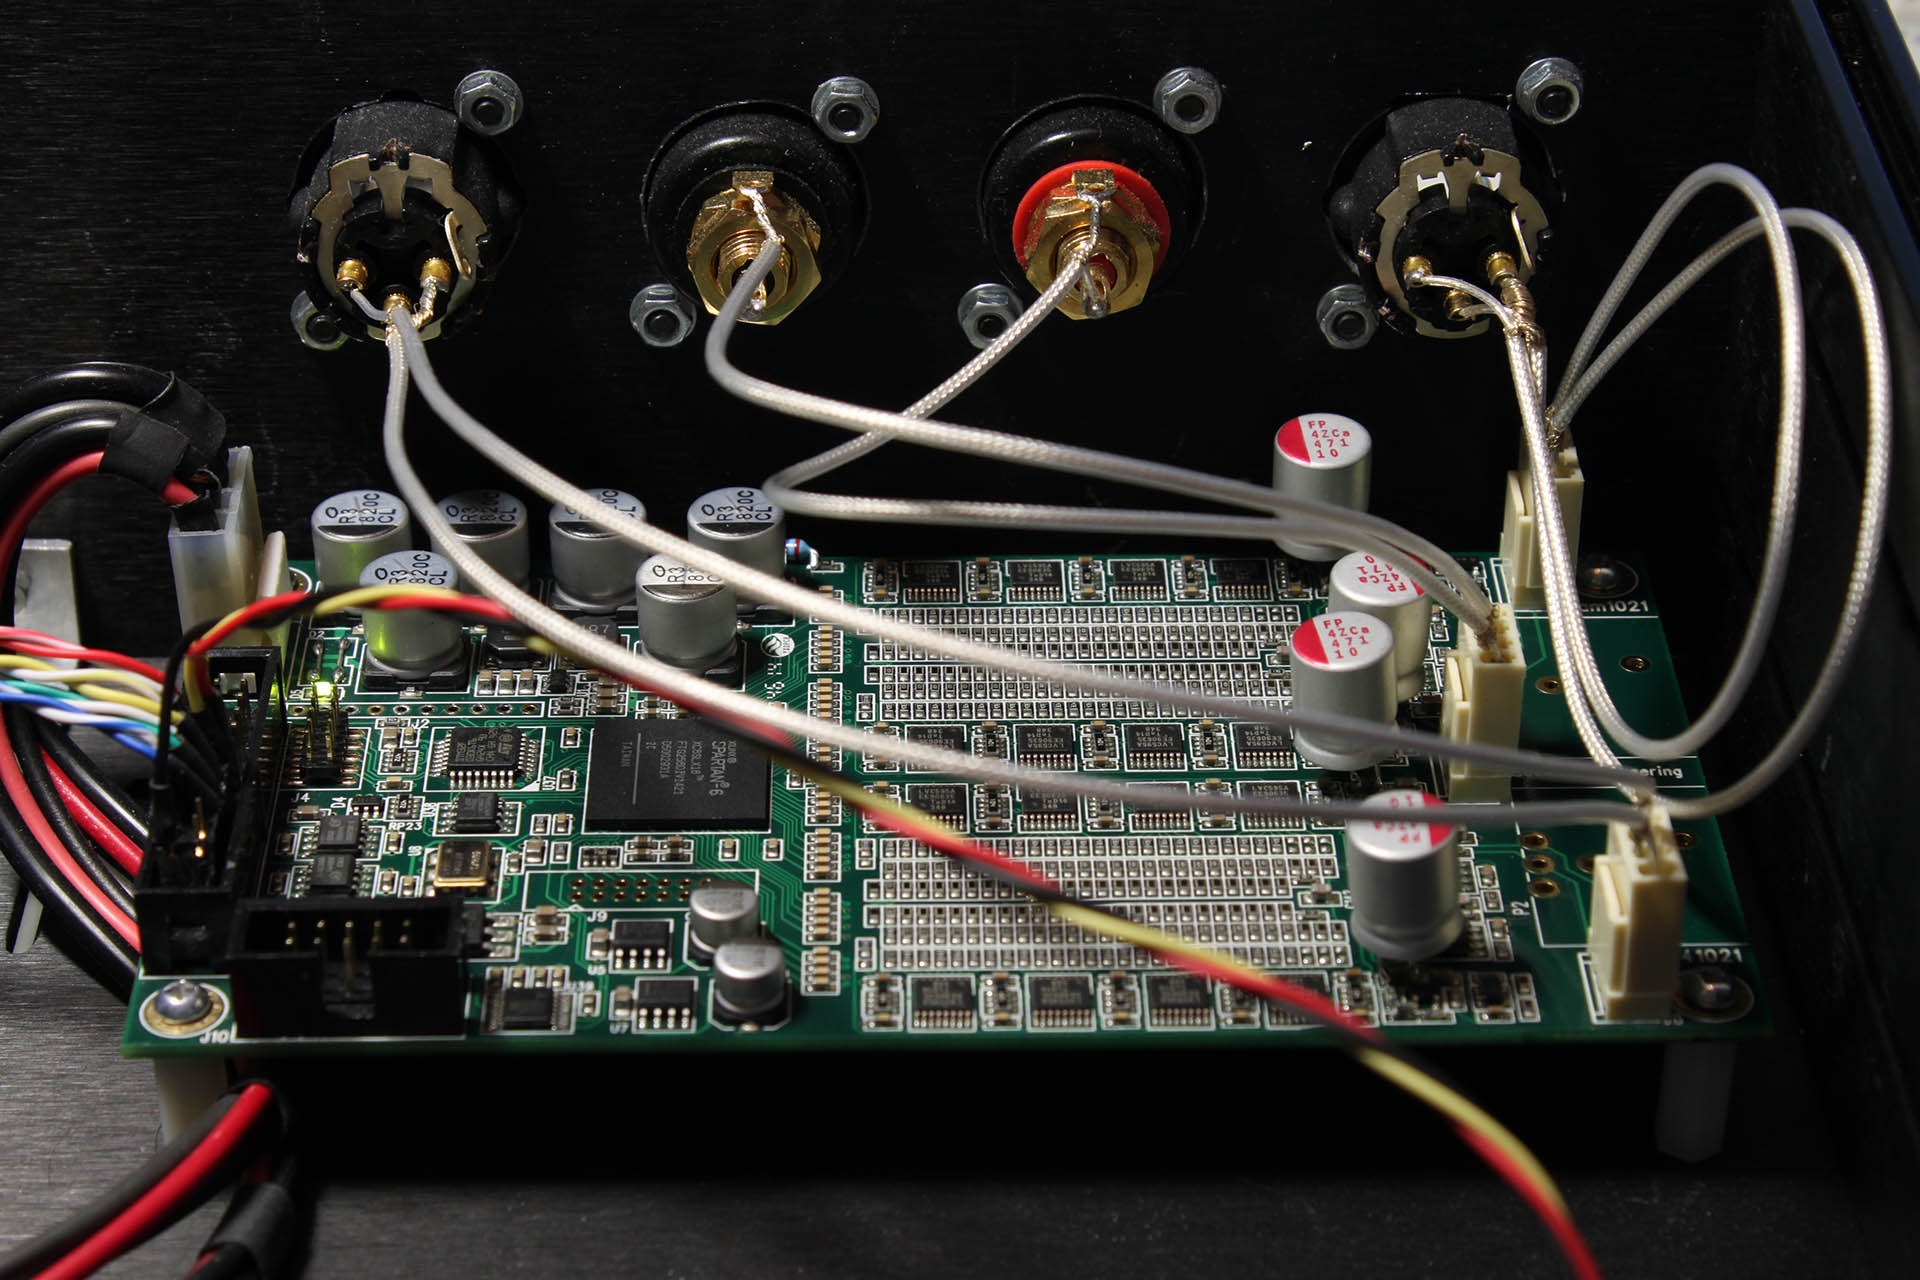
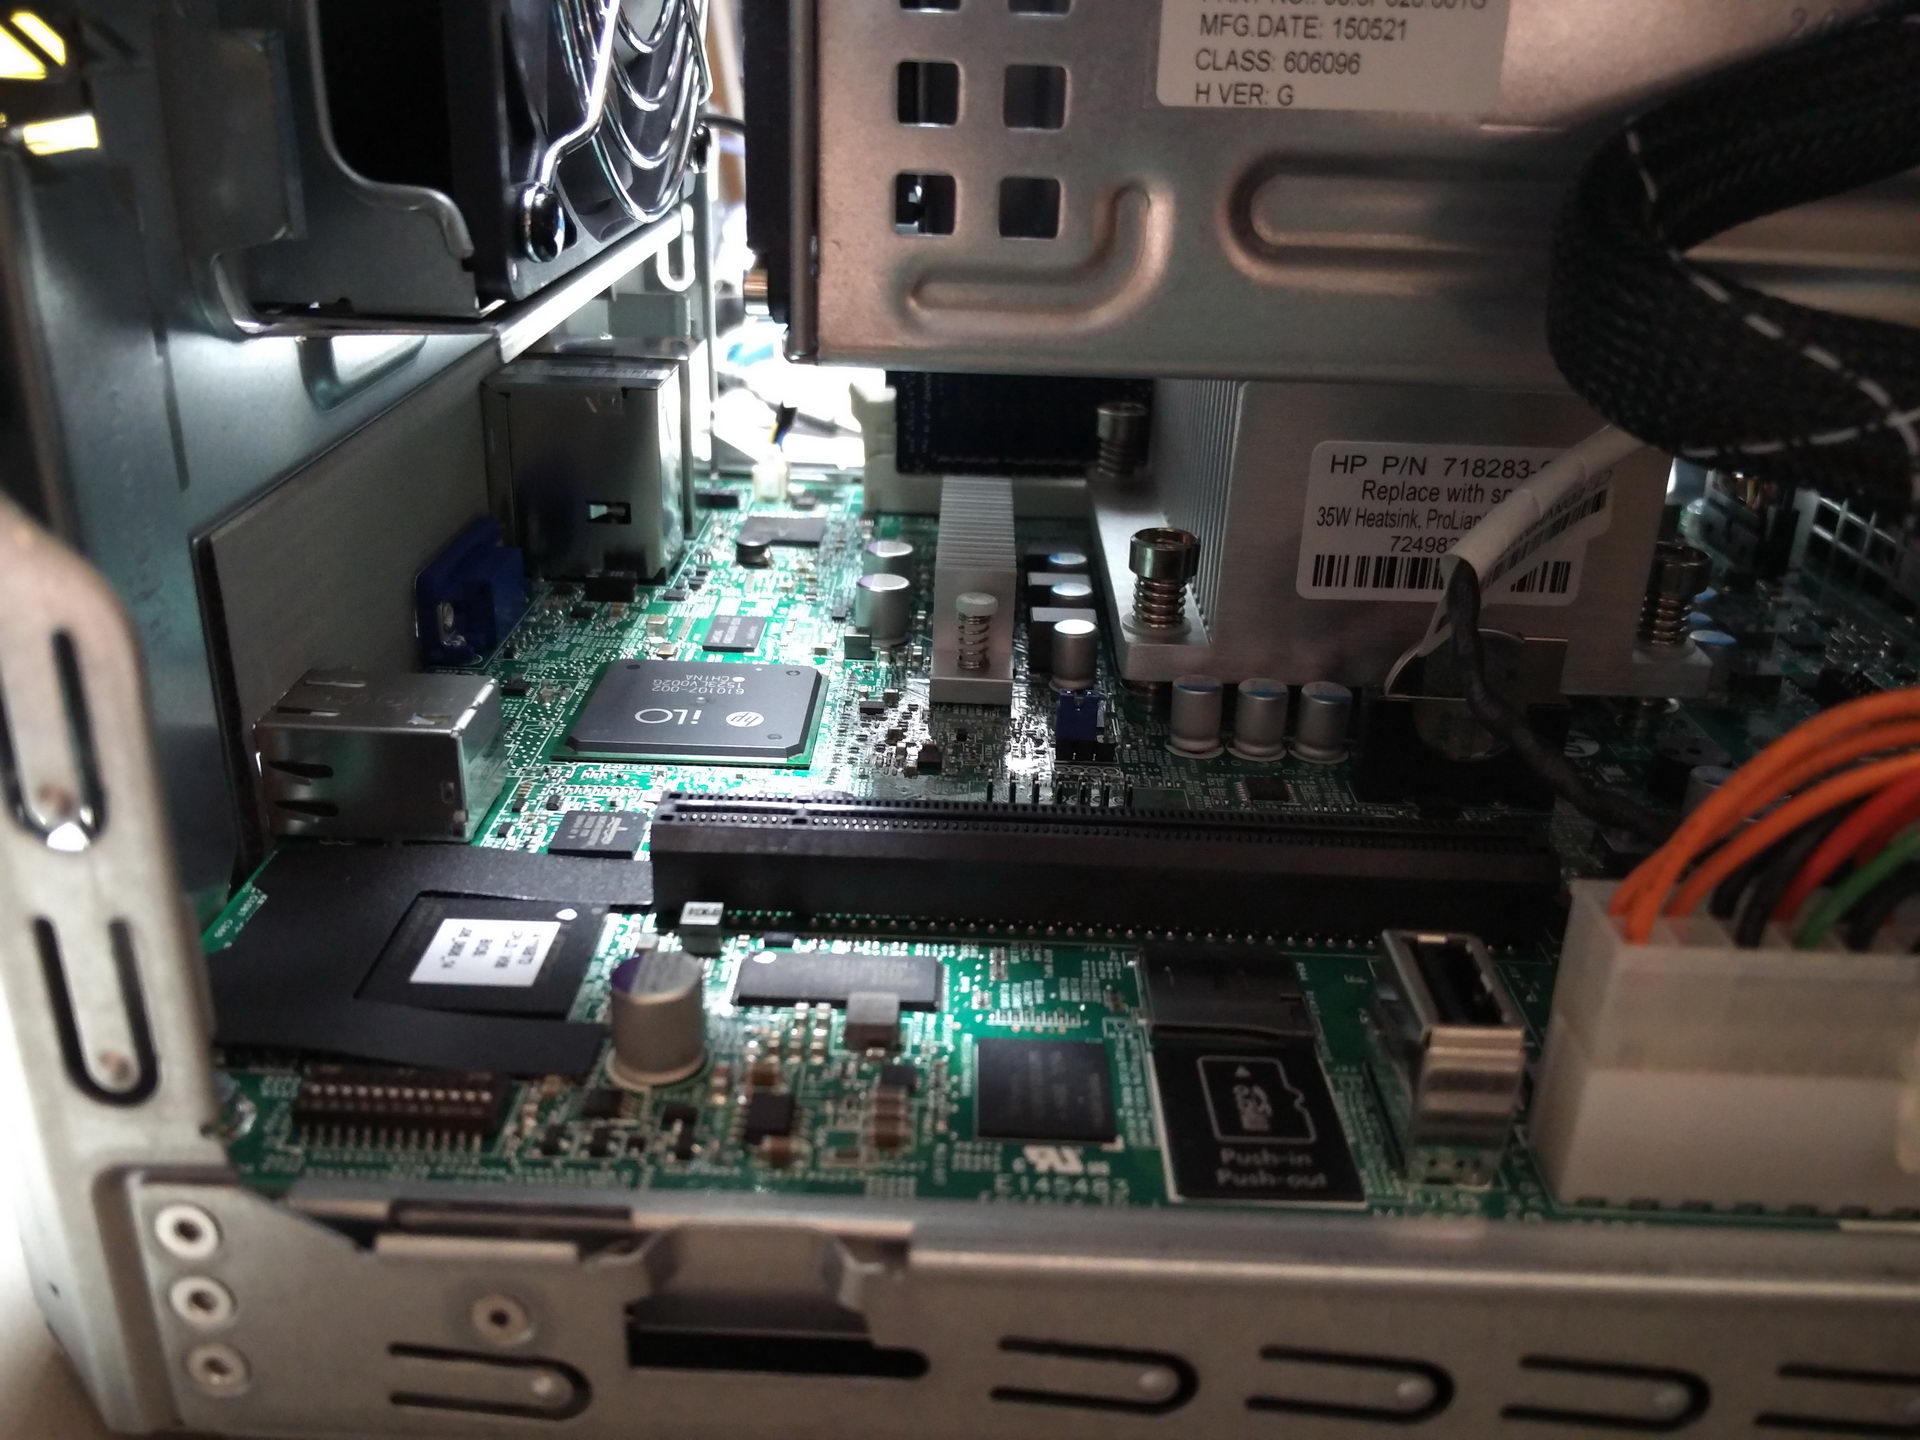
It supports 4 internal HDDs and an internal slim DVD-RW drive. Since it is 2016 (no-one needs DVD-RW drives any more), I decided to make better use of the server’s fifth SATA port by using it to connect an SSD system drive. Getting the SATA cable from the mainboard to the top of the case was no problem, but powering the SSD was. The server has a spare power connector, but it is meant to power HP’s DVD-RW drive which (oddly enough) has an old floppy drive power connector. I did not want to cut the cable and splice in a proper SATA power connector, so I did the sensible thing. I robbed an old floppy drive of its most precious component: Its power input jack.

2015-12-21 19.31.57

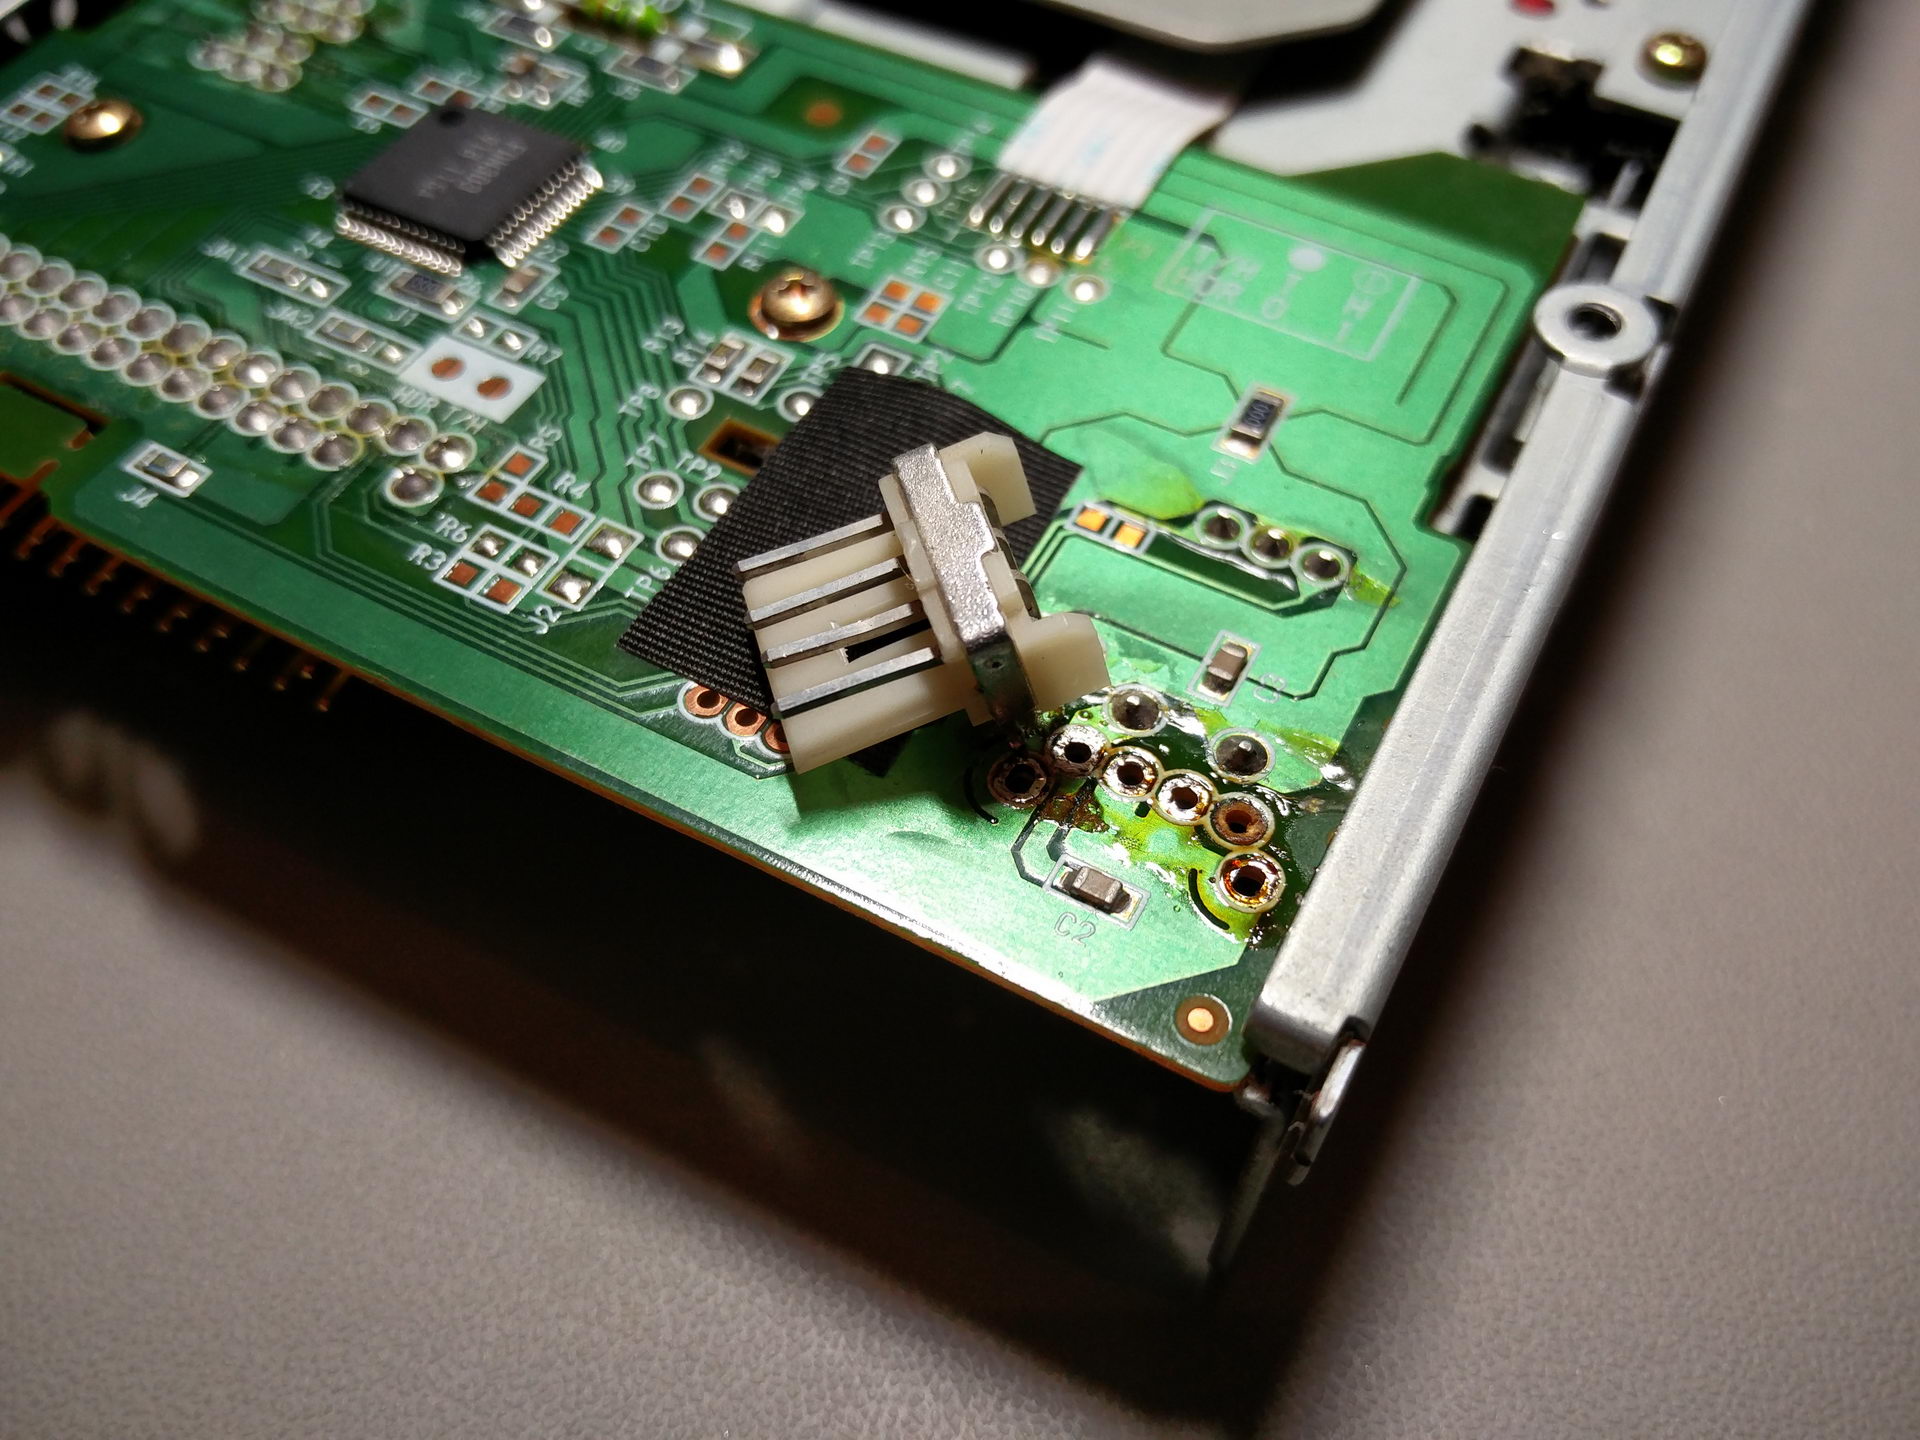
I made sure that it mated properly with the server’s connector.2015-12-21 20.21.48-2

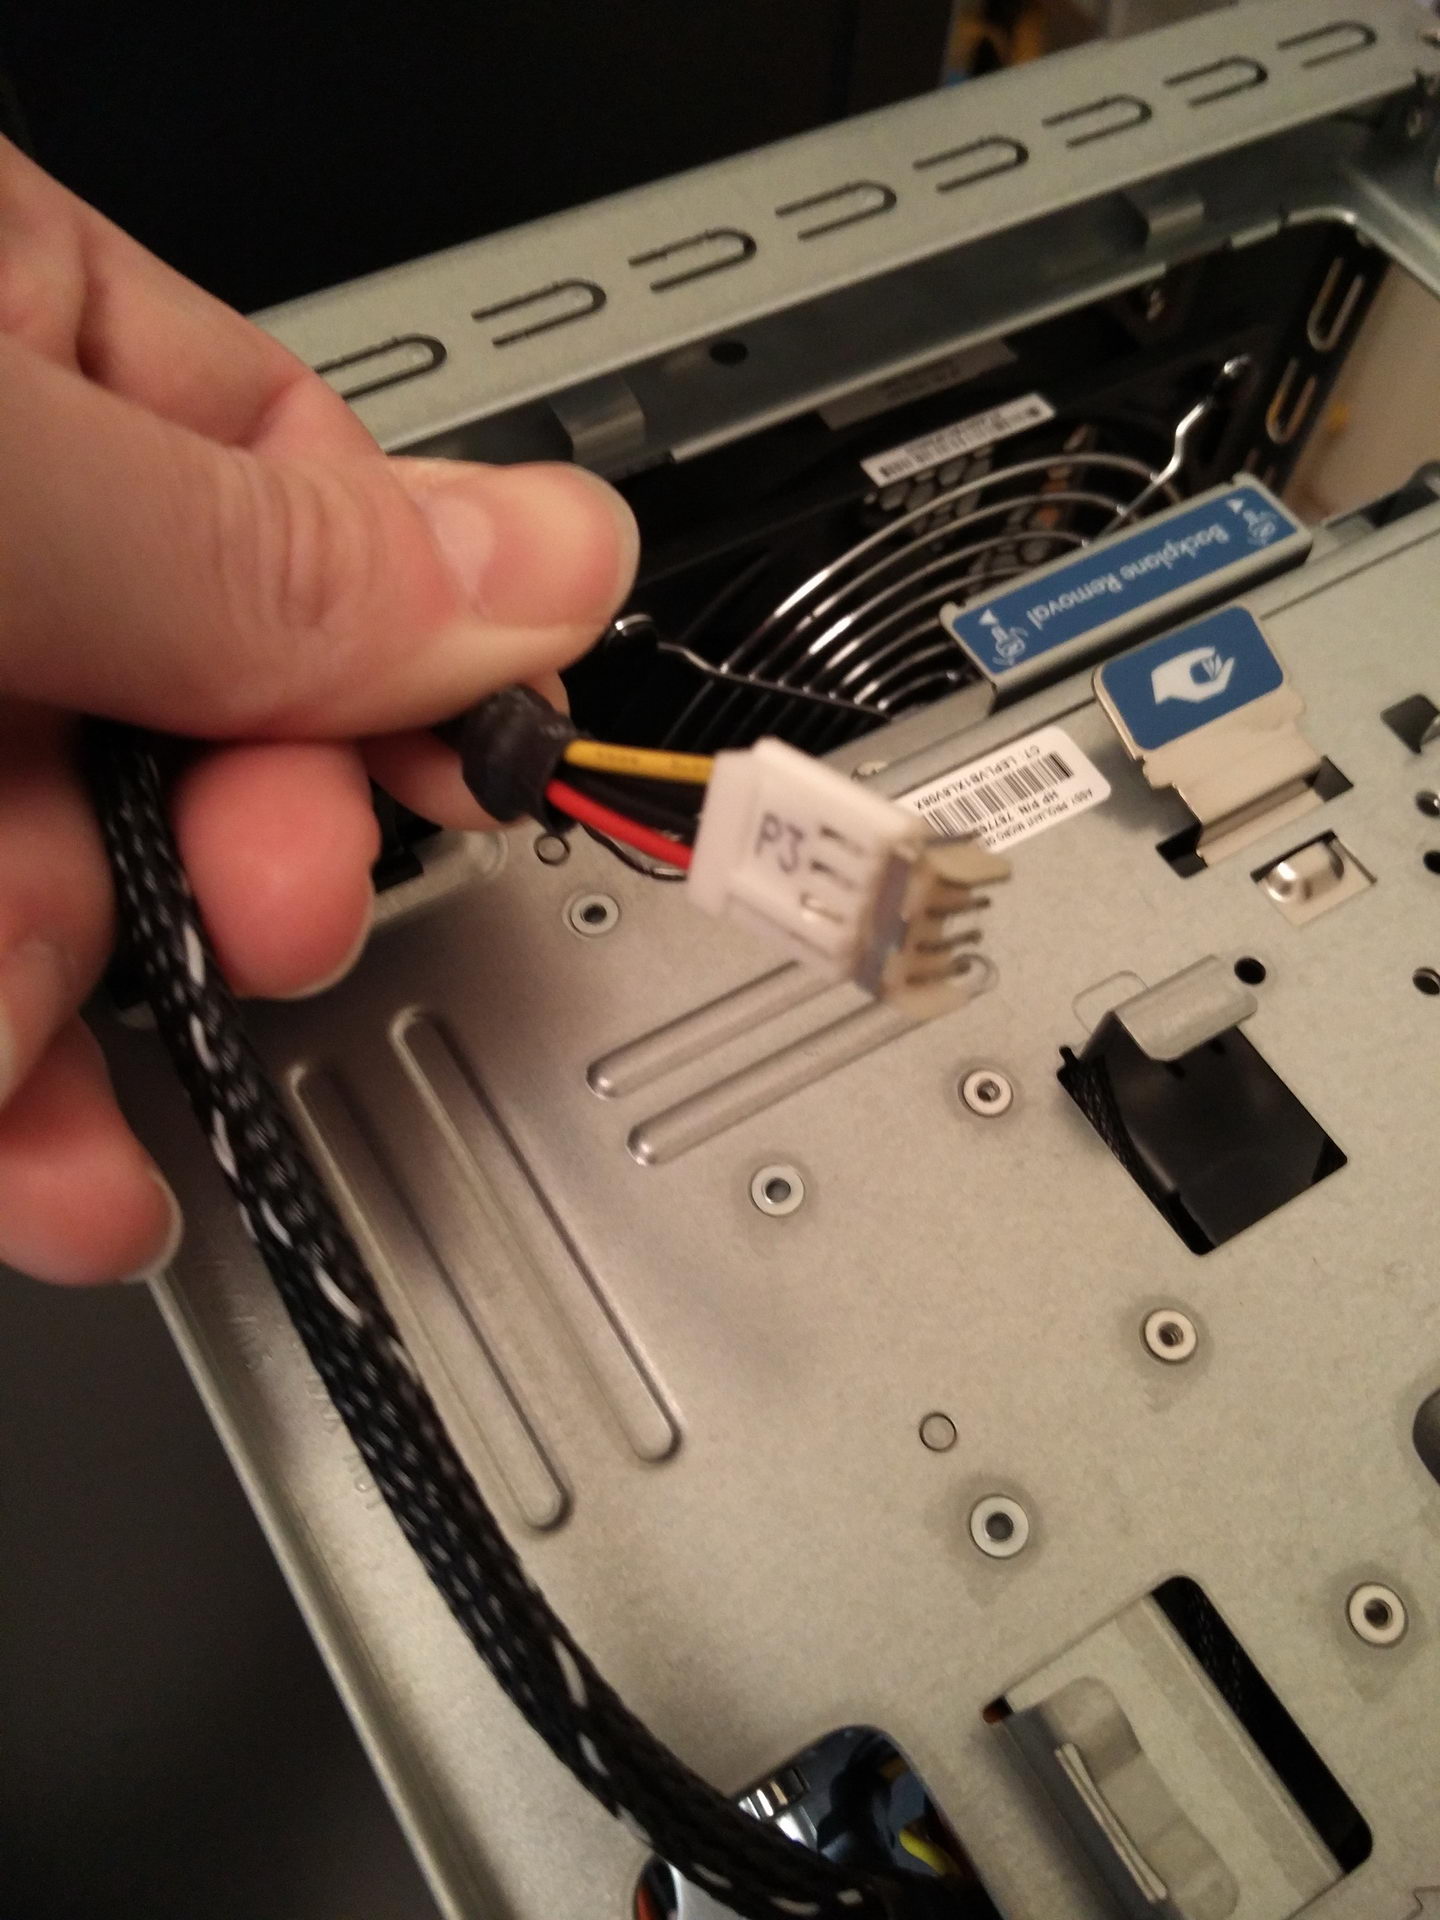
And I soldered on an old SATA power cable I had. I used heat shrink tubing (of proper colors of course :P) to make sure that there would be no possibility of shorts.2015-12-21 20.38.092015-12-21 20.40.17

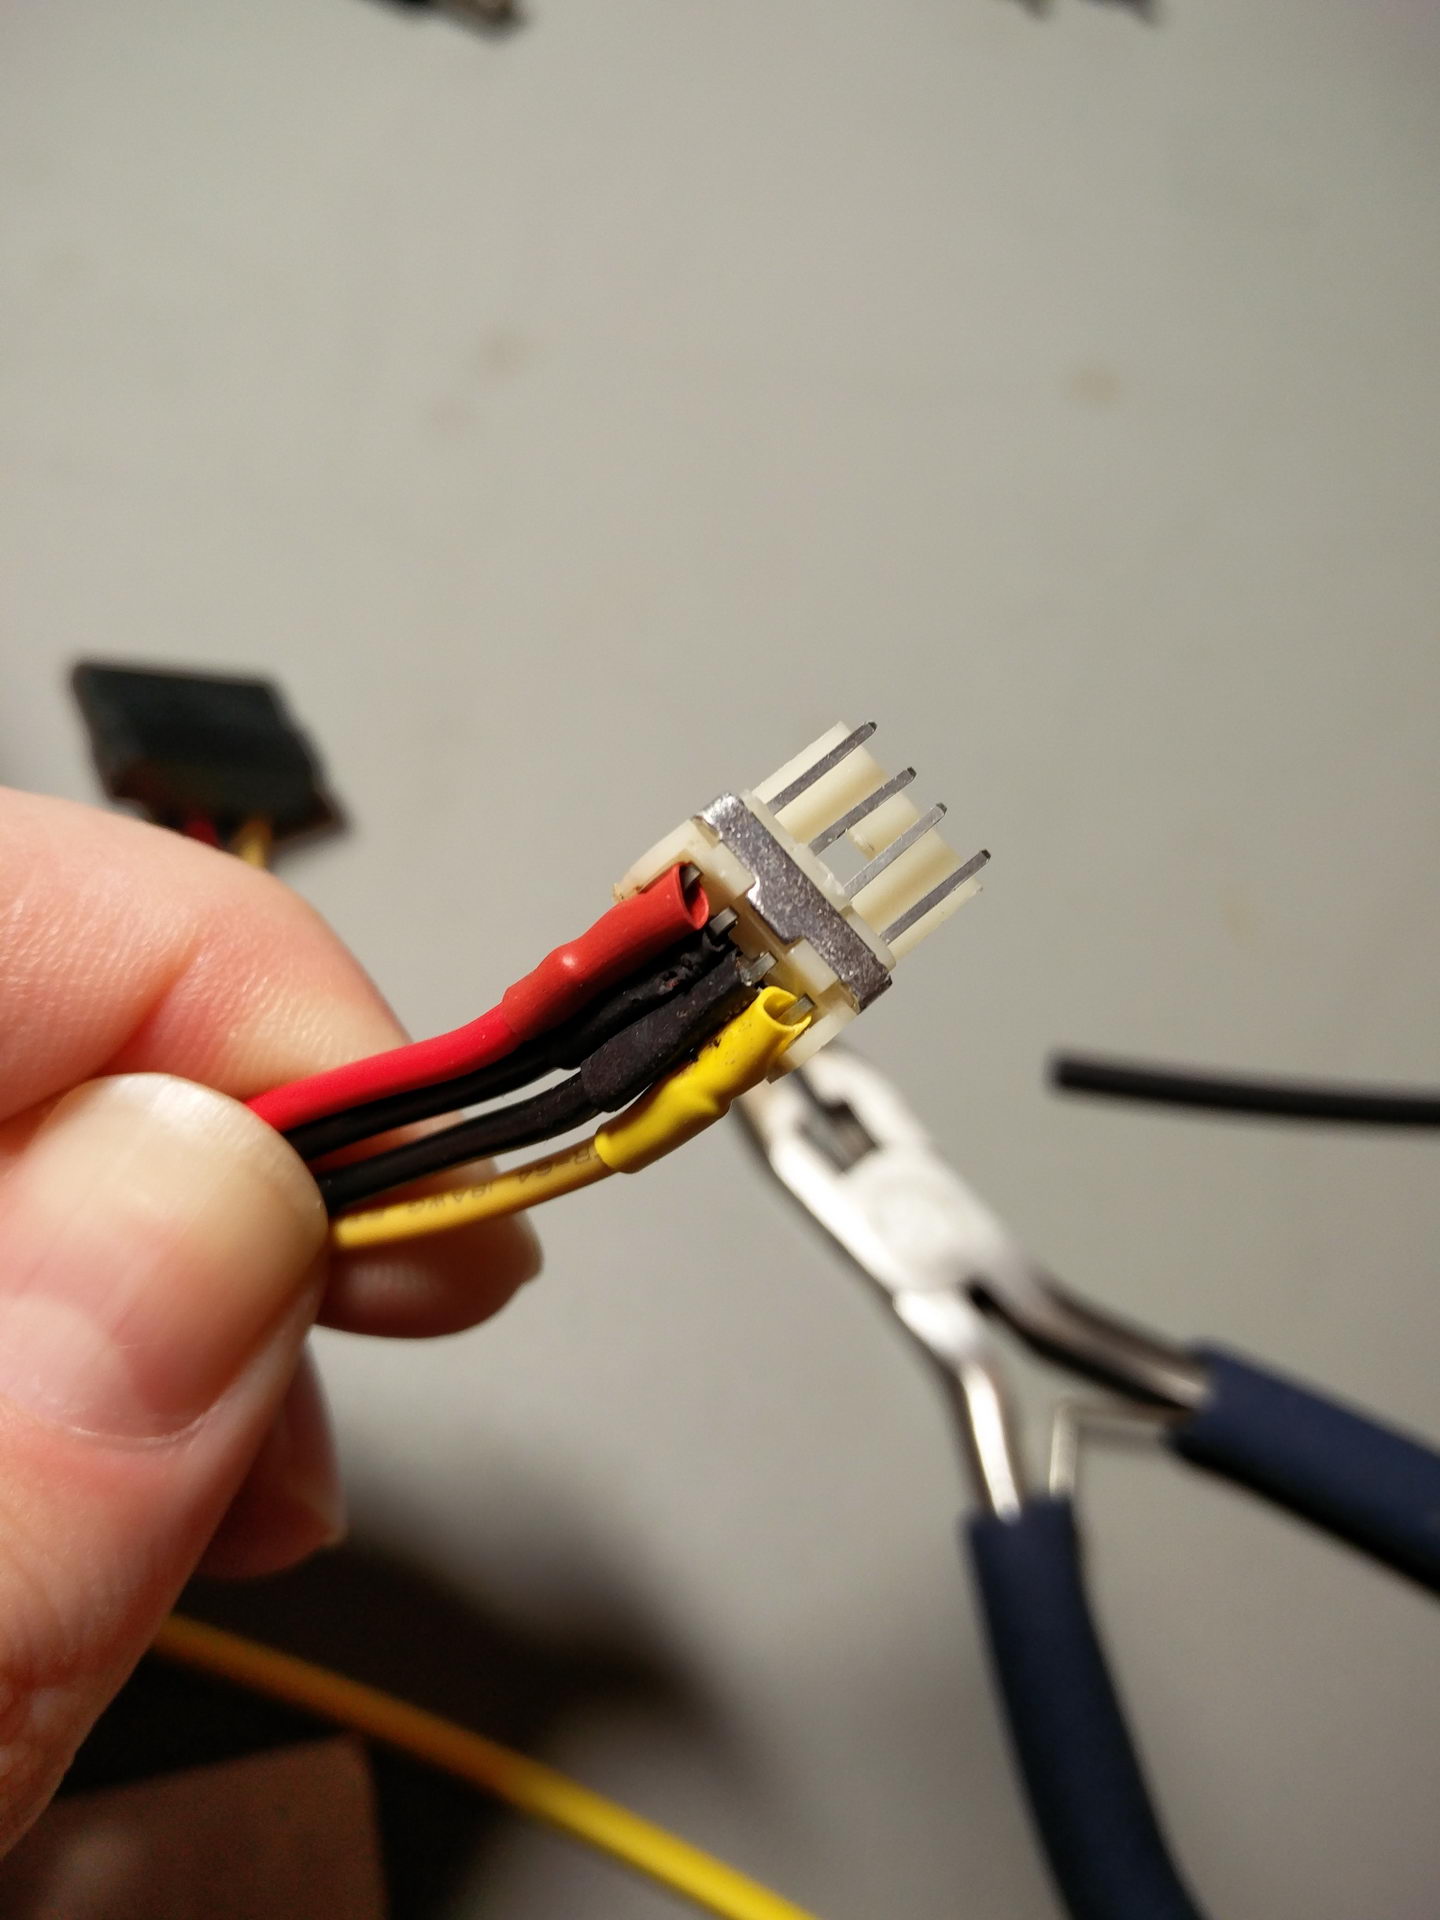
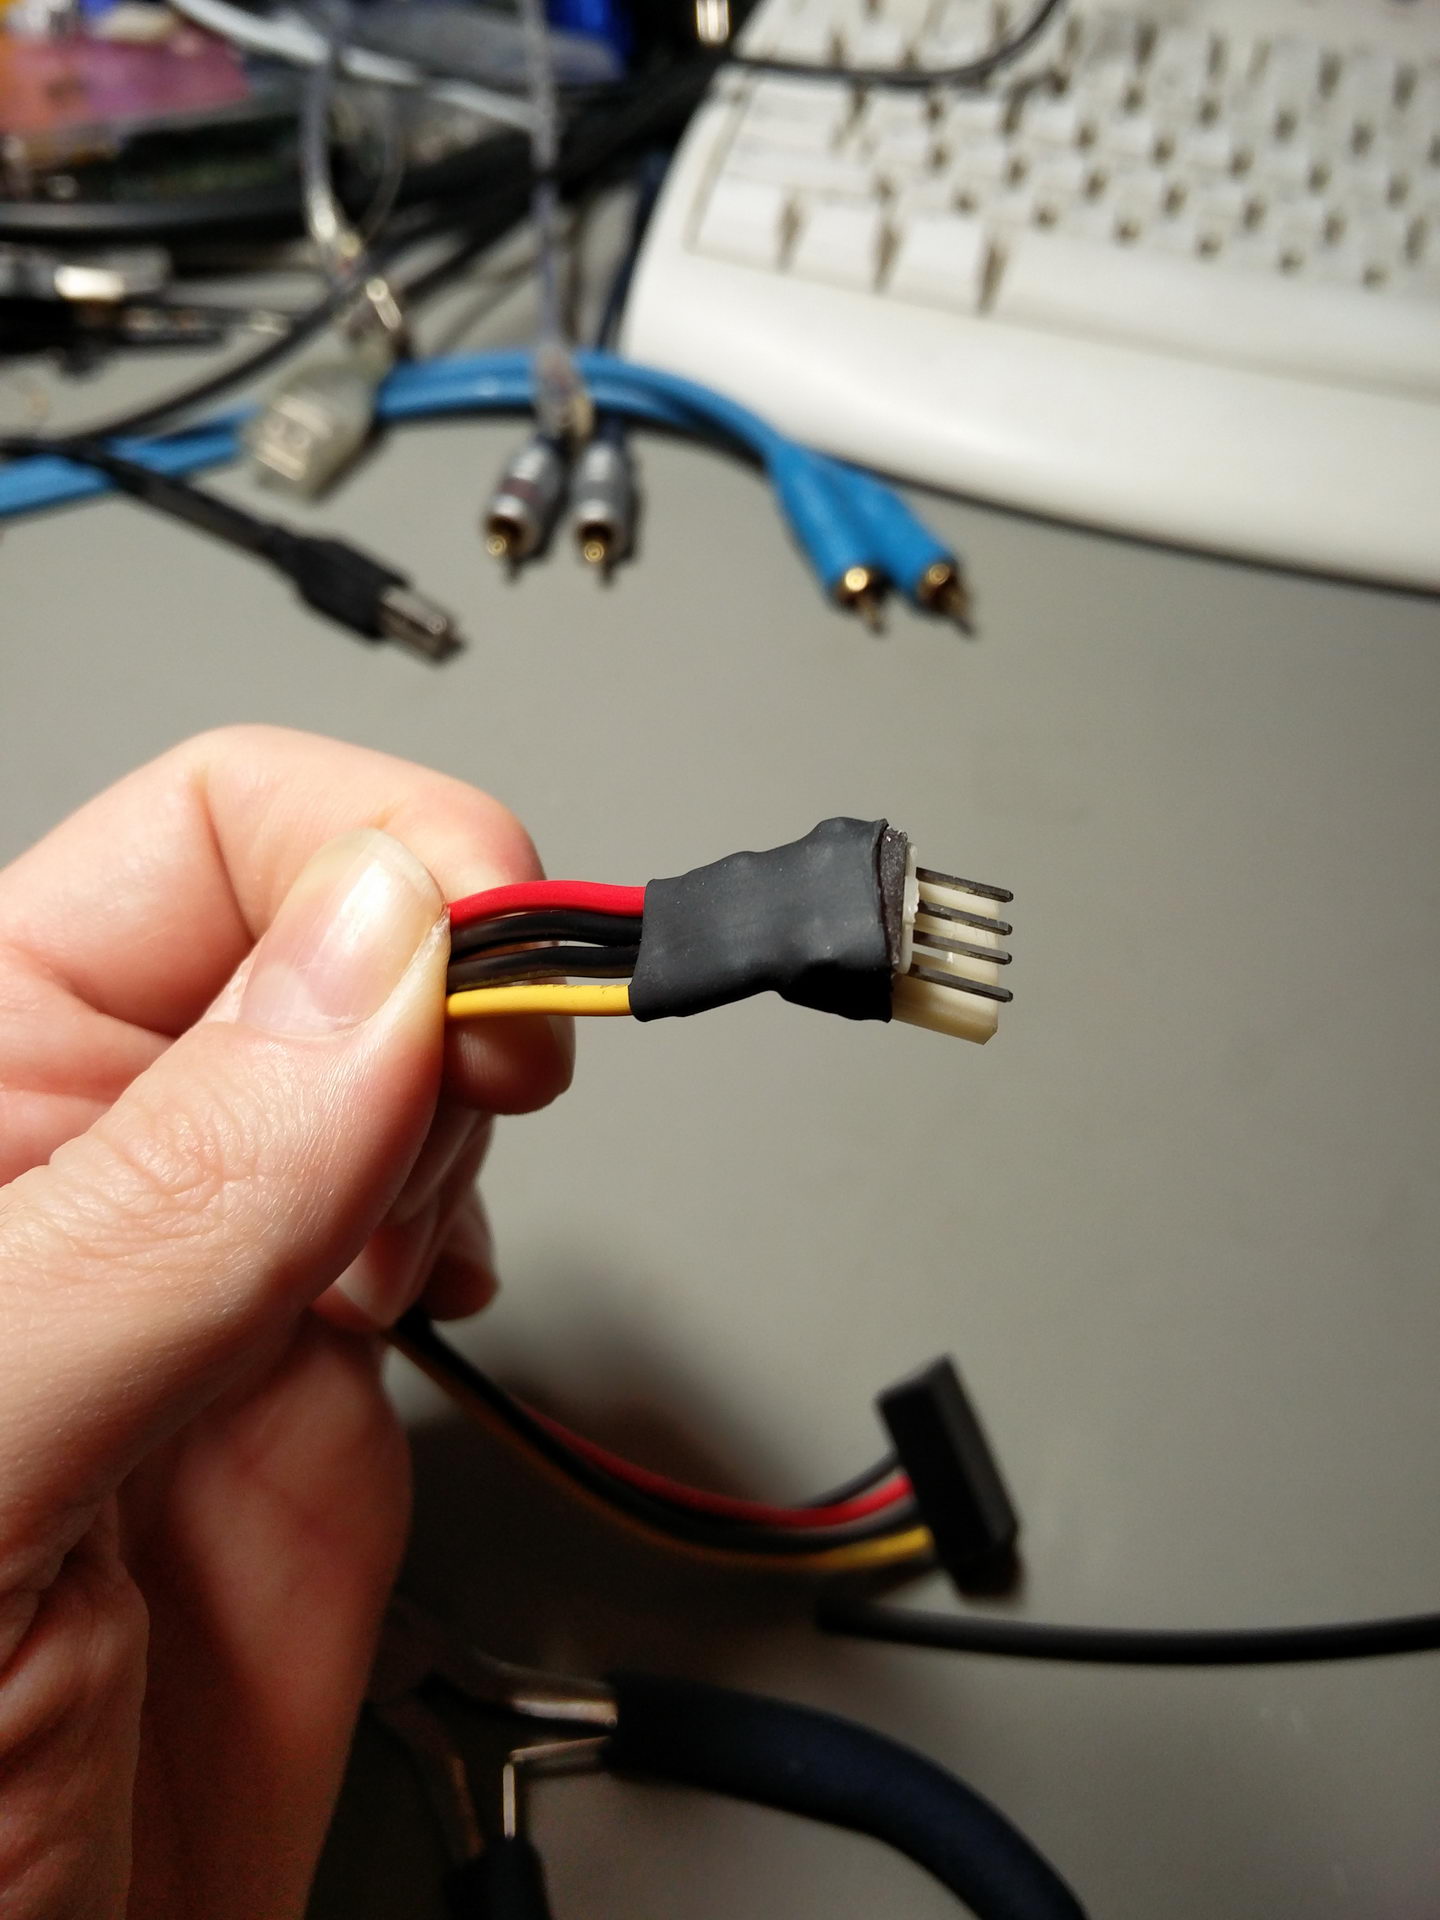
So now I had my SSD installed and it was time to install the OS.

2015-12-22 00.29.17

This is where things get interesting. Remember, this is a proper Proliant server. What this means is that it has a pretty strict operating system compatibility list, and no consumer OS are officially supported. So, Windows Server 2012R2 and 2008R2 are OK, Windows 8.1 is not. I normally run Windows Home Server 2011 (which is based on Server 2008) so I should be OK, but I decided to get started with a trial of the full fledged Windows Server 2012R2 (just for the experience..).

Installing an OS is supposed to be a simple procedure. HP’s Intelligent Provisioning takes care of drivers and server applications for you, but before you get to that there are a number of things to do.

We are dealing with an actual server here, so inexperienced users should definitely start by reading the manual or at least the quick start guide that comes with the server. If you do not do that, you should not expect to get very far. You will waste a few hours, wondering why Windows is not installing and what you are doing wrong.

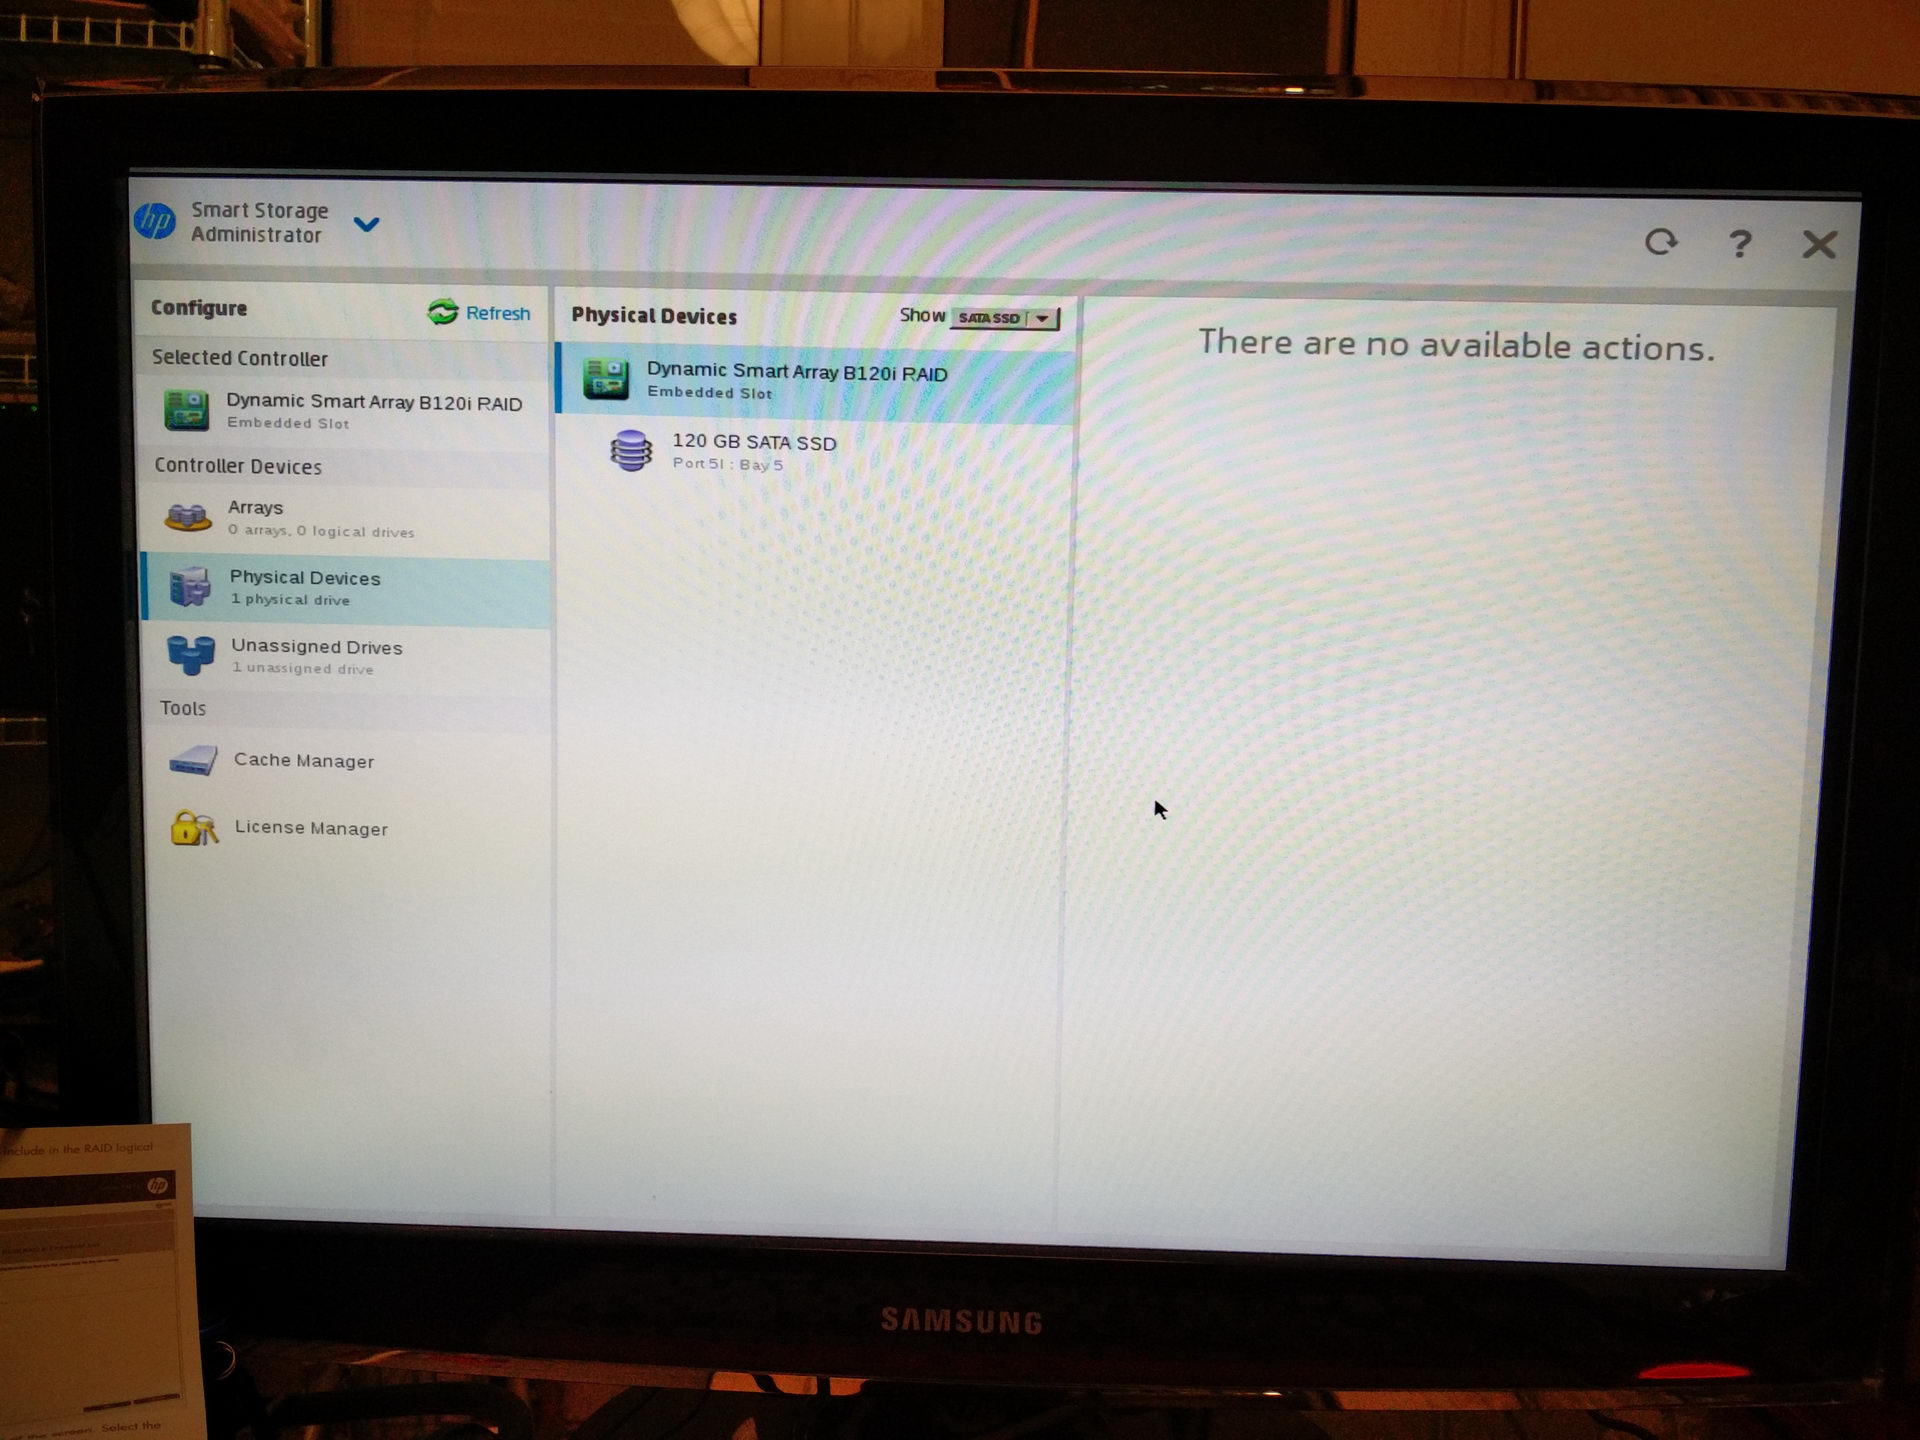
One of the first things to do is to decide whether you want to make use of the server’s Dynamic Smart Array RAID controller of not. You have a choice. You may run it either in AHCI mode (a.k.a. “dumb mode”) or in RAID mode. There are merits to either mode. If you go the AHCI route, you will get to keep your drives’ existing data (which would be wiped clean if you went the other way) and that data will be visible from other machines if you decide to take the HDDs out and put them inside some other machine. So the main drawback is noise. That’s right, the server’s main fan will run a lot quieter if you set your Smart Array controller in RAID mode. In fact, this way it will run even quieter than the previous generation of Microservers. I chose to go this way. So, first order of business is to create an array. You may create a RAID0 or 1 array if you have 2 or more drives or RAID0 if you have one. I would have a number of drives in my server, but I did not want redundancy, so I started with one RAID0 array consisting of my SSD system drive.

2015-12-21 21.01.31

Next up was a firmware update for the server’s subsystems. There is a bewildering array of firmwares that may need updating. Good thing that the process is automatic and is done from within the server’s BIOS, before you install the OS. The same goes for driver updates – they are downloaded automatically before the OS installation begins. Note that the firmware & driver updates come from HP’s web site (obviously..), so you should have at least one ethernet cable connected to your ethernet switch. The server will use DHCP to get on your network. Keep in mind that the firmware update when done this way is actually not very effective, meaning that chances are that there are newer versions of your firmwares available from HP’s site, but you should not worry about that just yet.

Do use HP’s Intelligent Provisioning to install your OS of choice, preferably from a USB installation medium. I know that there exist unofficial (and thus unsupported) ways to install non-supported operating systems, such as Windows 8.1, but I have not done any serious research into them. YMMV.

2015-12-21 21.46.51

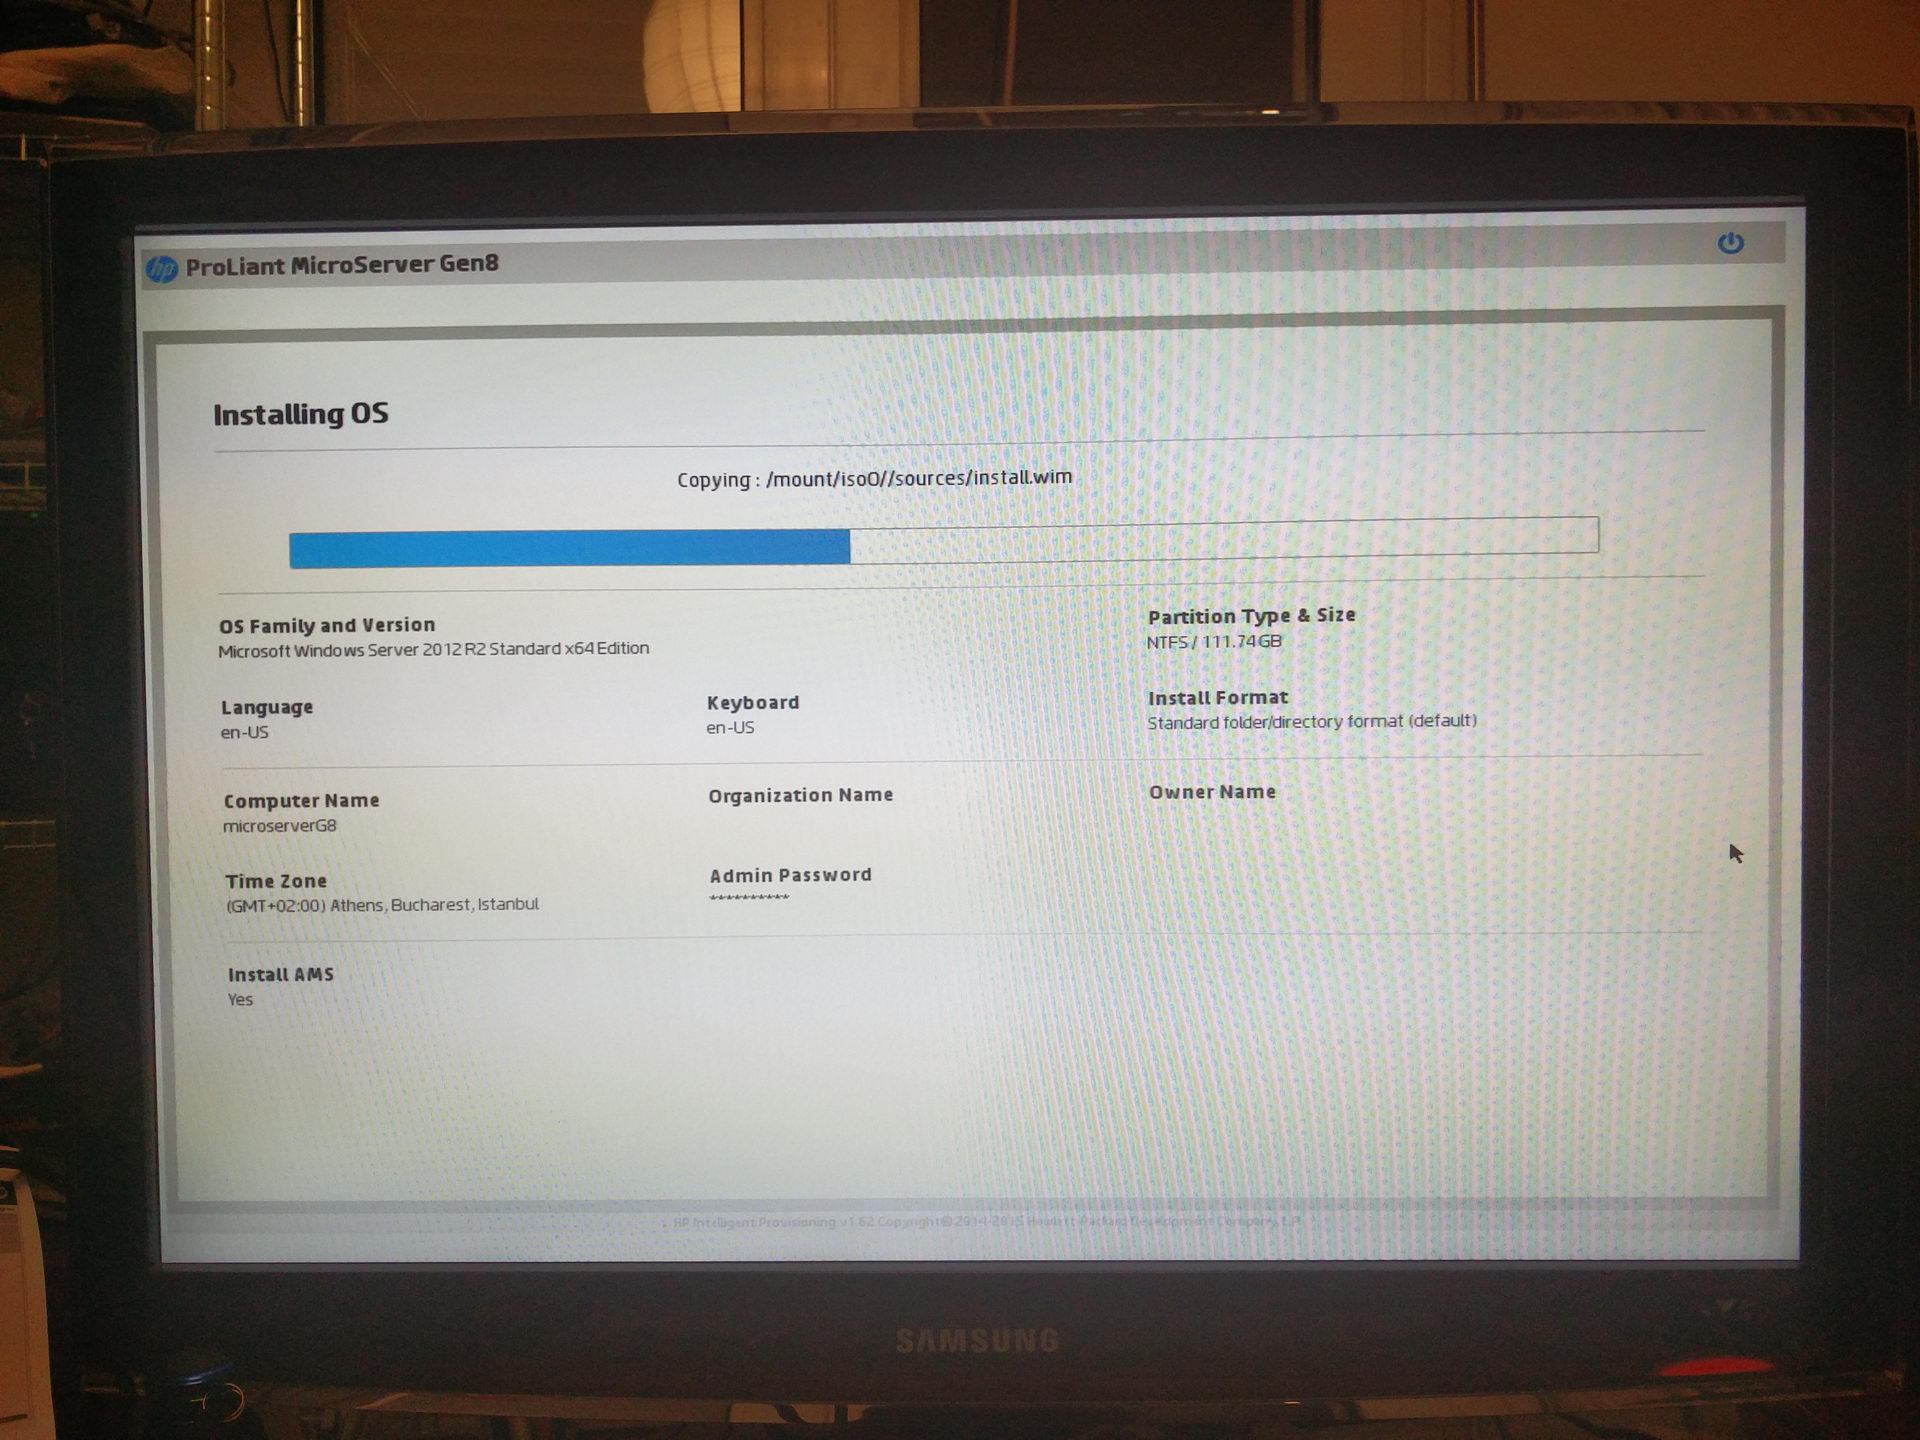
The server will reboot (several times actually..) and you should be patient. Each reboot takes more than 2 minutes, since the server does extensive testing of its subsystems (processor, memory, controllers, iLO, etc).

2015-12-22 20.17.38

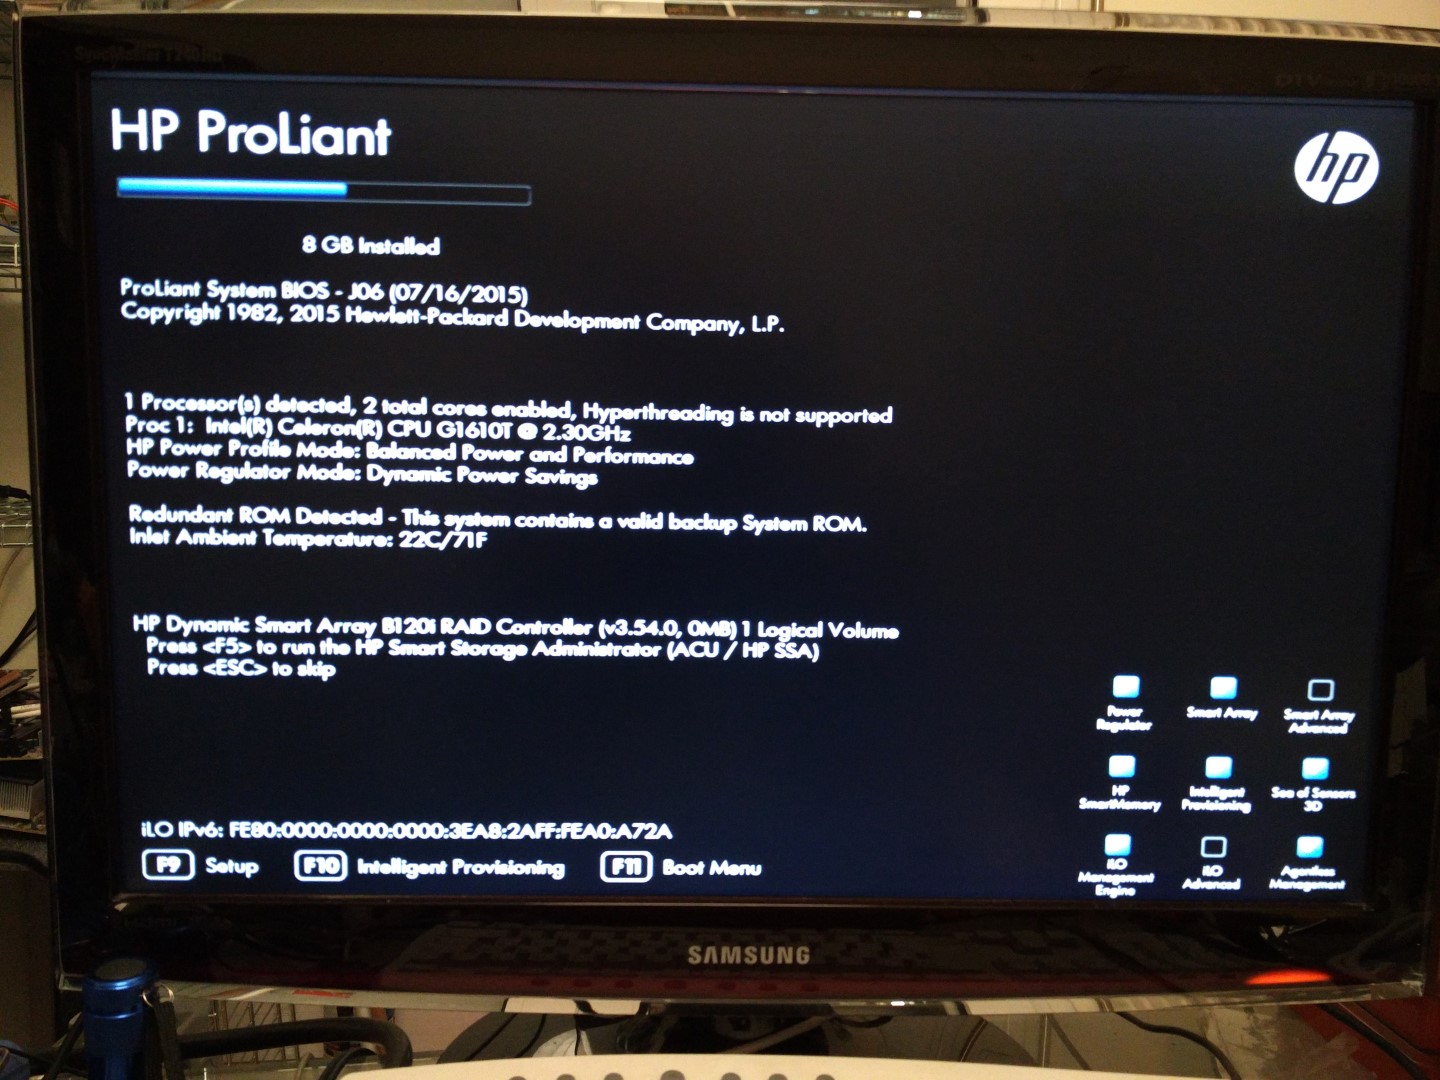
You may have noticed that I now have 8GB of RAM installed. I added a 4GB ECC DDR3 DIMM that I had bought for my first Microserver (from 2011). I no longer see the “Genuine HP Memory” message since it is (if I remember correctly) a Kingston DIMM, but I do have twice as much memory, so I can live with that. This memory stick is not officially supported, and it is a bit slow compared to the one that came preinstalled, but it works just fine and 8GBs of RAM offer much better overall performance than 4GBs.

Once you have Windows installed, you should got to HP’s site and register your server. This way you will have access to official support plus HP’s up-to-date ISO file (Service Pack for ProLiant) with all the latest drivers, firmwares, etc. You should mount that ISO image and install the relevant software. You will get useful tools for managing your Smart Array controller, making firmware and driver updates, viewing logs, etc.

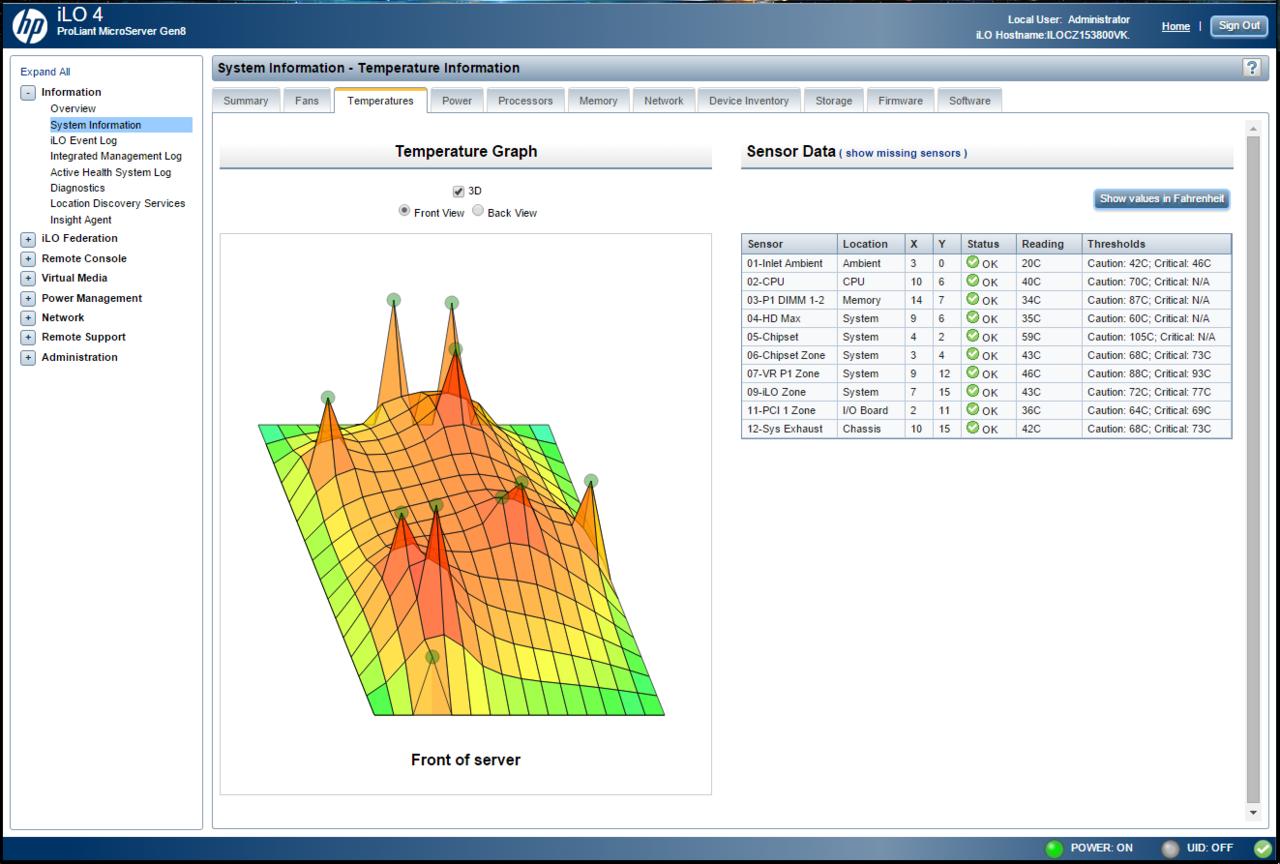
You should also make use of your iLO 4 system.

2015-12-21 19.19.10

It will give you remote access to your server’s console without having a monitor connected (up to the time that the OS loads) and a bucketload of diagnostic information such as fan speed, temperatures, etc.

Gen8 temperatures

Once I had the OS installed, I moved my 4 x 3TB WD RED drives from my old Microserver to the new one, one at a time (copying the data through the network link). Now I’m waiting to receive a PCIe e-SATA controller that is compatible with the Gen8 Microserver so that I can connect my Lian Li DAS enclosure with its port multiplier interface and its 5 extra SATA drives.

Deep In House, Vol. 7 & 8

Once again, the holidays are (ok, were) upon us so I found the time to do a holiday mix. I had a lot of material to cover, so I decided to split it in two parts.

Enjoy!

Volume 7:

Deep In House, Vol. 7 (December 2015) by Dimitris Dimitrakoudis on Mixcloud

Tracklist:
1. Kilo Kish - Curious (Le Flex Remix) [Bonus Track]
2. Moon Boots feat. Janelle Kroll - Utopia (Radio Edit)
3. Duke Dumont - Ocean Drive
4. The Weeknd - Can't Feel My Face (Rainer Grimm Remix)
5. Tensnake feat. Nile Rodgers & Fiora - Good Enough To Keep (Original Mix)
6. C Tod - Light To Dark (Extended Mix)
7. Milk & Sugar - Ready Or Not (Club Mix)
8. Saccao & Gorkiz Feat. Tyler Jade - Fool Me Once (Slick Beats Remix)
9. C-Block - So Strung Out (Christian Cardwell & Nigel Stately Remix)
10. Dellmon & West K - You'll Find Me (Deepjack & Mr Nu Remix)
11. Daniel Steinberg - Let Me Down (Tube & Berger Remix)
12. Lastraw JazzyFunk - Darkest Nights (Mark Lower Remix)
13. Aeroplane feat. Benjamin Diamond - Lets Get Slow
14. F U S E R - I Want U (Original Mix)
15. Katerine - Ayo Technology (Milen & Vasco C Remix)
16. Rose - No Good (Toniia & Santiago Remix)
17. Modjo - Lady (Sllash Remix)
18. KRONO feat. Linying - Run (Original Mix)
19. Jutty Ranx - I See You (Pretty Pink Remix)

Volume 8:

Deep in House Vol. 8 (December 2015) by Dimitris Dimitrakoudis on Mixcloud

Tracklist:
1. Tep No - Swear Like a Sailor
2. Marlon Roudette feat. Stewart - Everybody Feeling Something
3. Imany - Don't Be So Shy (Filatov & Karas Remix)
4. Frey - Ridin Higher (Original Mix)
5. Teenage Mutants & Purple Disco Machine - Get Lost
6. Cosmo Klein YNOT - When Doves Cry (Original Mix)
7. Four7 feat. Tiffany - J'adore (Original Mix)
8. NTEIBINT feat. Σtella - The Owner
9. Man Of Goodwill - An Abyss Of You (Mark Lower Remix)
10. Disclosure feat. Sam Smith - Omen (Claptone Remix)
11. Claptone feat. Jaw - Dear Life (Purple Disco Machine Remix)
12. Adana Twins feat. Human Life - Bleeding (Original Mix)
13. Calvin Harris & Disciples - How Deep Is Your Love (Extended Mix)
14. Deepjack & Mr Nu Inner Rebels - Got to Have Your Love (Andrey Exx & Troitski Remix)
15. Sam Feldt - Show Me Love (EDX's Indian Summer Remix)
16. Calvin Harris feat. Haim - Pray to God (Calvin Harris vs Mike Pickering Hacienda Remix)
17. Joyce Muniz faet. Bam - Back In The Days (Original Mix)
18. Blinkie feat. Alahna - Don't Give Up On Love (Club Mix)
19. Consoul Trainin & Vanilla Ace - Let Me Be Your Fantasy (Extended Mix)
20. Kaskade & Deadmau5 - I Remember (Shiba San Remix)
21. Gorgon City feat. Katy Menditta - Imagination (Astero Remix)
22. Option4 feat. Flash Lights - Love Like No Other (Original Mix)

Soekris DAM1021 s/pdif Inputs Board

I made a little s/pdif input board for my Soekris:

2015-12-05 16.41.34 (Large)

It has a coax input, two Toslink, and it includes a USB-to-serial adapter so as to facilitate easy update of the DAM’s firmware.

It also has an on-board low noise LDO for the Toslink modules and their switch, plus one more LDO for supplying the 1.2V necessary for the coax port.

More info to follow..

New page: Super Solid-state Sidecar

I built a solid-state alternative to the TPA’s Sidecar.

2015-11-03 20.19.20_resize

Its main features are:

  • Switching between I2S and S/PDIF with bus switches (solid state devices).
  • Support for two I2S inputs, with source selection.
  • On-board LDO regulator with 4.9V output for the Buffalo III’s 4-input S/PDIF board.
  • Drop-in replacement for the Sidecar.

Schematic, PCB, etc. in its dedicated page: Super Solid-state Sidecar for Buffalo III

Soekris dam1021 Vref mod

It took me a while to get to it, but I finally managed to perform the Vref mod on my Soekris.

I opted for a variation on the “factory mod” with larger organic polymer capacitors.

But before I get to the actual modding, I’d like you to take a minute to appreciate just how small a 0603 part really is. This is a 0603 resistor compared to a regular 1/4W resisitor. It is that small.

0603_comp_to_0.25W

I would not recommend to anyone to attempt this mod without some form of magnification. I used a run-of-the-mill magnifying glass with good results, but it would have been nicer (on my eyes) if I had a proper microscope.

Also, it is crucial to have a soldering iron with a very fine tip, and by very fine I mean needle point. I use an Antex CS18 with a 0.12mm tip.

So, let’s get started. This is one of the “stock” Vref regulators:

Vref_bef

We plan on soldering these 0.1R resistors on top of the existing parts:

Vref_to_be

You should start by putting a little soldering paste on the existing solder joints. Do not skip this step – it will make your job a lot easier.

Then add some solder on one of the two joints of the existing part so as to tin it. Then place the new part on top of the existing part and heat the tinned joint while holding the new part in place with some forceps. I usually just press lightly on top of it to keep it in place. Use needle-point forceps.

Upon heating, the solder should melt and stick to the new part as well. Then go to the other side of the part and solder it.

Once the new part is secured in place I usually go back to the first joint and add some more solder, just to be sure.

Repeat this for all 8 resistors.

Then it was time to soldered on the capacitors. I had decided to go with the Nichicon NS 470μF / 10V parts. They sport 10mΩ ESR which is perfectly adequate.

I bent one of their leads so that it came closer to the other one, so close that the distance between them was exactly the length of the X5R capacitor they were meant to be soldered on. I then cut them to the proper length (a.k.a. as short as possible). I proceeded to tin both of their leads and then soldered them on top of the existing capacitors. It was a lot easier than soldering the 0603 resistors.

When I was done the Vref regulators looked like this:

Vref_done

And the entire board now had the well-known “modded” look:

Vref_done_full_board

Since I had the board out and the soldering iron hot, I figured I would also do the “power thump” mod, by soldering a 27.1K resistor to the points designated by Soren:

thump_mod

The entire procedure took me a little over an hour.

Vref_mod_mounted

Now I have to have a listen to see what’s changed..

They’re here!

I’m talking about my new Universal Signal Isolator PCBs:

USI_bare_slanted USIs_bunch

IMG_0320_res

I built one to test it out and everything seems to be working as it should. Next step is a page for the project, with schematics, a BoM and build instructions.

It is compatible with the current versions of both the ArDAM1021 and TFT HiFiDuino projects.

For now you can find more info in this post.


Update: TFT HiFiDuino v2.13

I did a little work on the TFT HiFiDuino code, incorporating most of the enhancements I made to the ArDAM1021 code.

v2.13_1

v2.13_4

v2.13_2

v2.13_5

v2.13_3

v2.13_6

These are the enhancements:

  • Option of displaying white text & graphics on black background as well as the “original” look.
  • New encoder code (it requires a new library).

Plus a few minor bugfixes here and there.

The new version of the code is here (v2.13): TFT_HiFiDuino_v2.xx (11256 downloads ) (Note: As always, the code on this page may not be the current one, i.e. there may be a newer version available. The latest version is always up at the project’s official page.)

I will also update the code’s official page with the new version of the code.